Blogs

Set Yourself up for Ironman Success

Watching the Hawaii Ironman World Championships on TV or Youtube can inspire any triathlete to want to train for and complete an Iron Distance event. As someone who has completed the event ten times and has coached athletes leading up to the event, I can attest to the motivation it provides. However, before you sign up for an Ironman event, there are several things to keep in mind. Firstly, defining your WHY to keep motivation is key. You need to develop an iron-will and build stamina both mentally and physically. Visualize your goal and remind yourself of your reason for training for an Ironman event to keep you motivated throughout the weeks of training. Secondly, the right gear is essential. Invest in a professional bike fit and the appropriate shoes and clothing for running and swimming. Consult with a coach or bike expert to determine if a tri or road bike is best for you, and consider investing in additional equipment to enhance your experience. Nutrition is also crucial. Consult with a coach or Registered Dietitian to determine your nutritional needs during training and on race day. A well-balanced diet consisting of carbohydrates, proteins, and fats is essential, as is fueling with sports nutrition bars, gels, electrolyte drinks, and sufficient water during training. Training for an Ironman event is demanding, so it is essential to break your training year into different phases to make it manageable. New athletes should give themselves at least six months to prepare for their first Ironman and build up their training volume slowly. Keeping a log of your training progress and planning recovery periods is also crucial to avoid injury and track your progress. Finally, remember to enjoy the journey. Finishing an Ironman event is a rewarding experience, and the satisfaction you will get is like nothing else. Follow a structured training program, focus on your daily nutrition and training fueling plan, and get adequate sleep. If you do that, you’ll be in great shape to cross the finish line. Contact me to learn more about personalized t2coaching and check out our Ironman Training Plans on Training Peaks

Navigating Setbacks

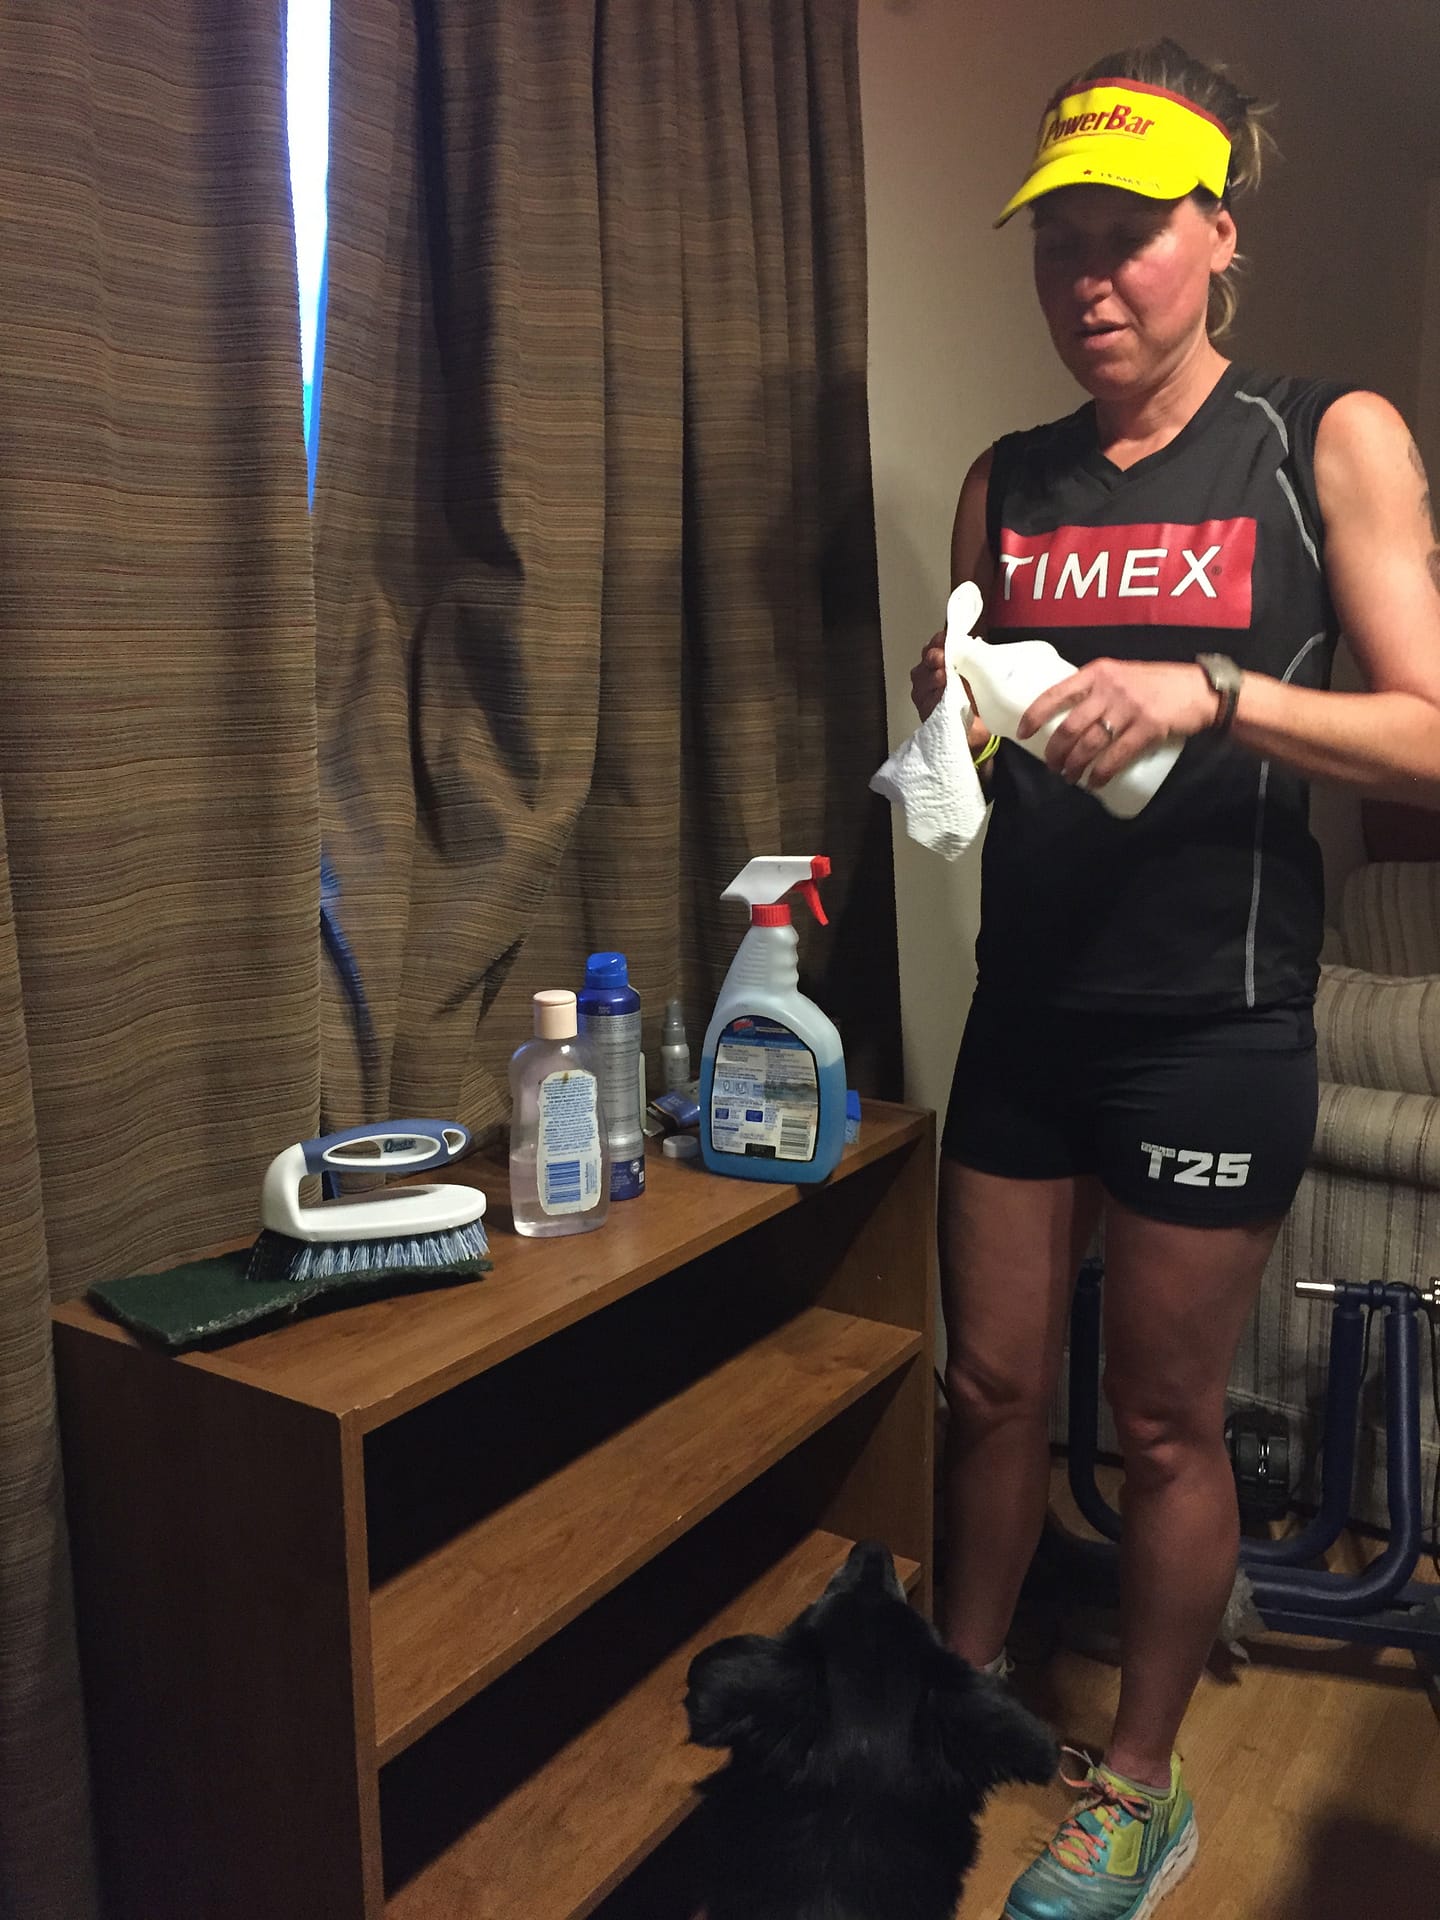
In the world of triathlon, the path to success is often a winding one, filled with peaks of achievement and valleys of challenges. Two weeks ago, I had the biggest setback since Patella surgery 21 weeks ago. 
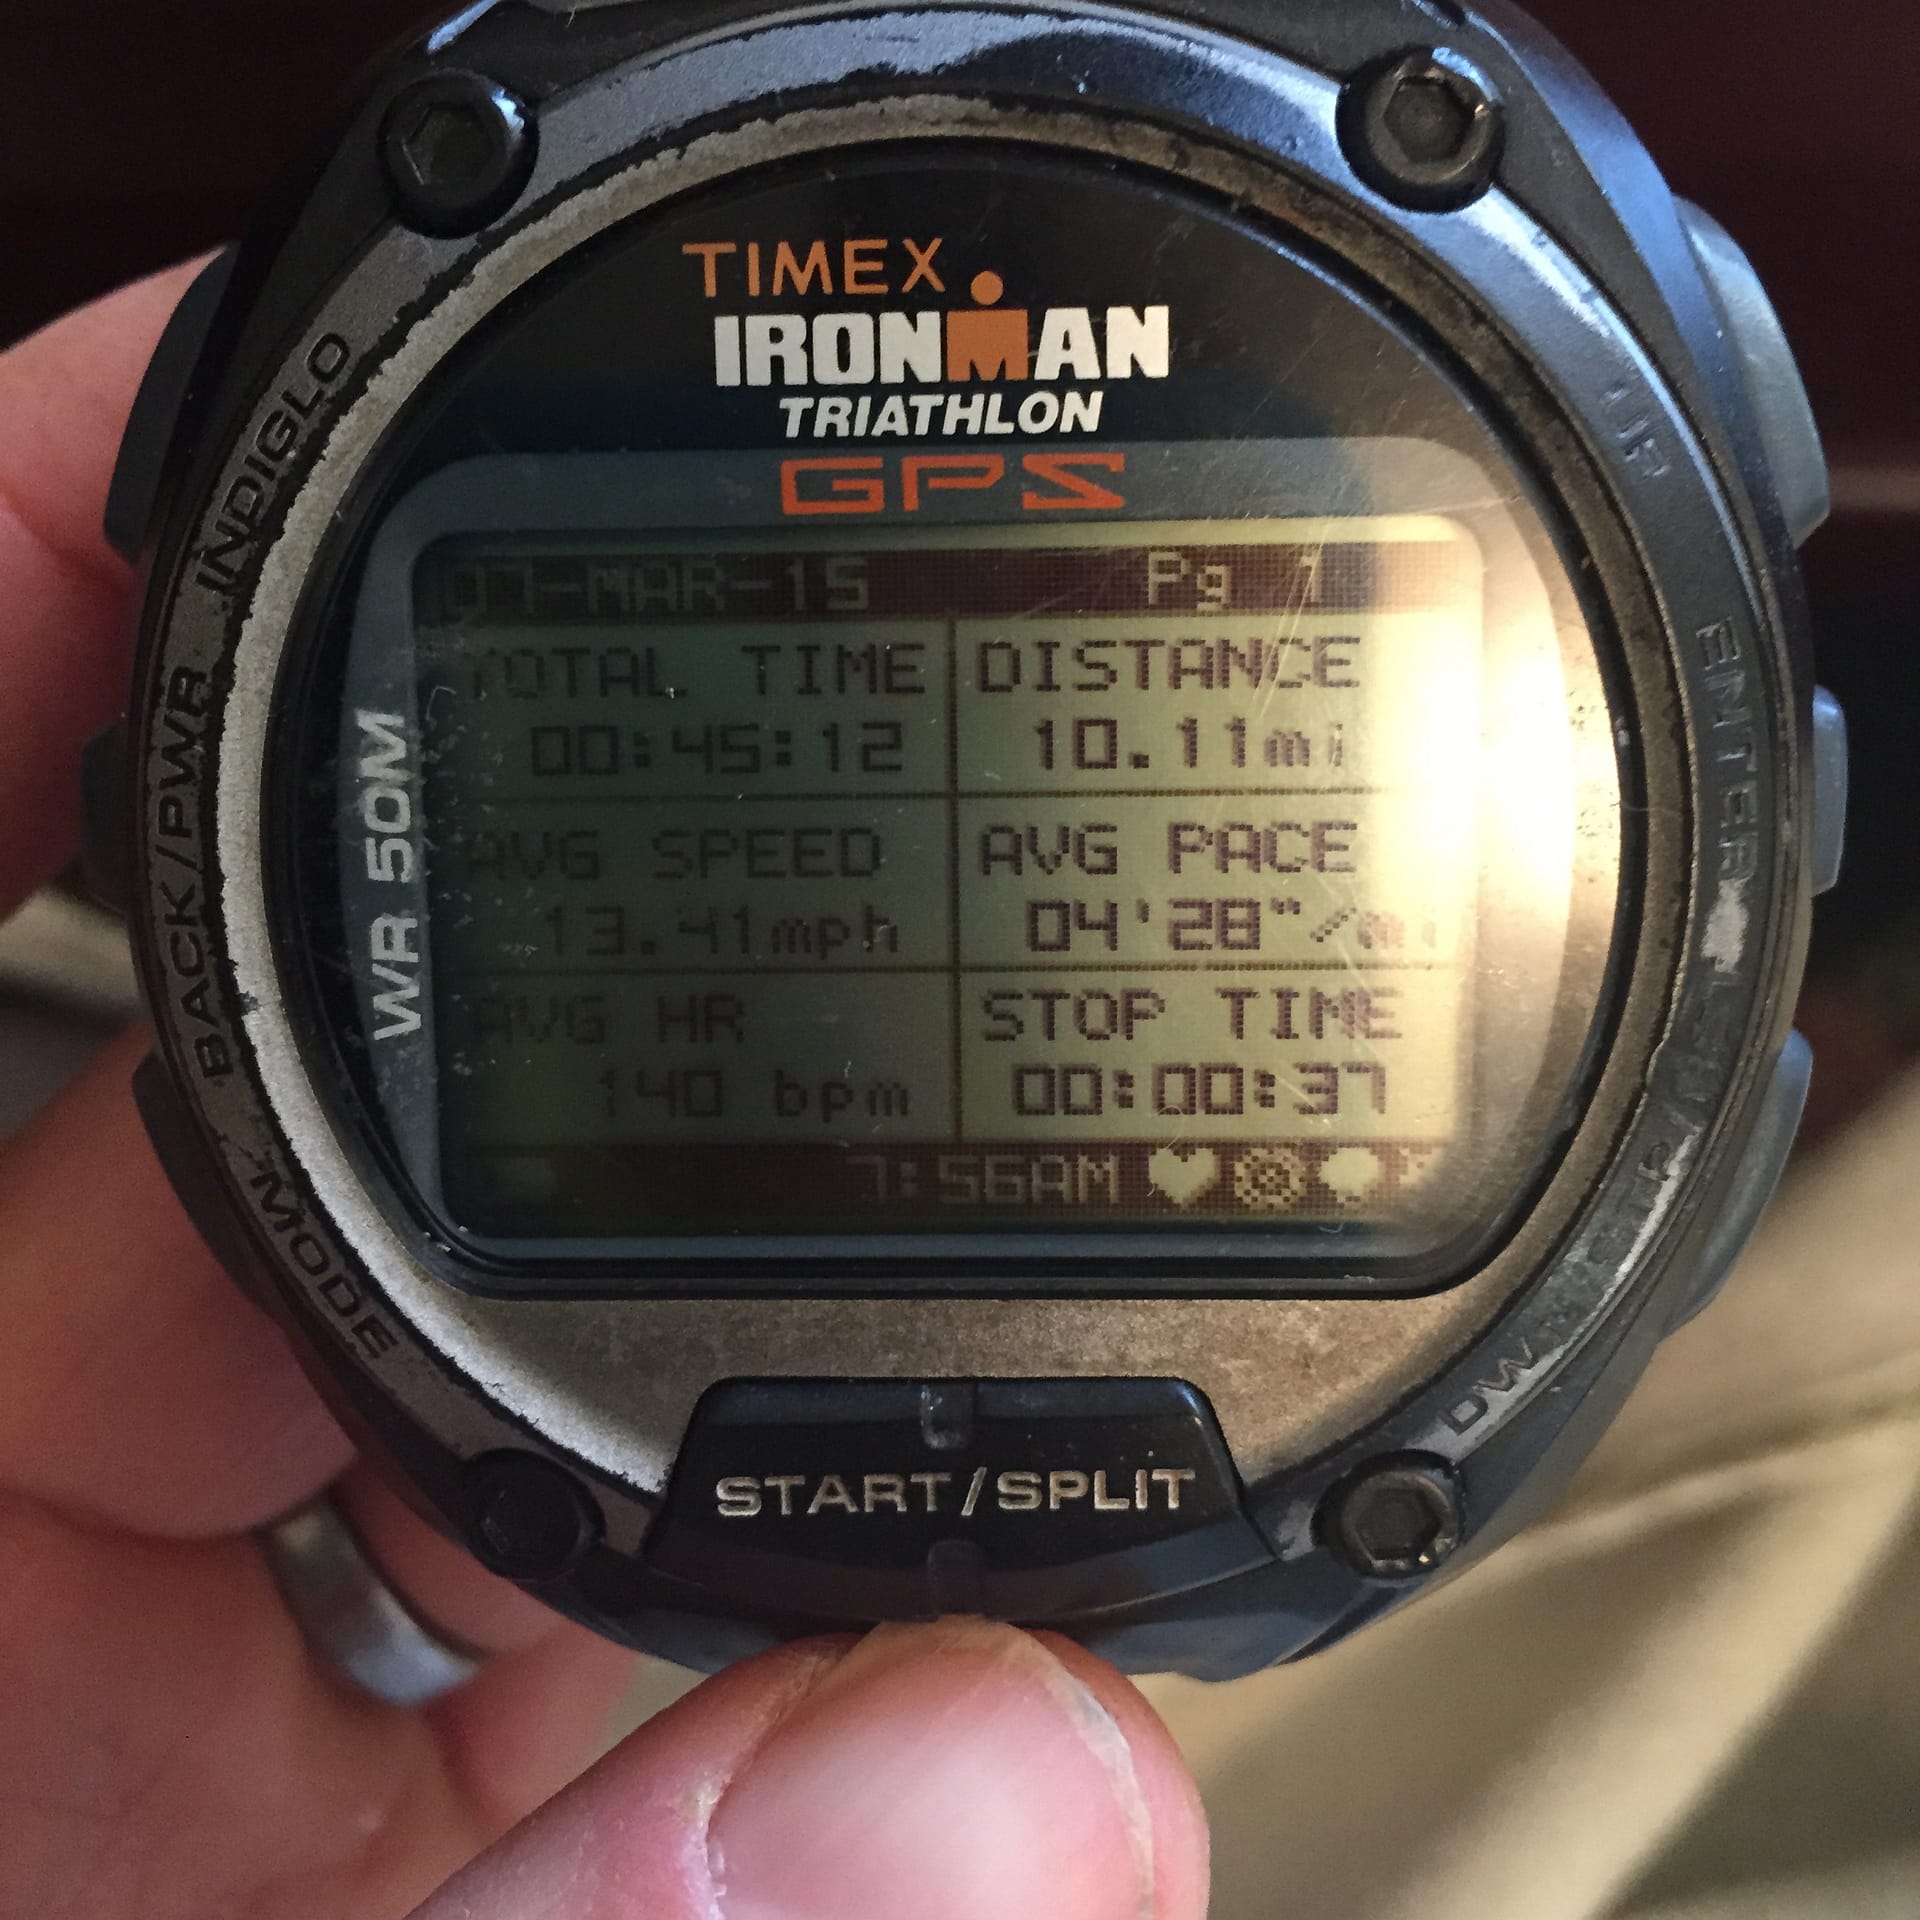
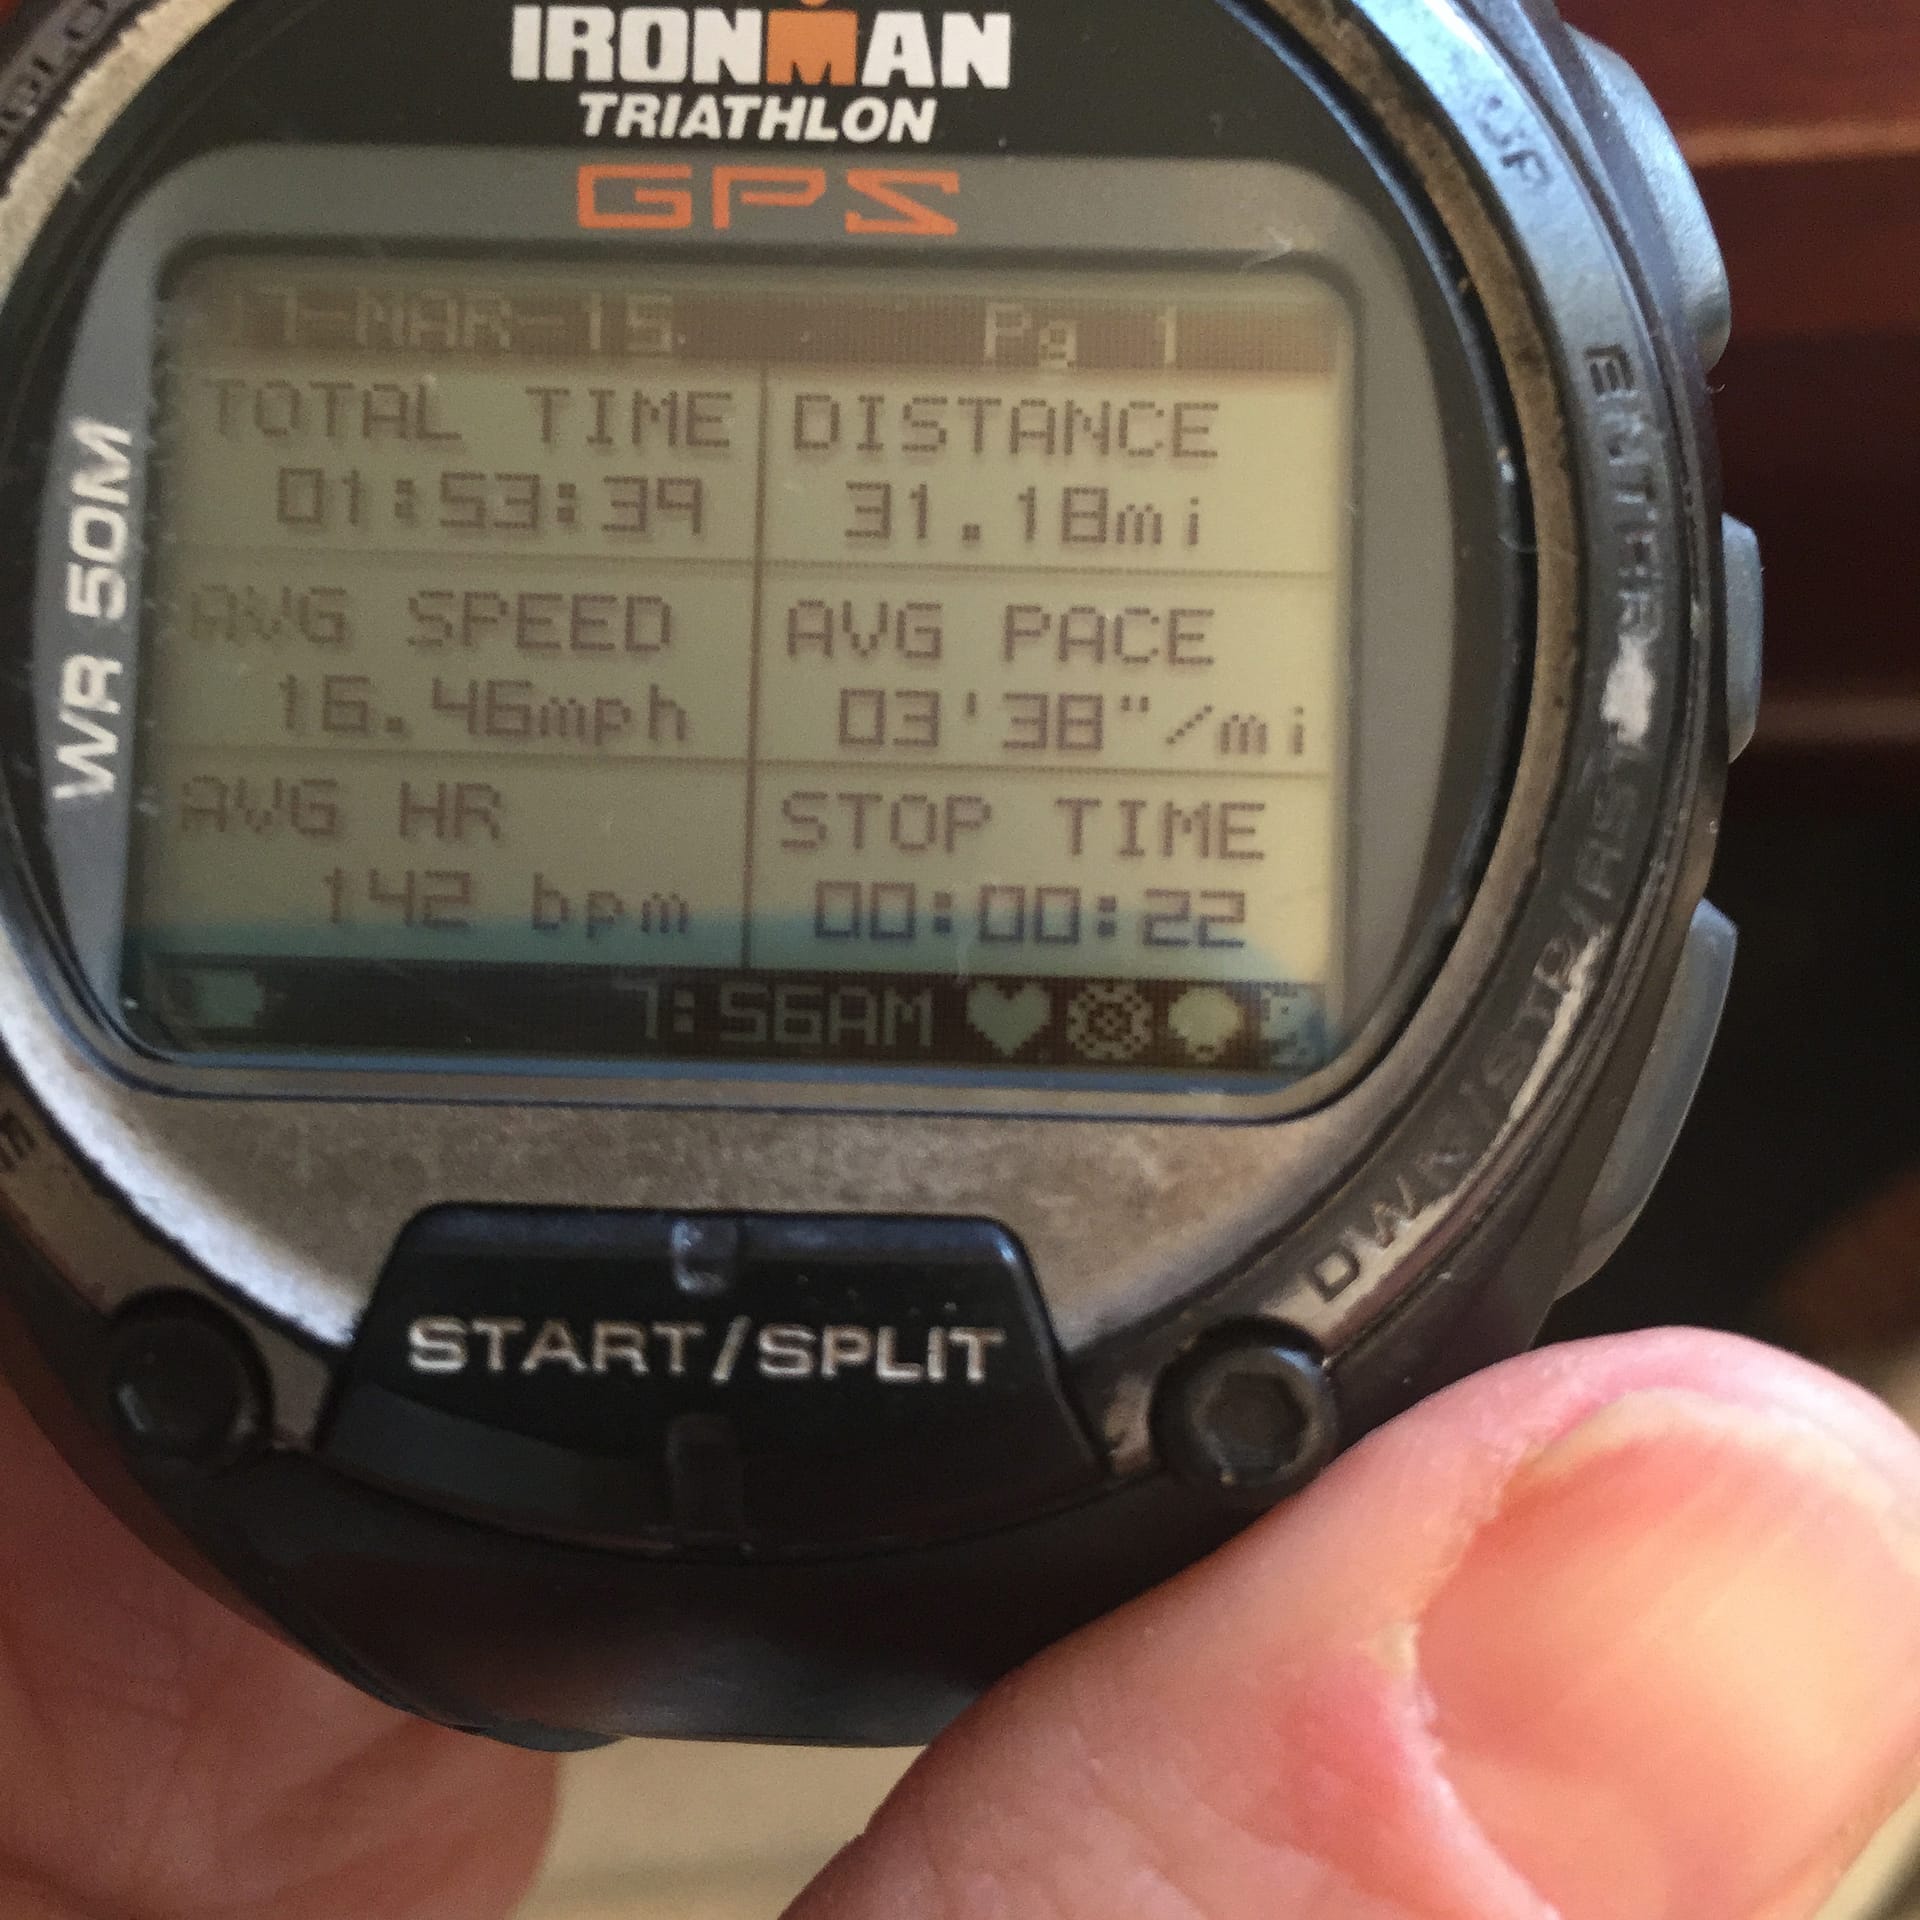
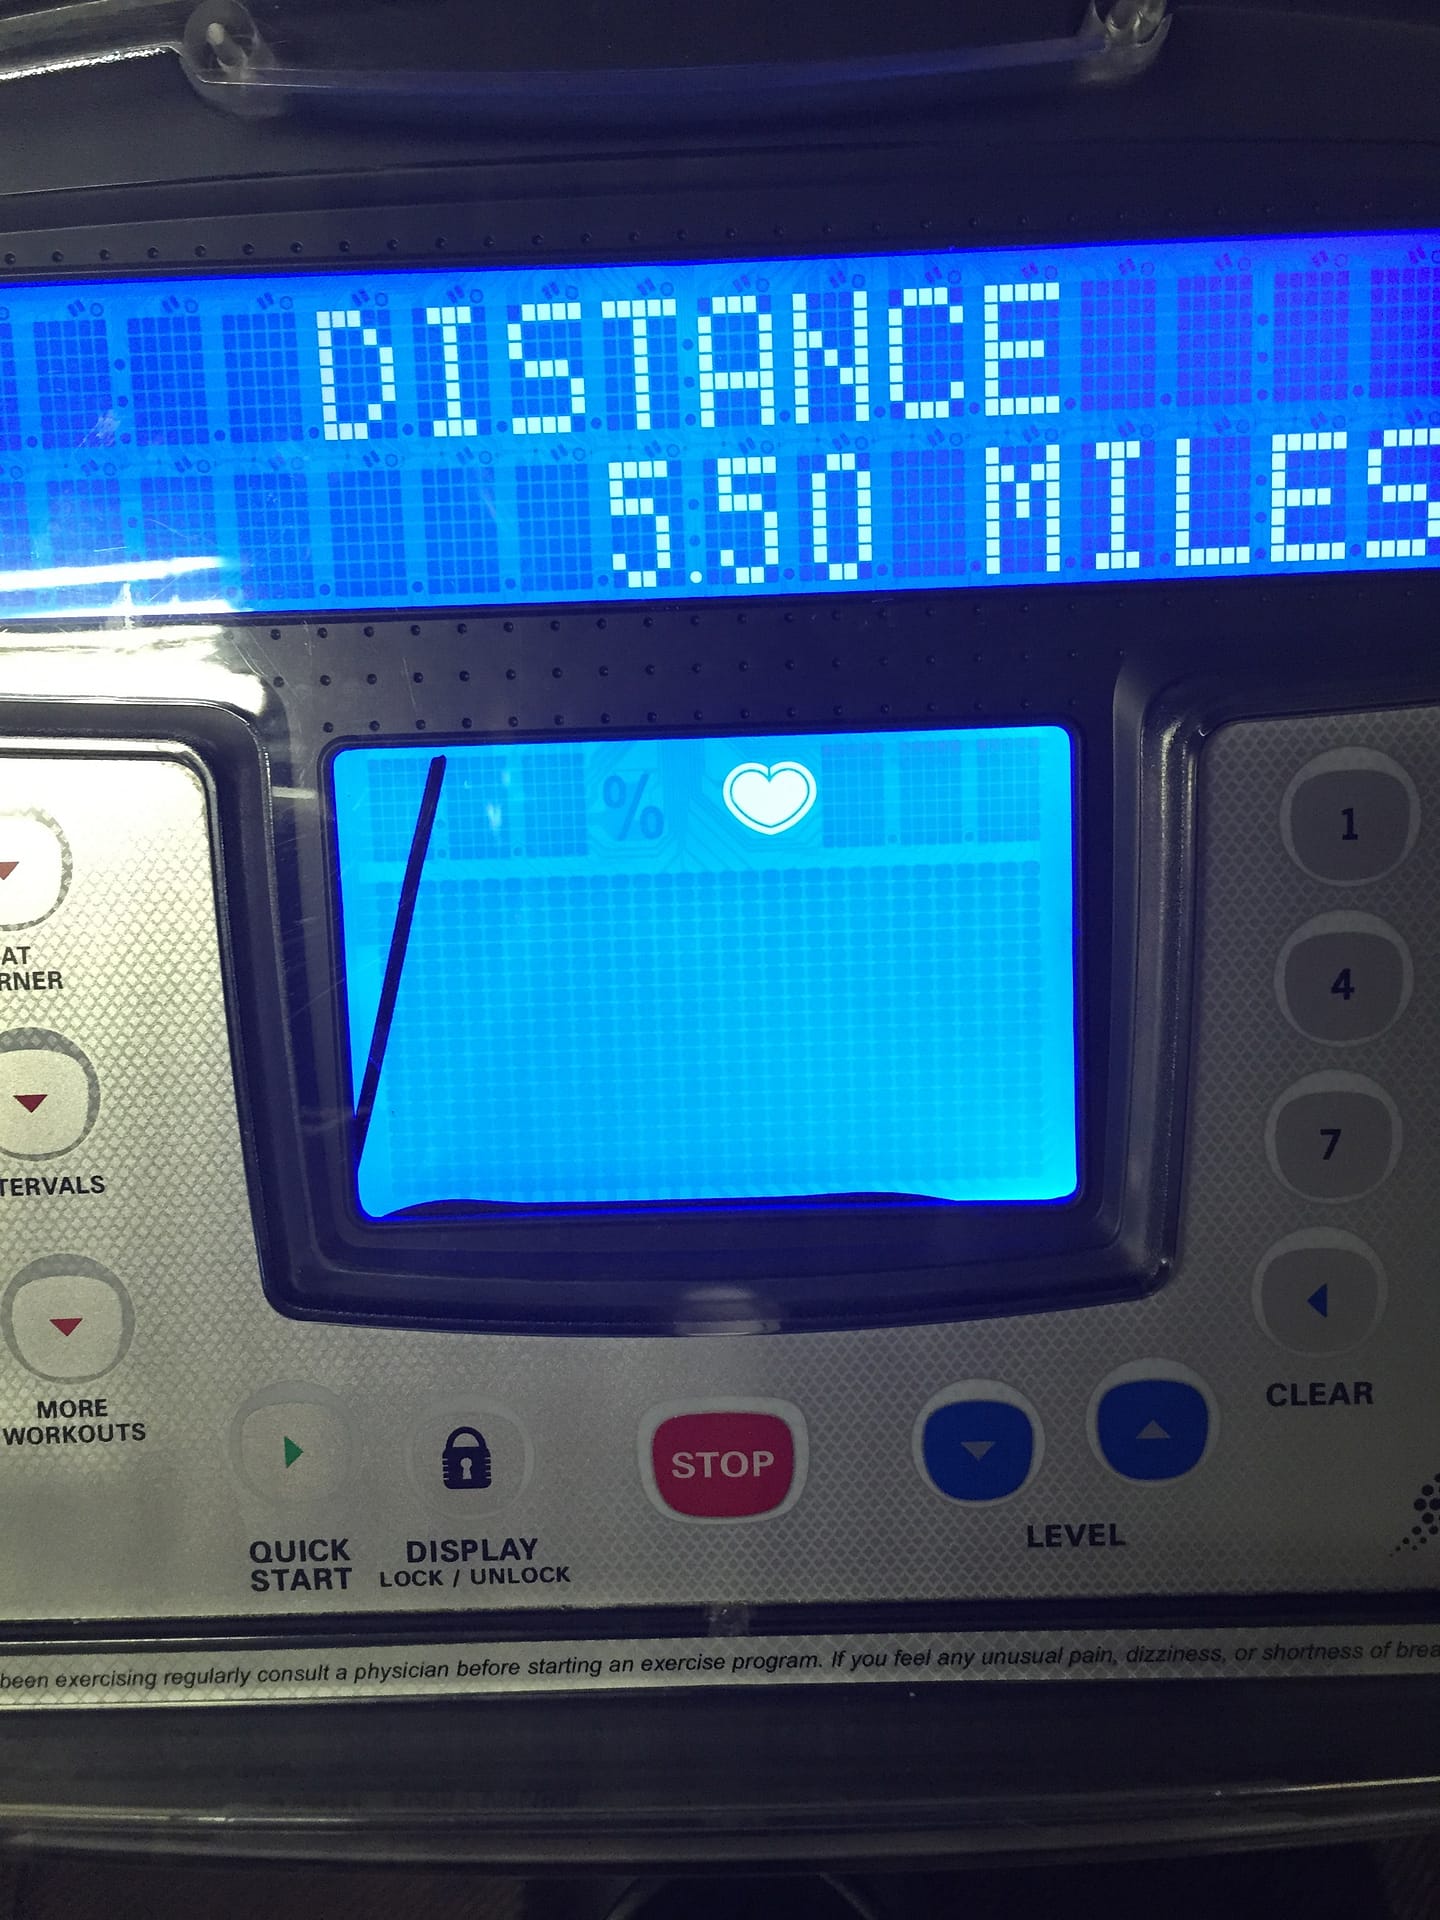
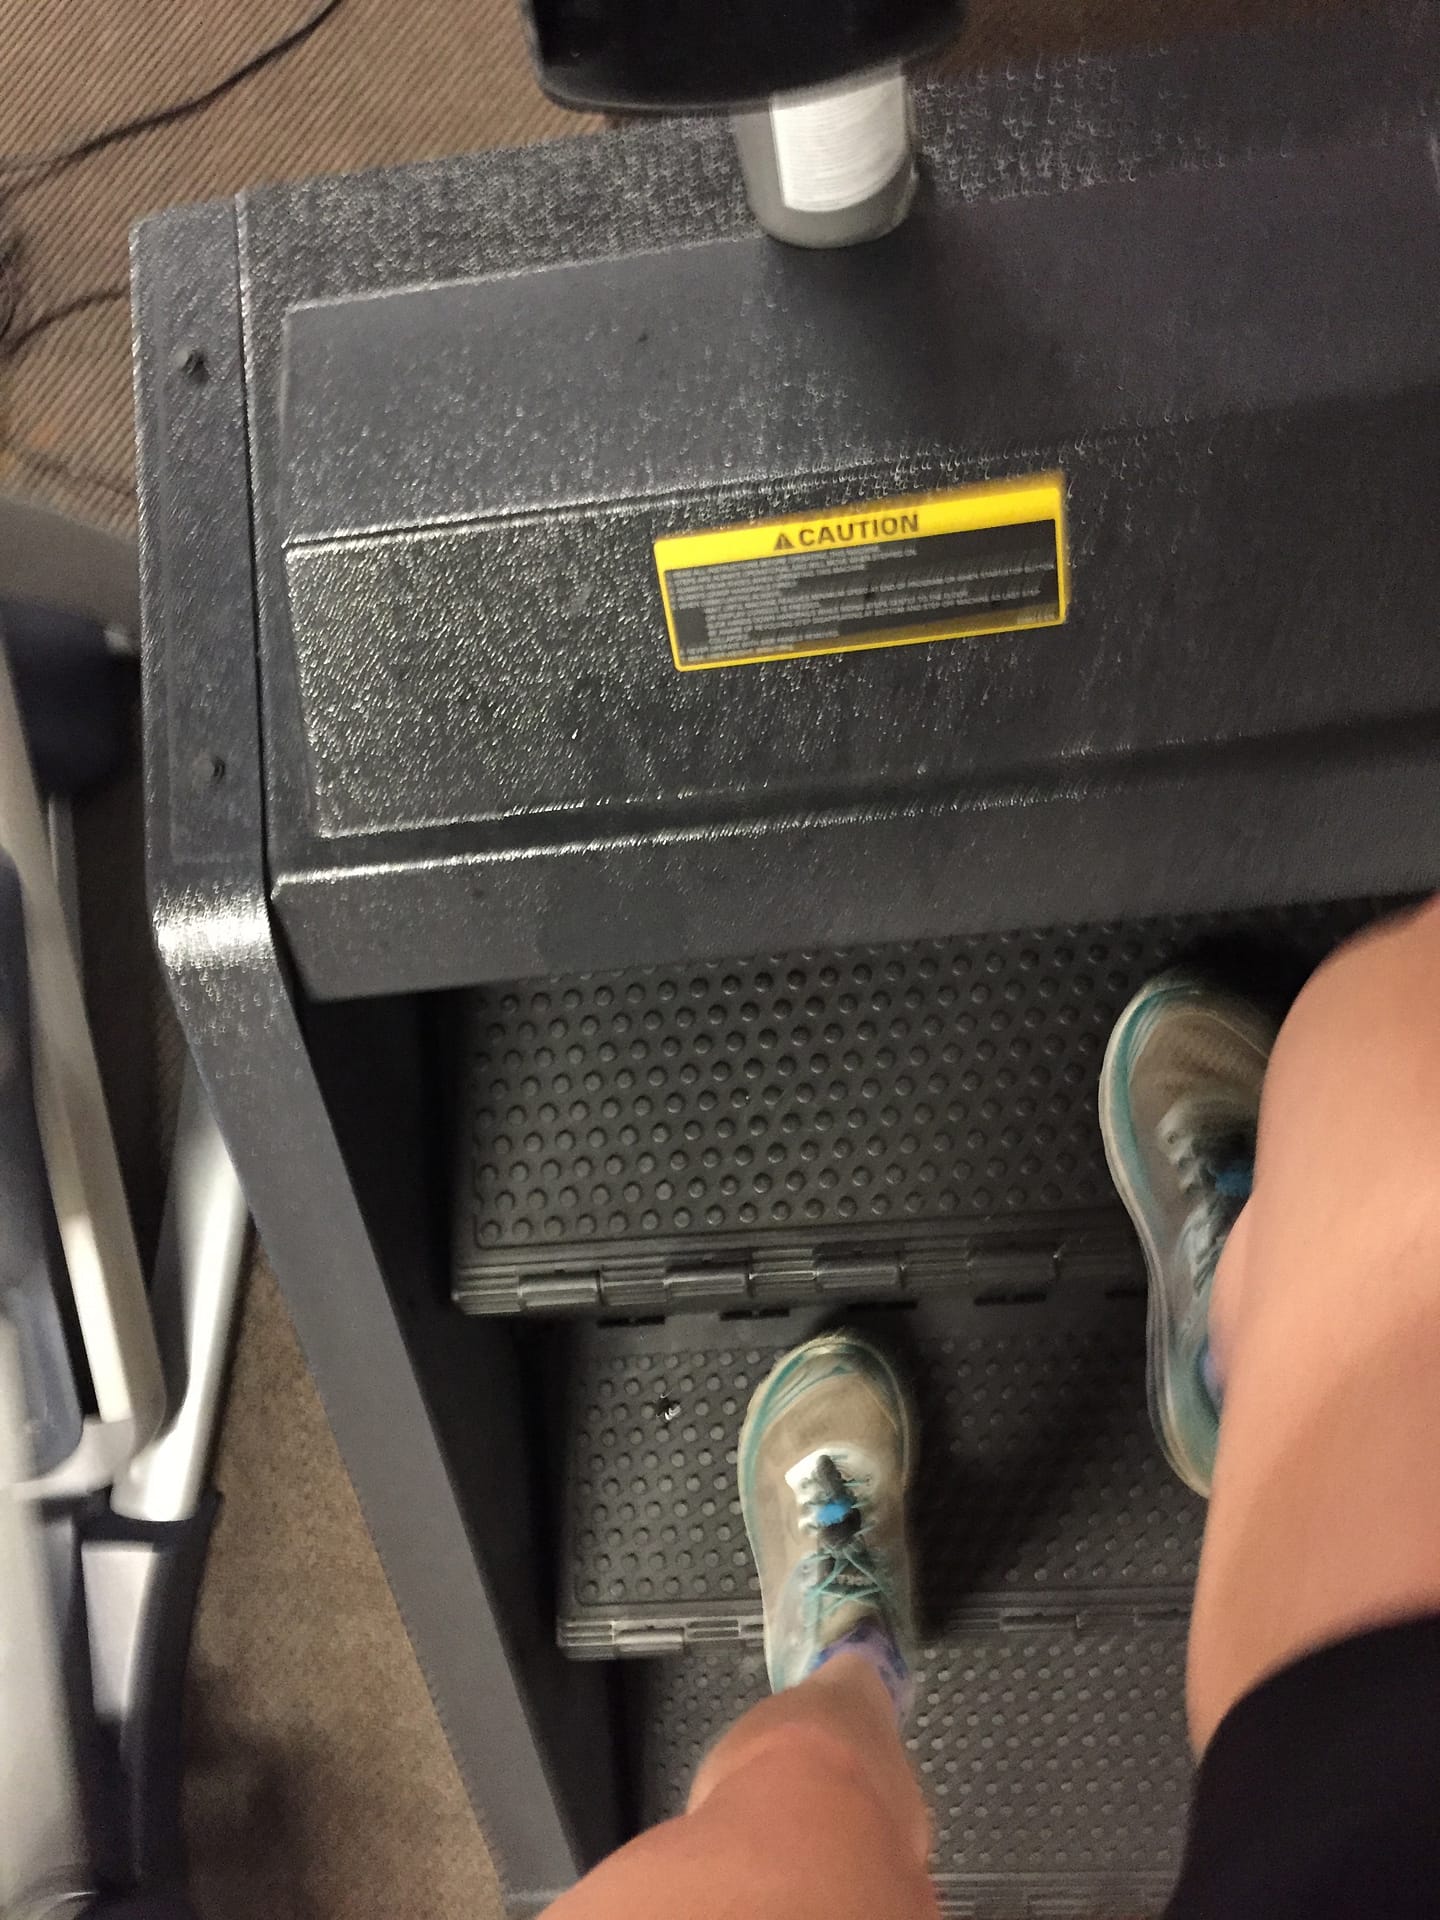
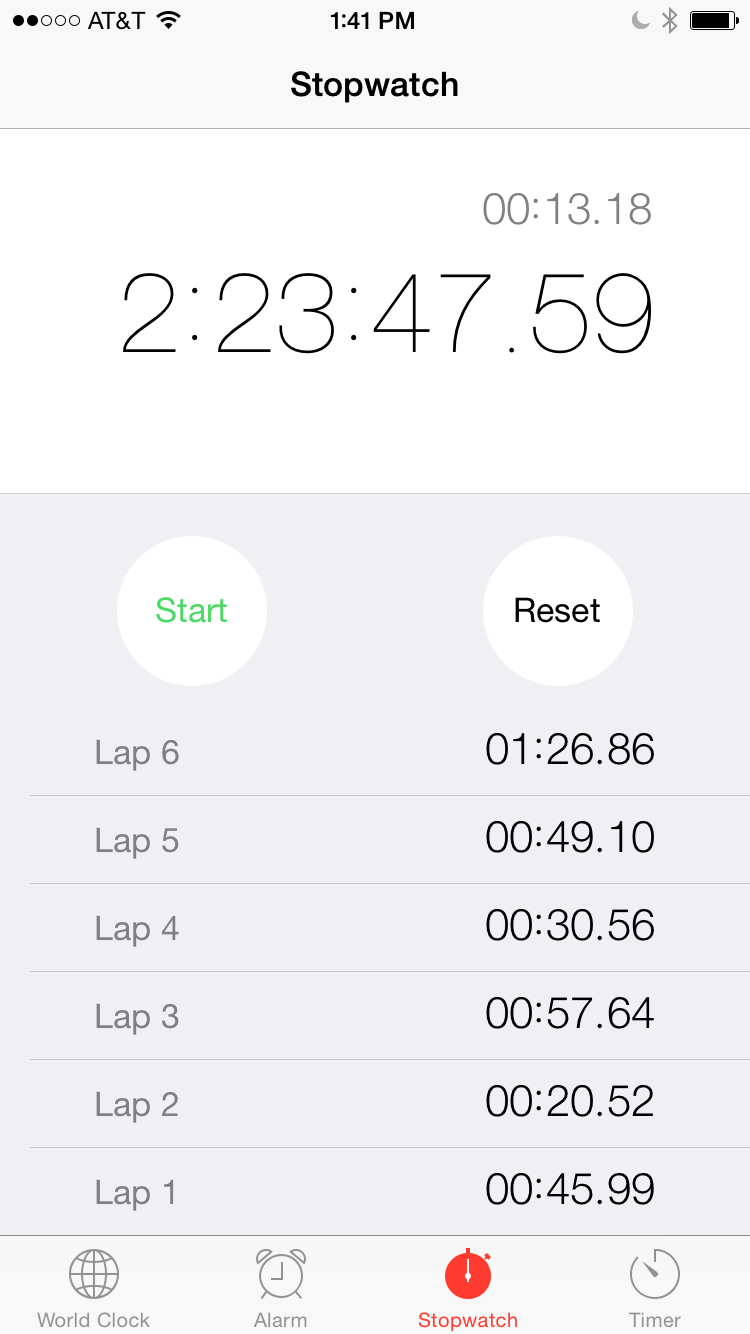
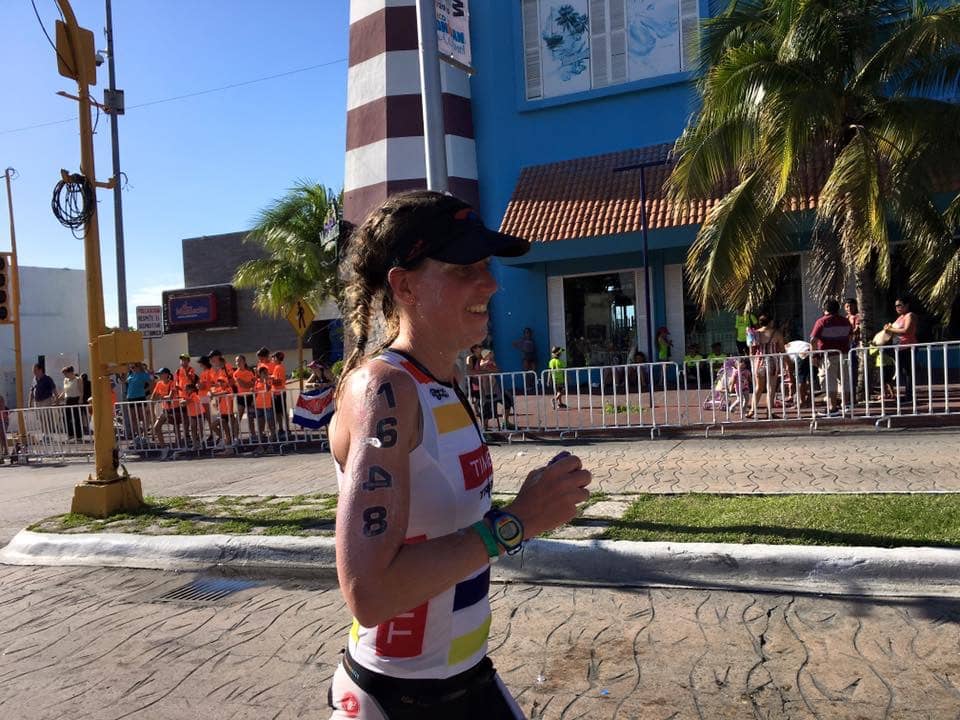
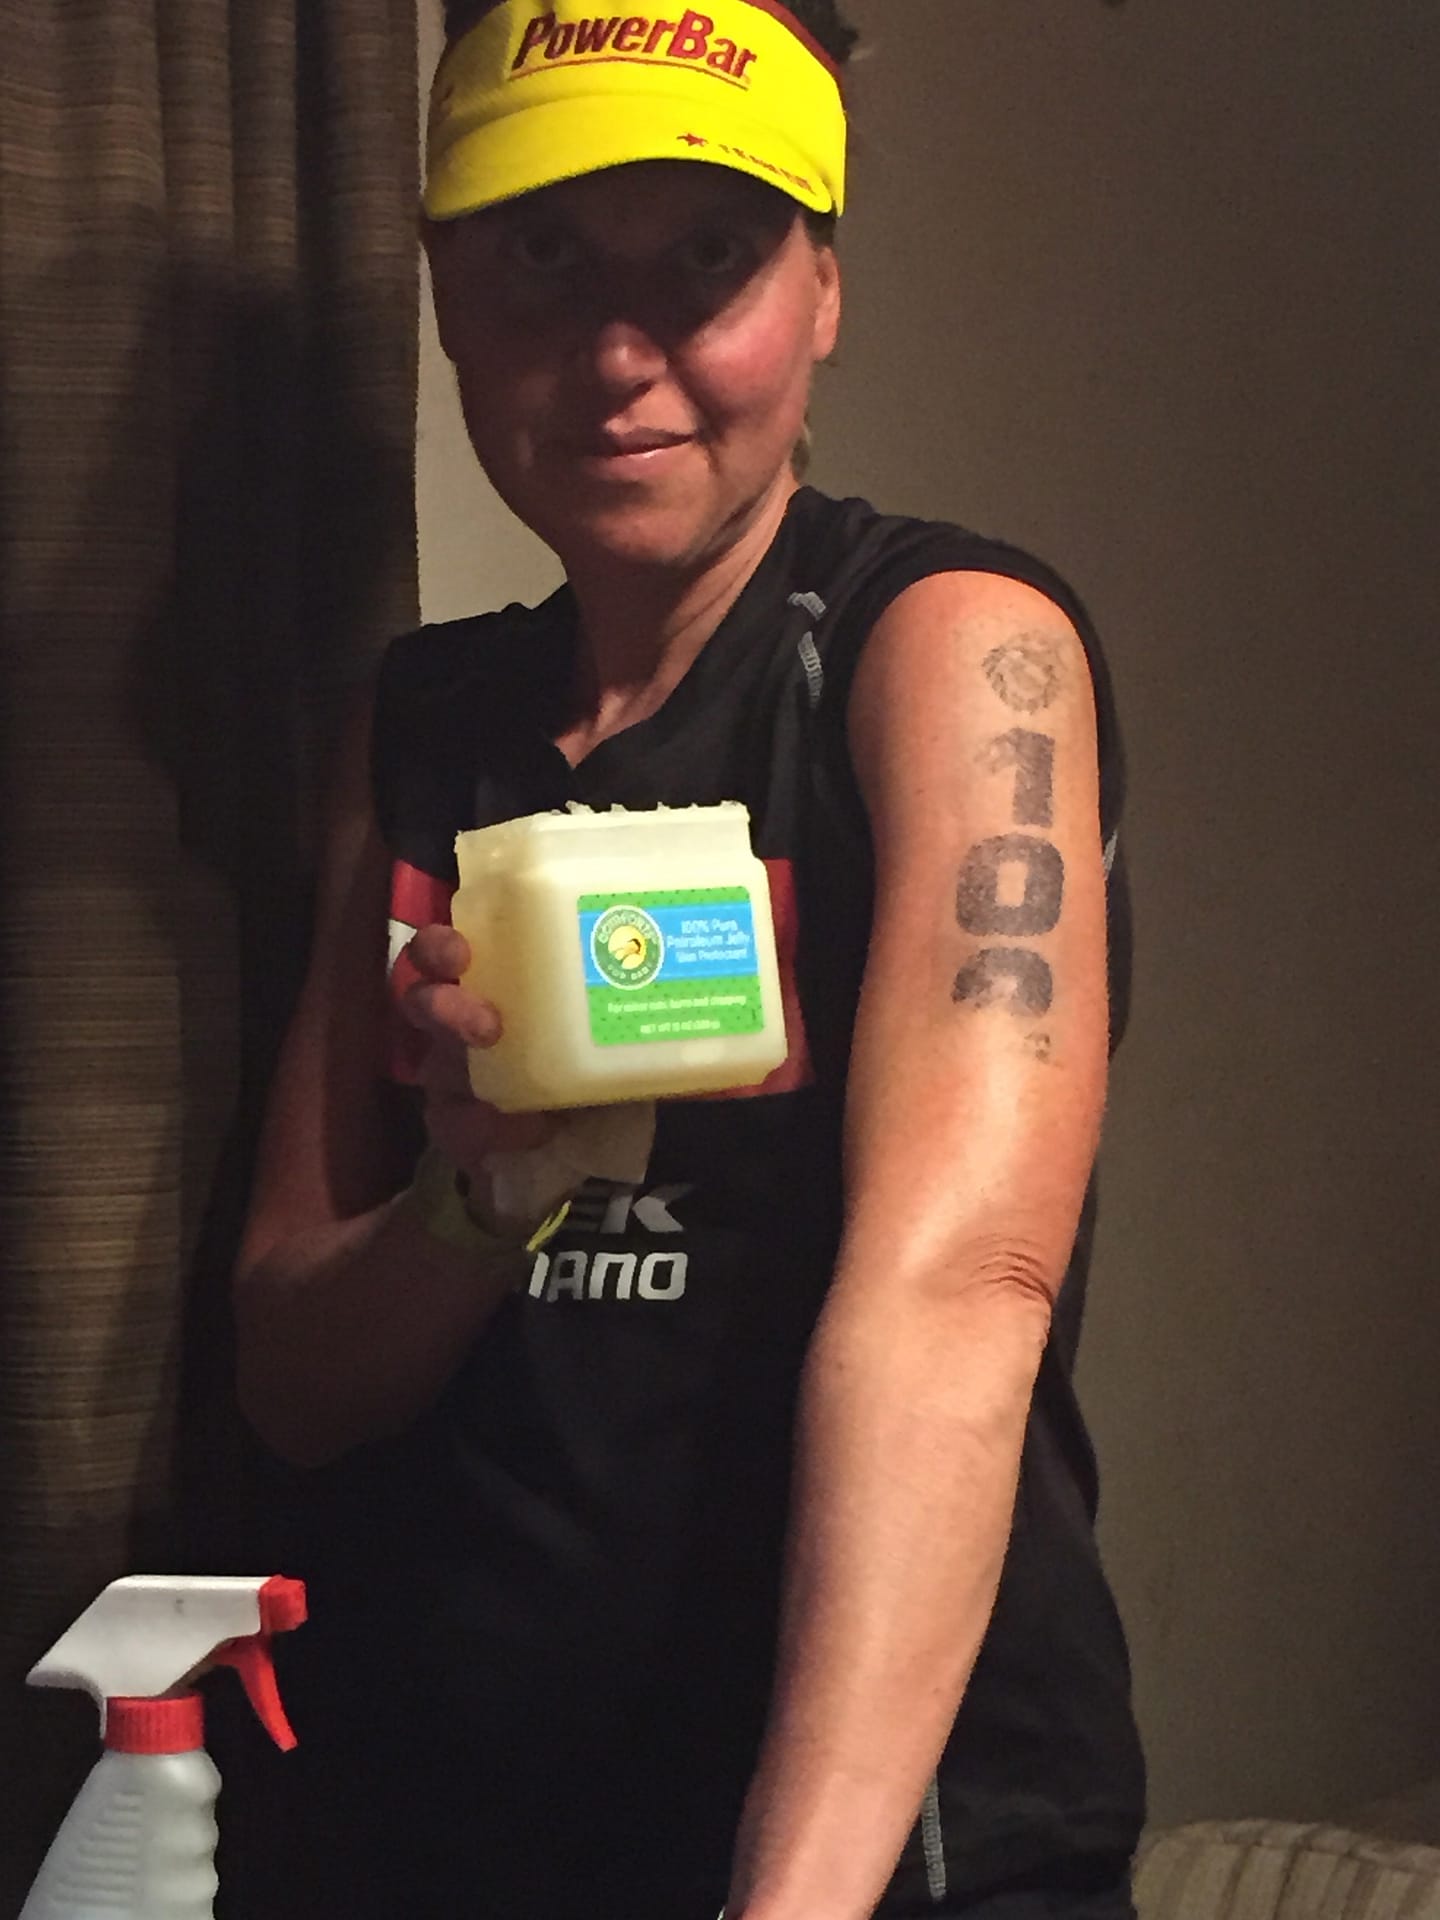
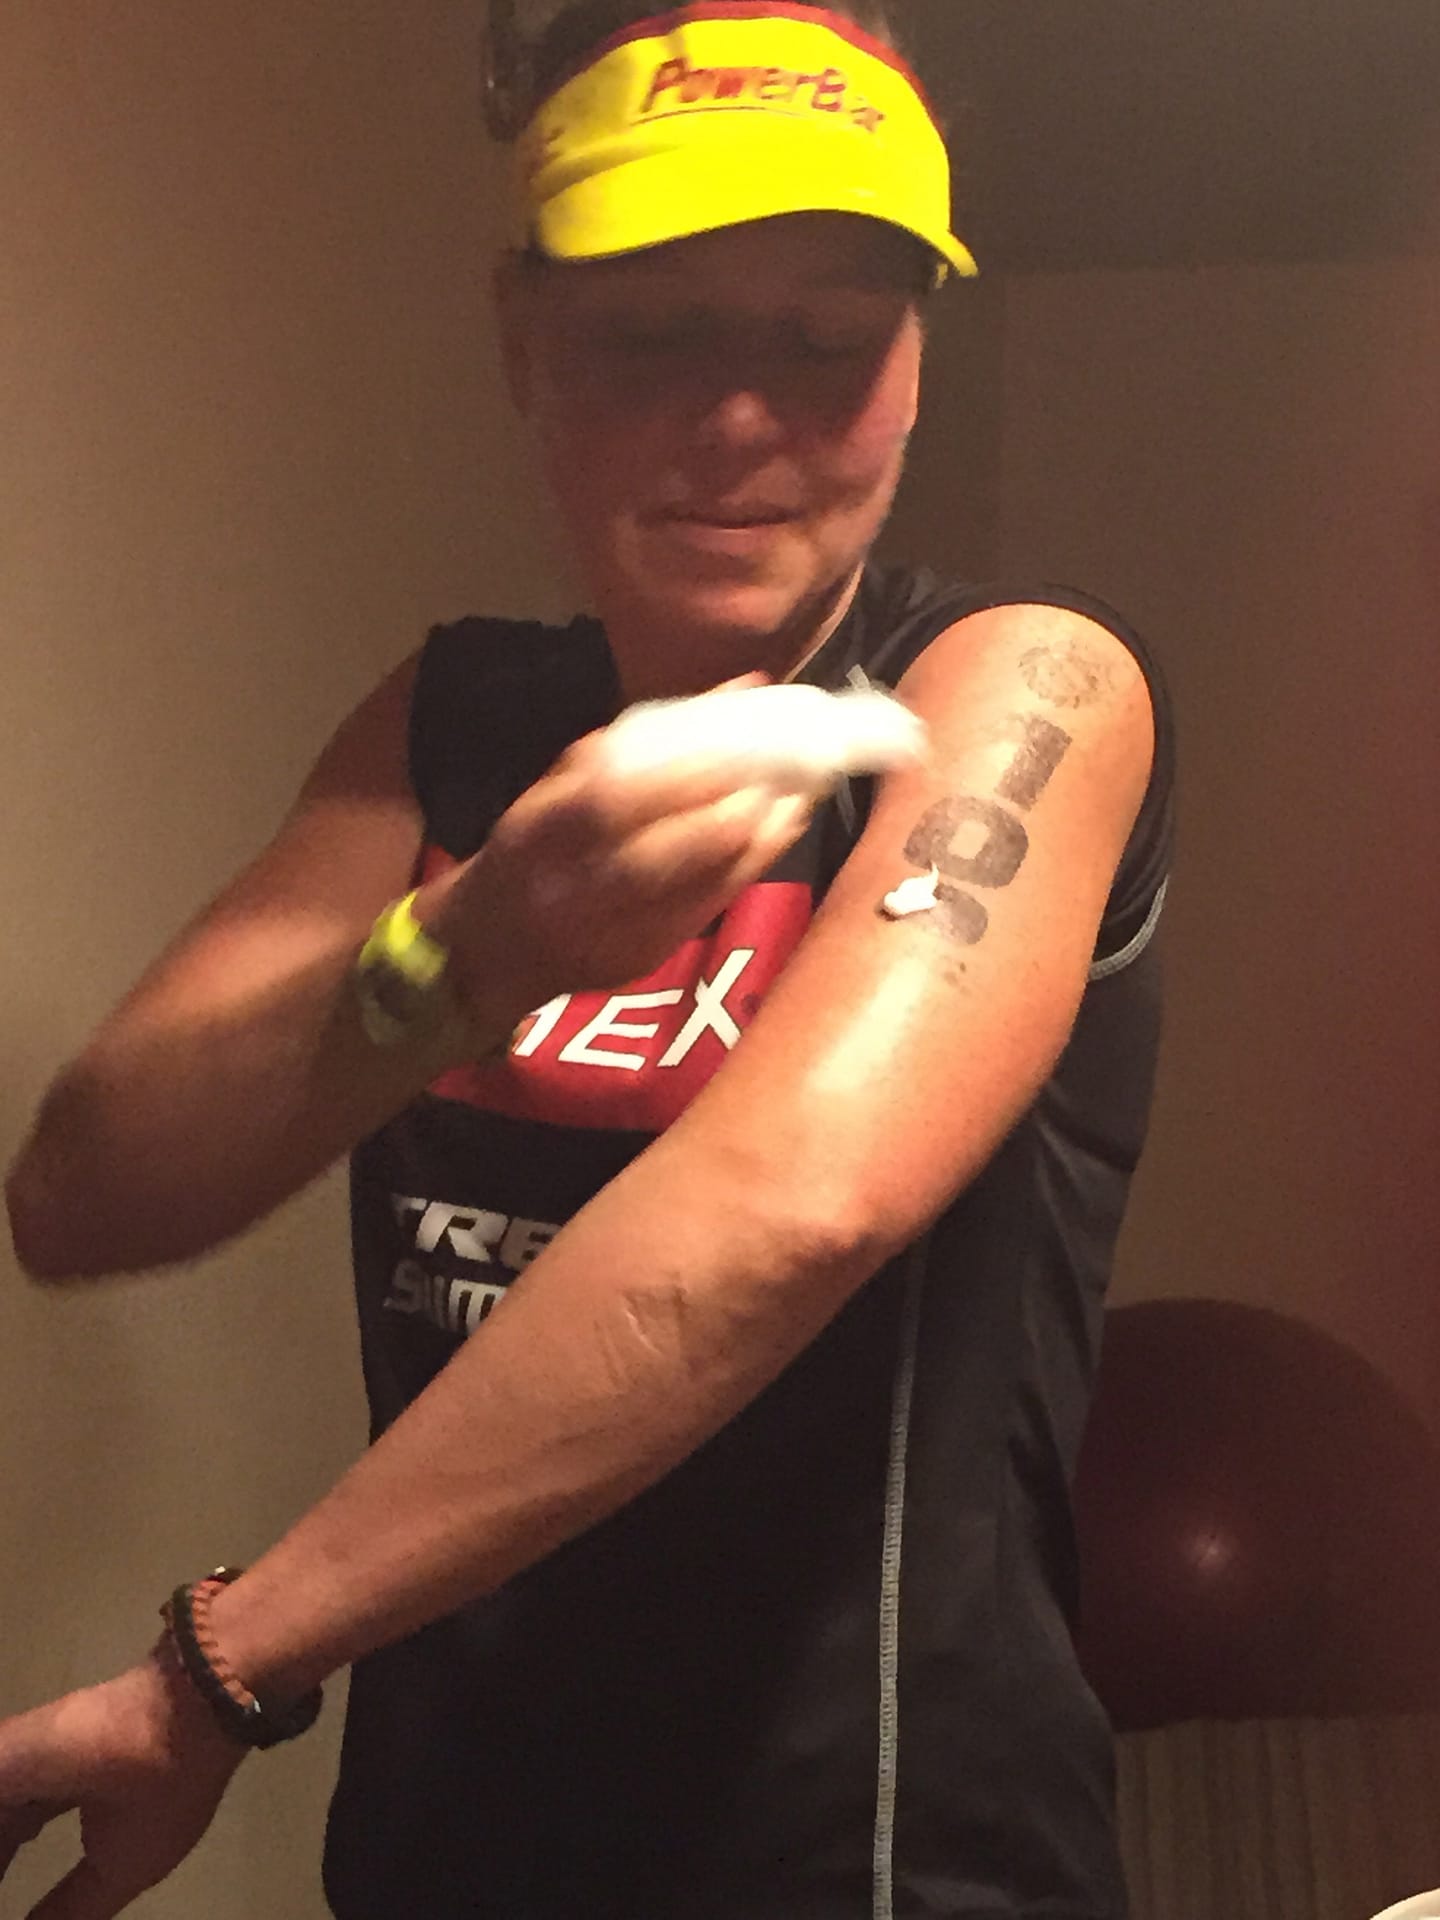
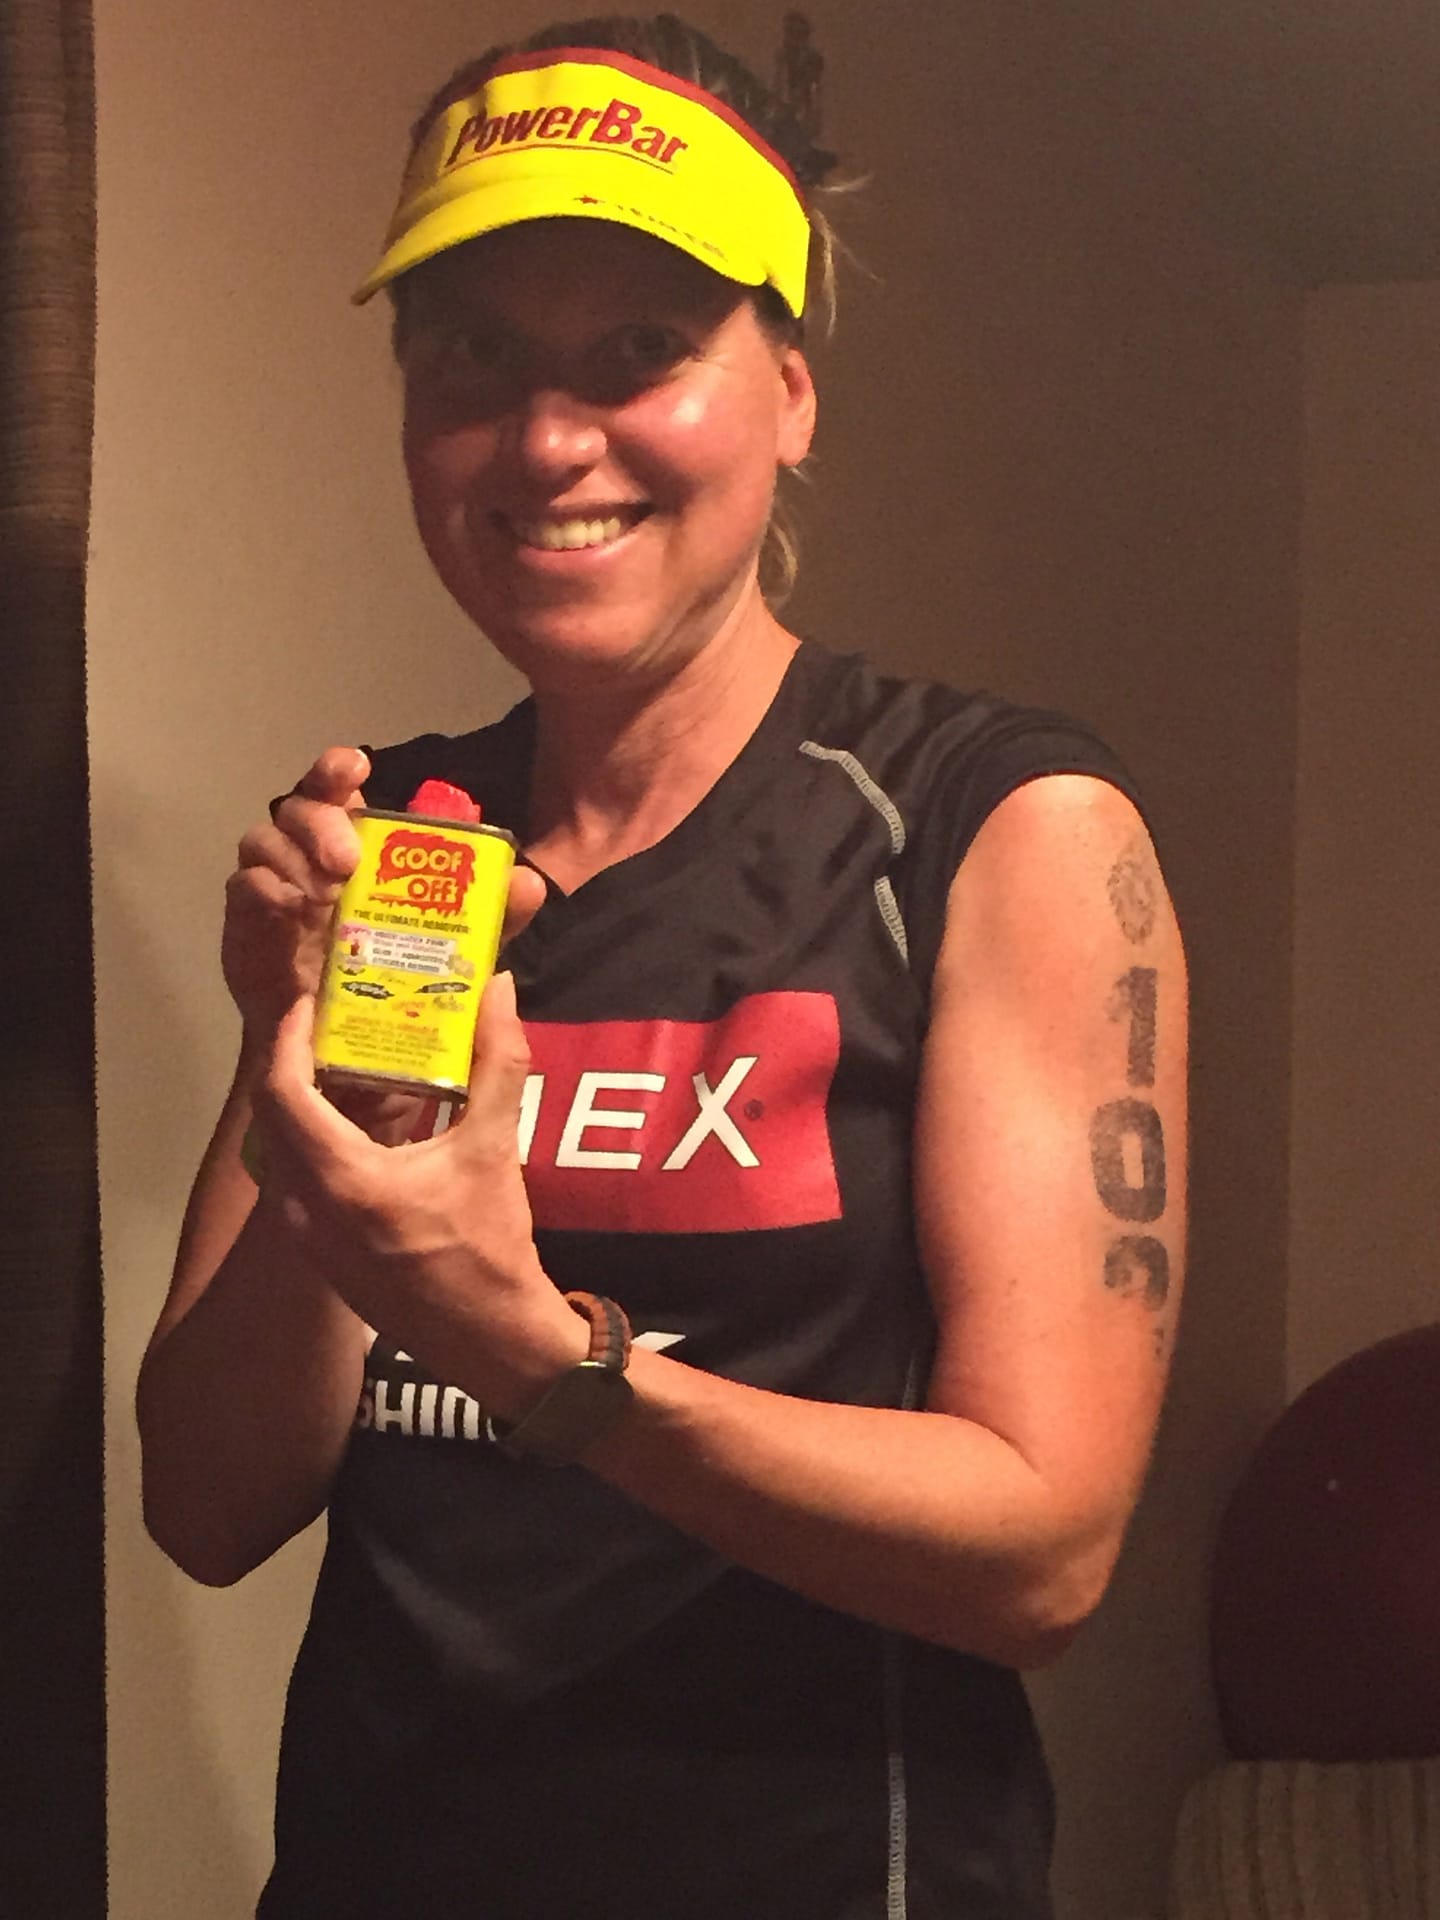
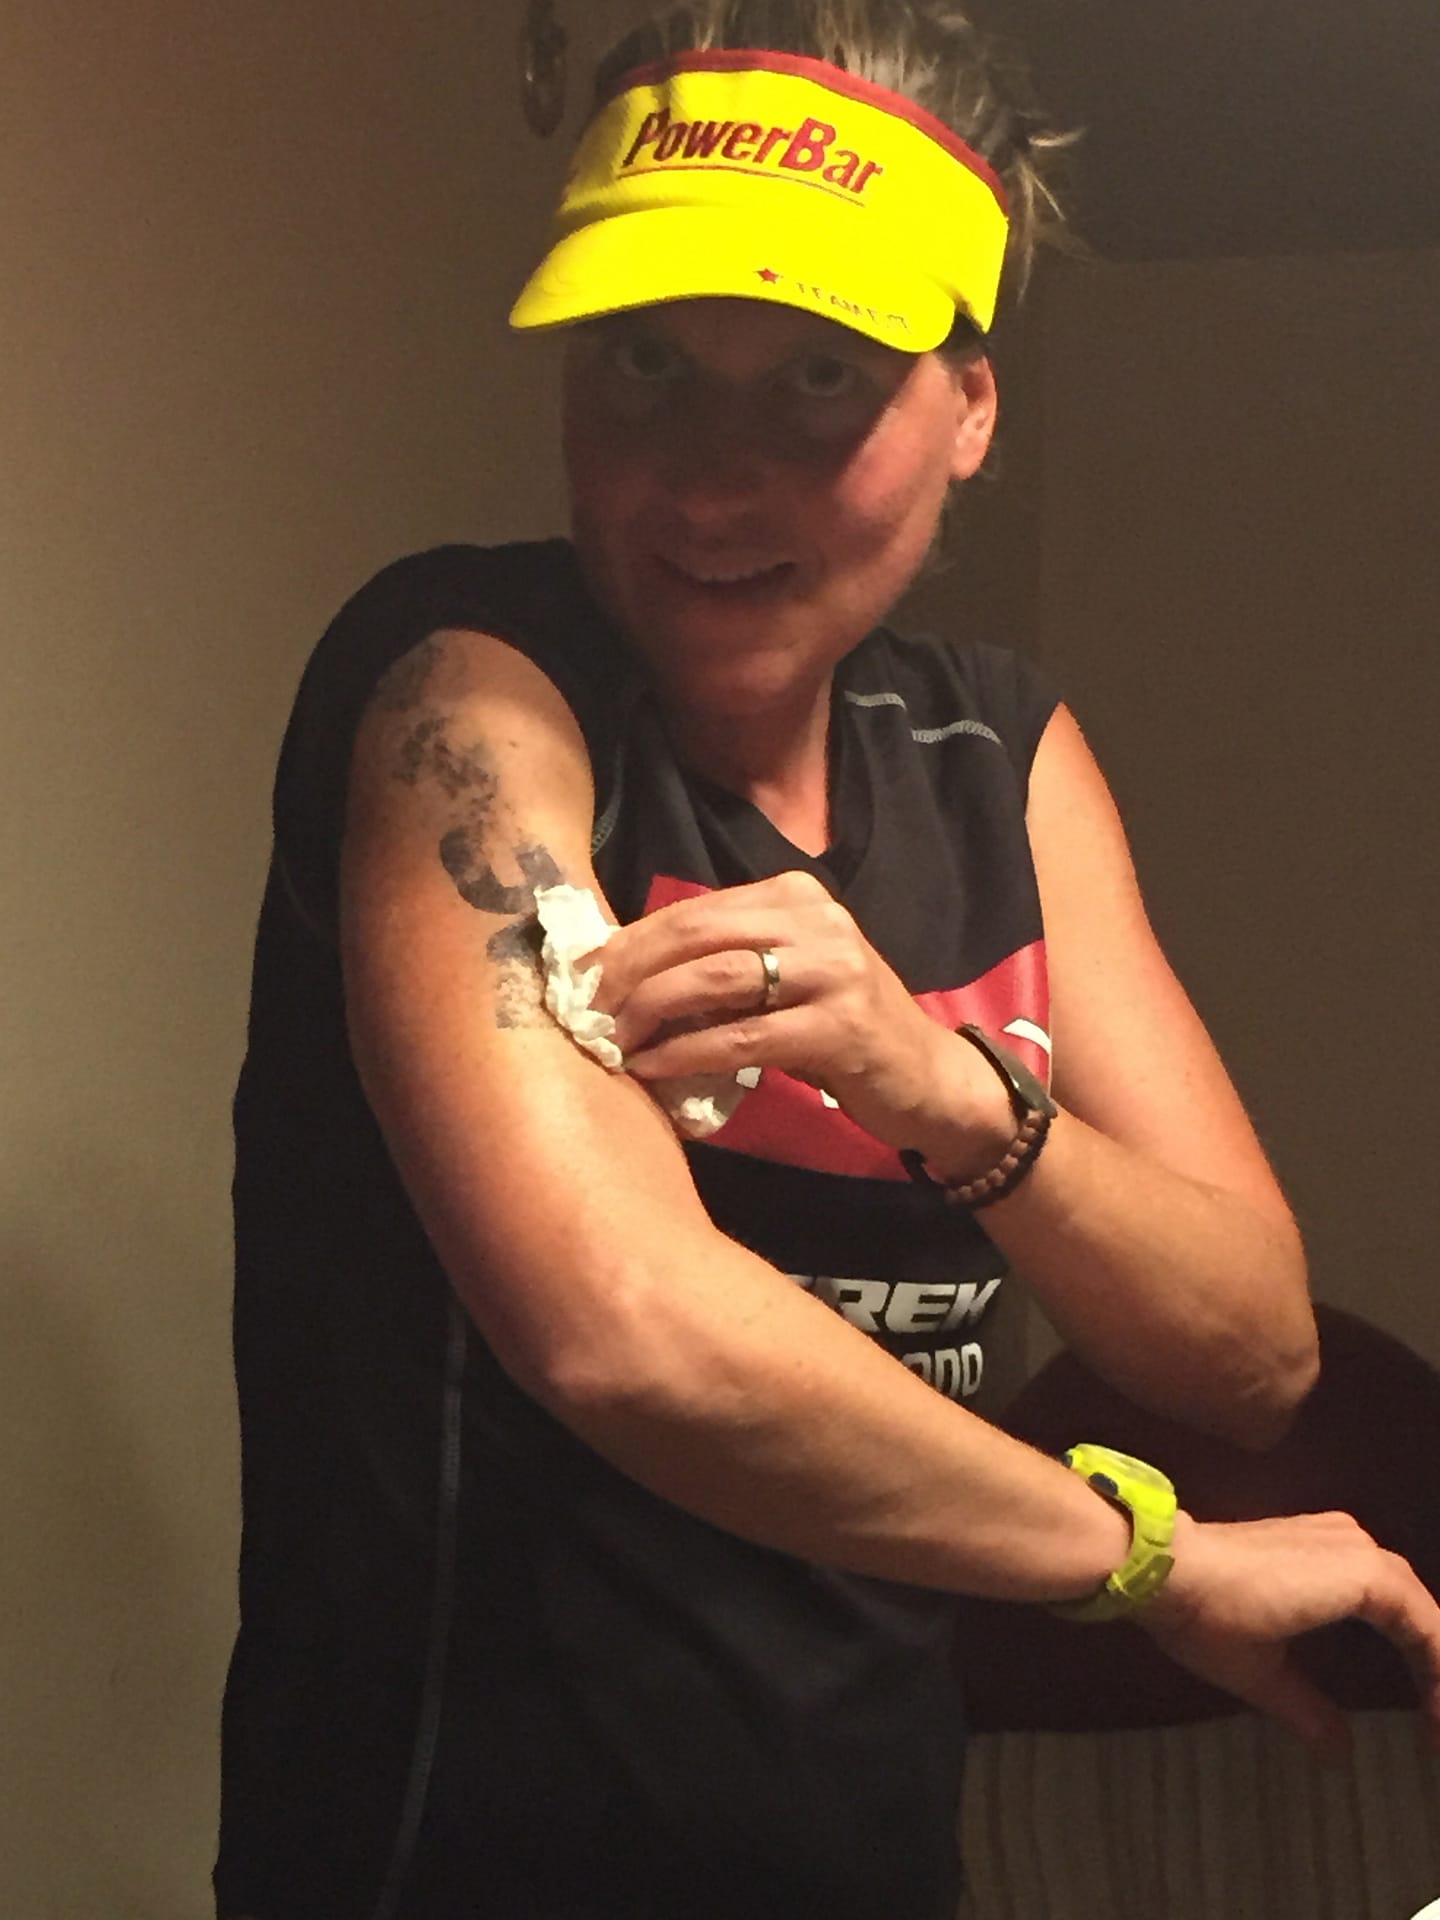
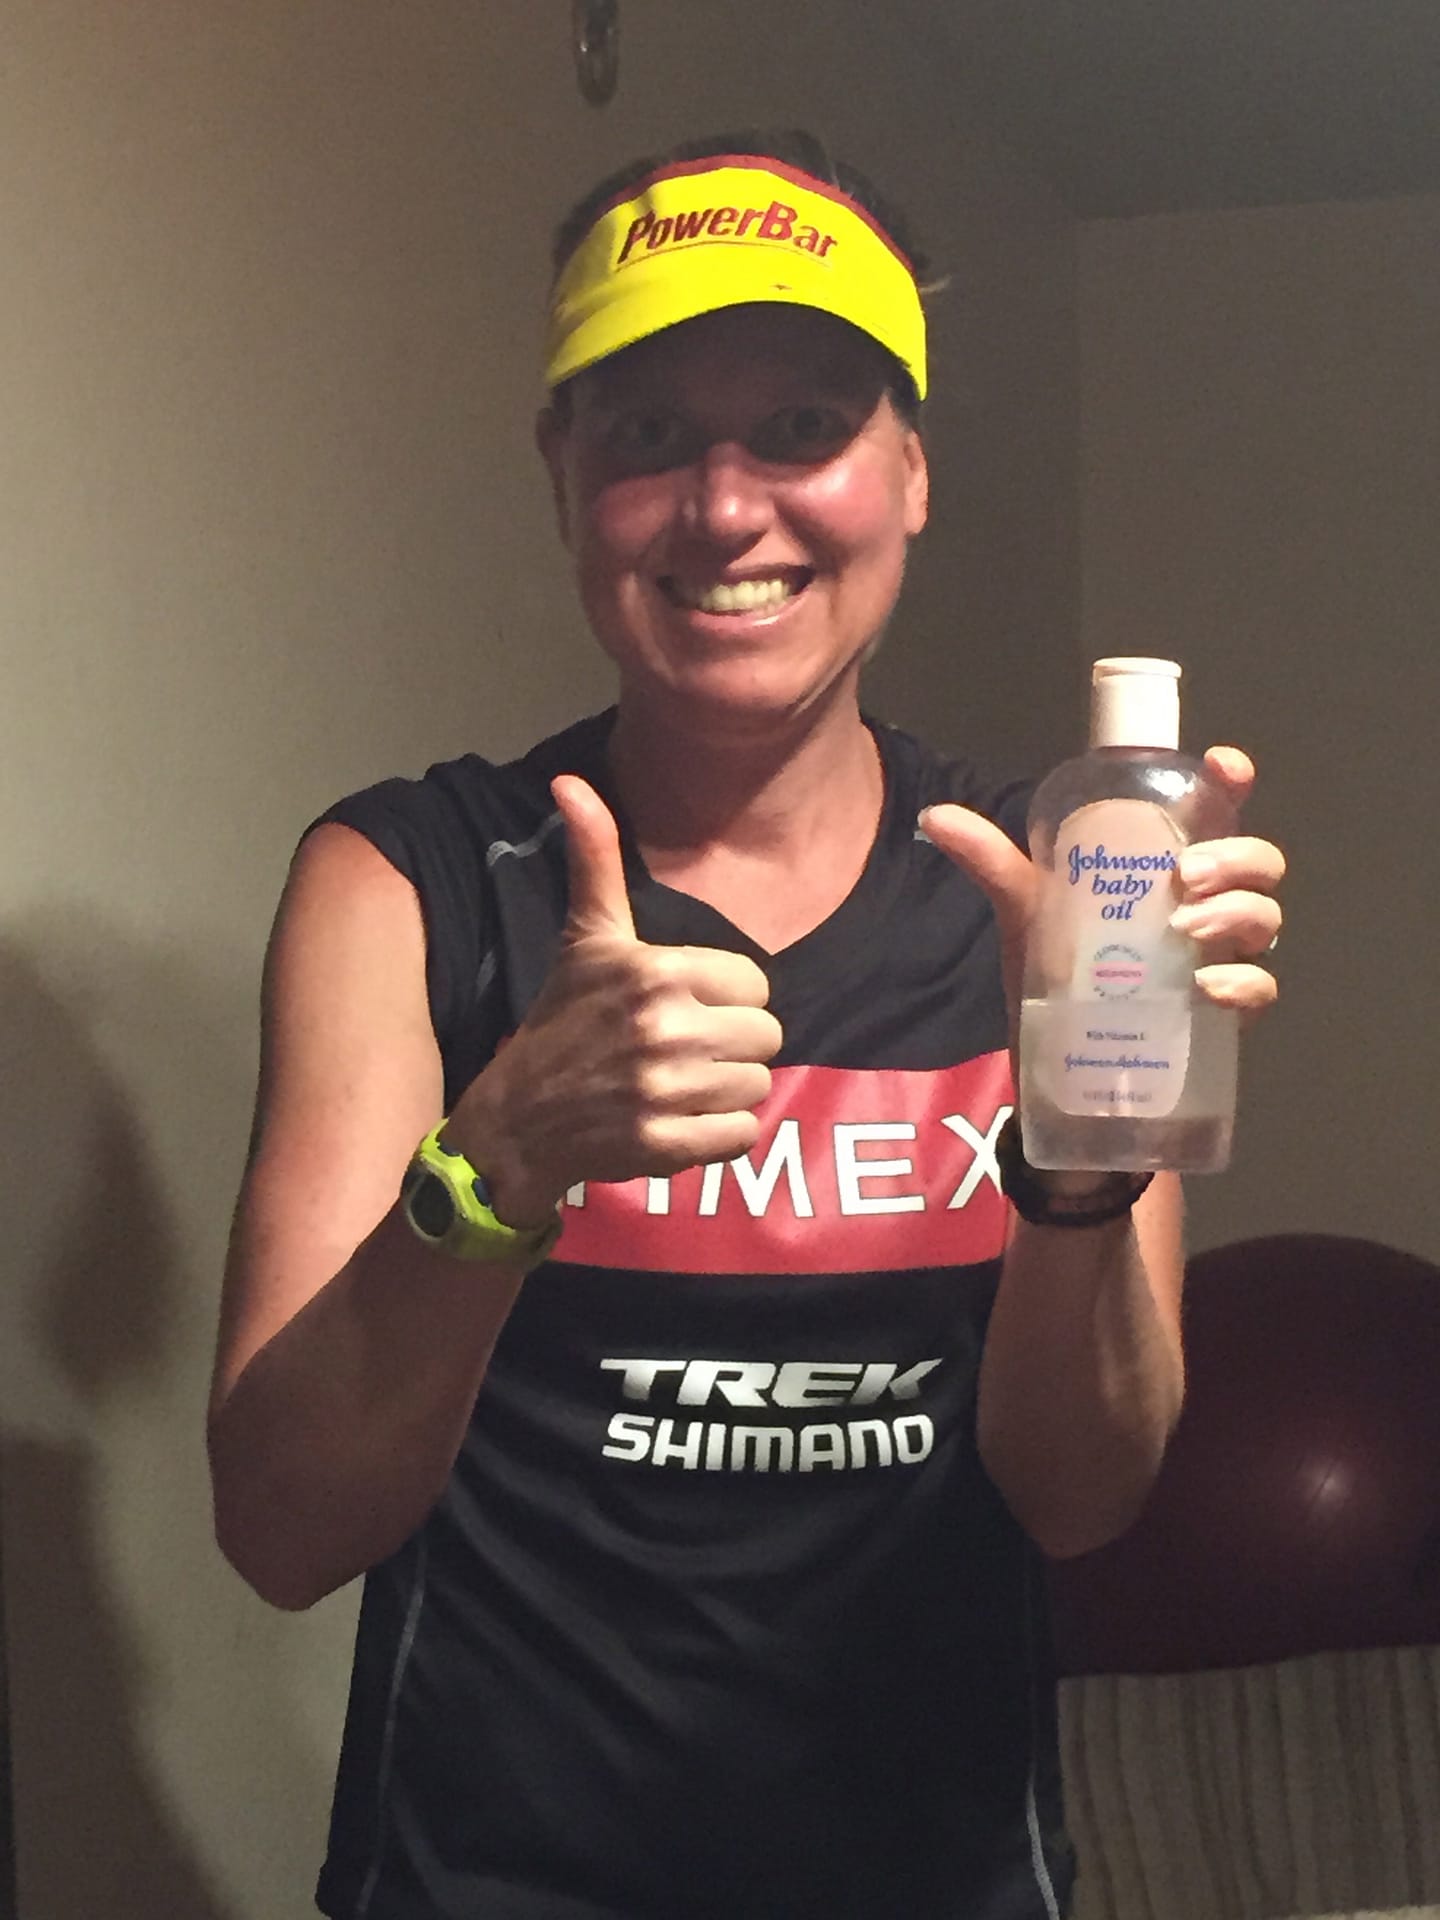
I was at 18 weeks post-knee surgery, I was riding, not walking, the hills outside and anticipation for more riding and possibly running was gaining strength. A triumphant race at East Cobb’s Sprint triathlon marked a milestone – even if it came with a numbed leg. Walking the 5k under an hour, 8 weeks previously walking a 5k was a struggle in an hour and seventeen minutes. Anticipation for the upcoming season was building, plans were forming, and then, an unforeseen twist. A sudden “pop,” the sound of uncertainty, echoed from the body’s core. Except, this time, it wasn’t the injured knee. It was the good one. 
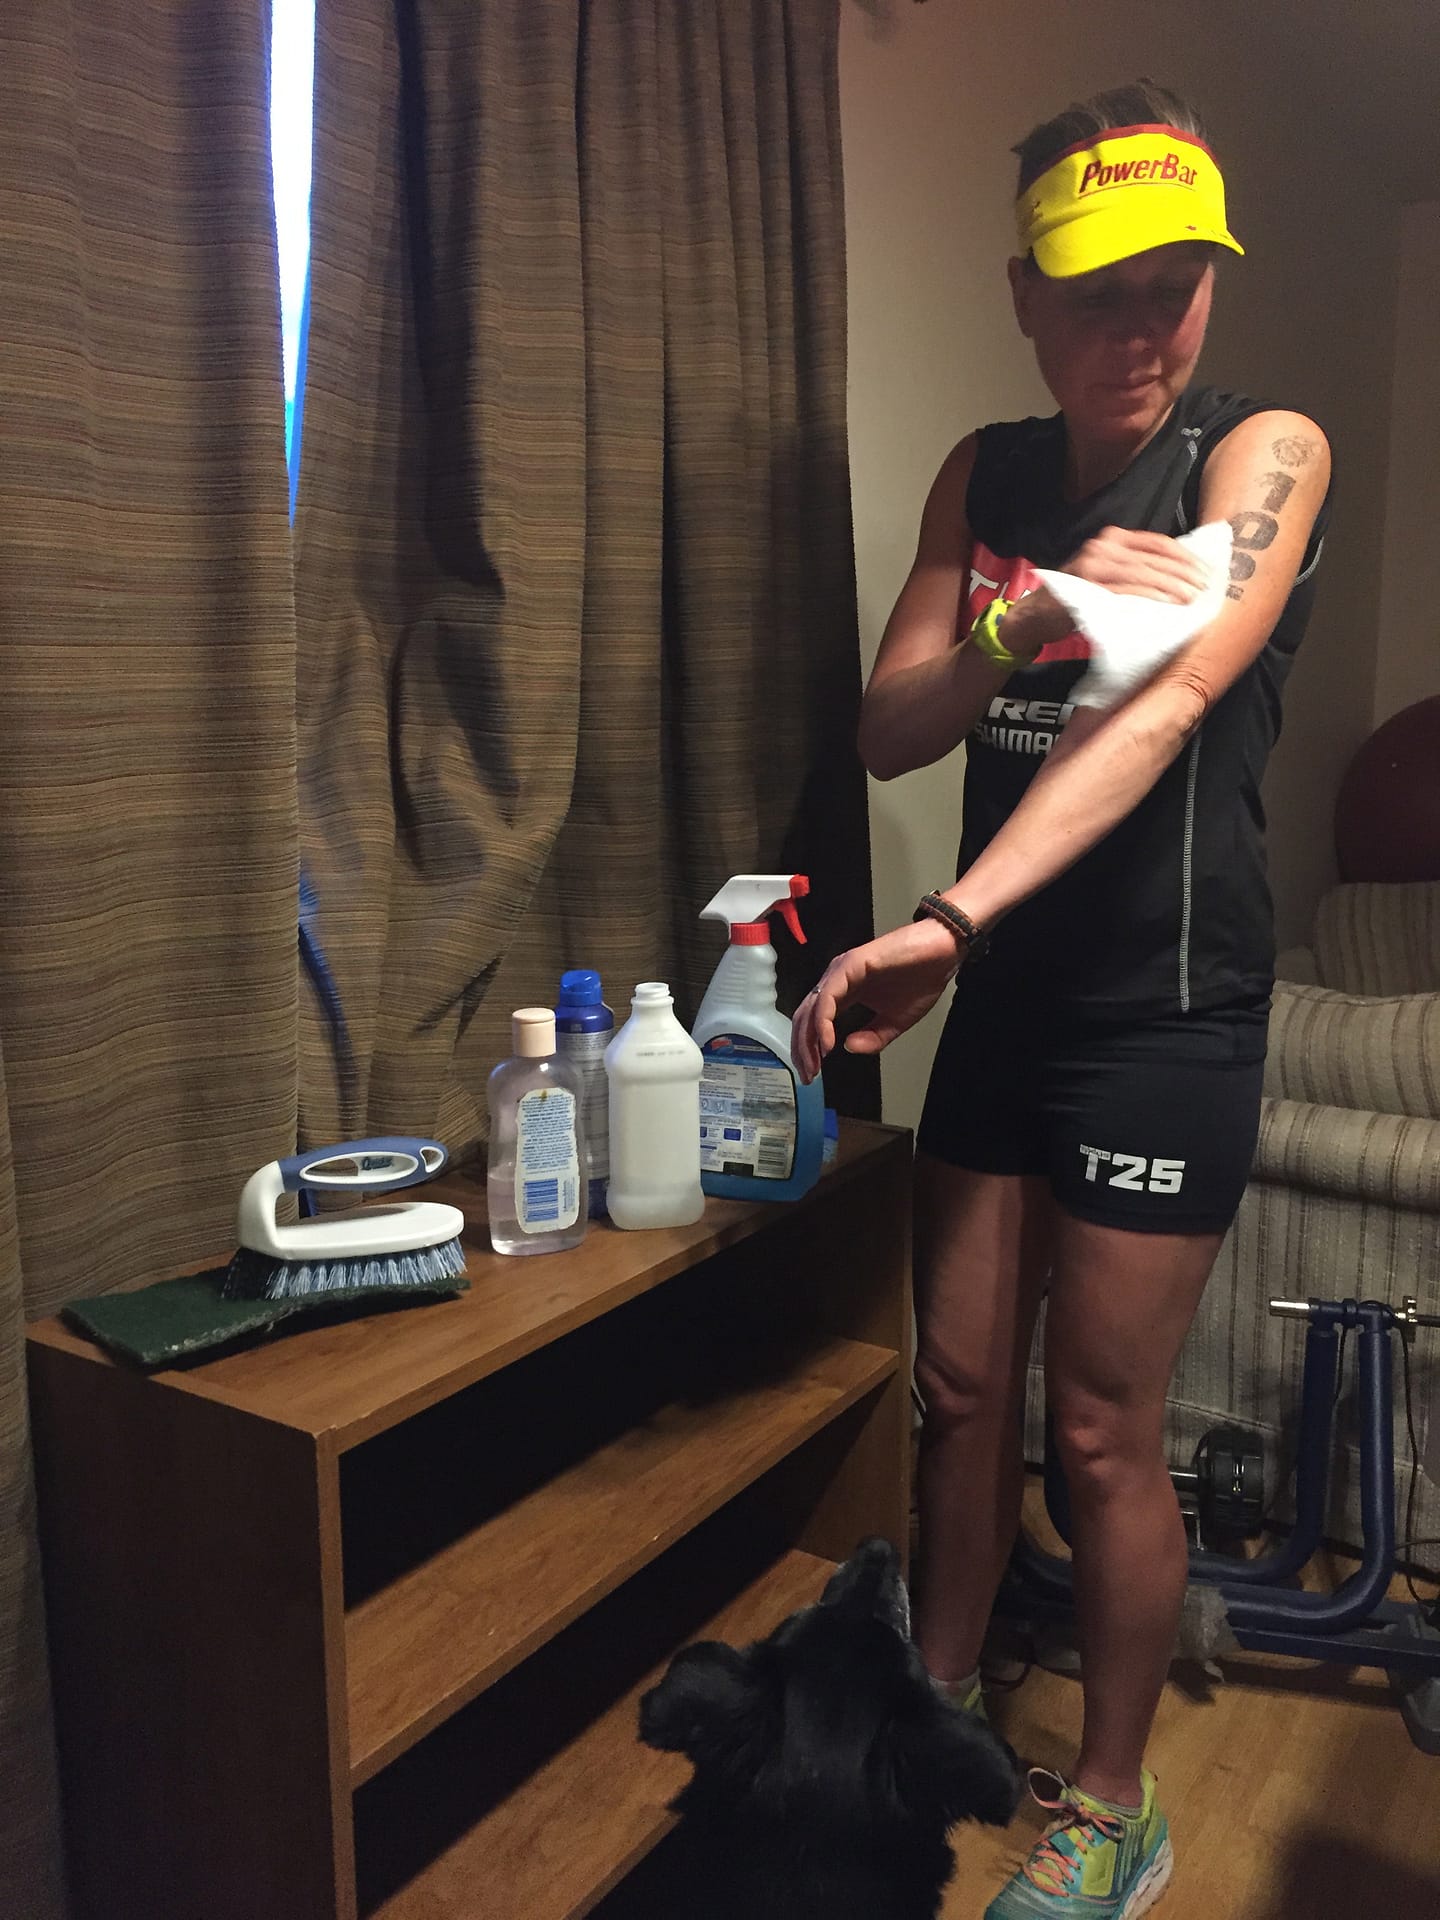
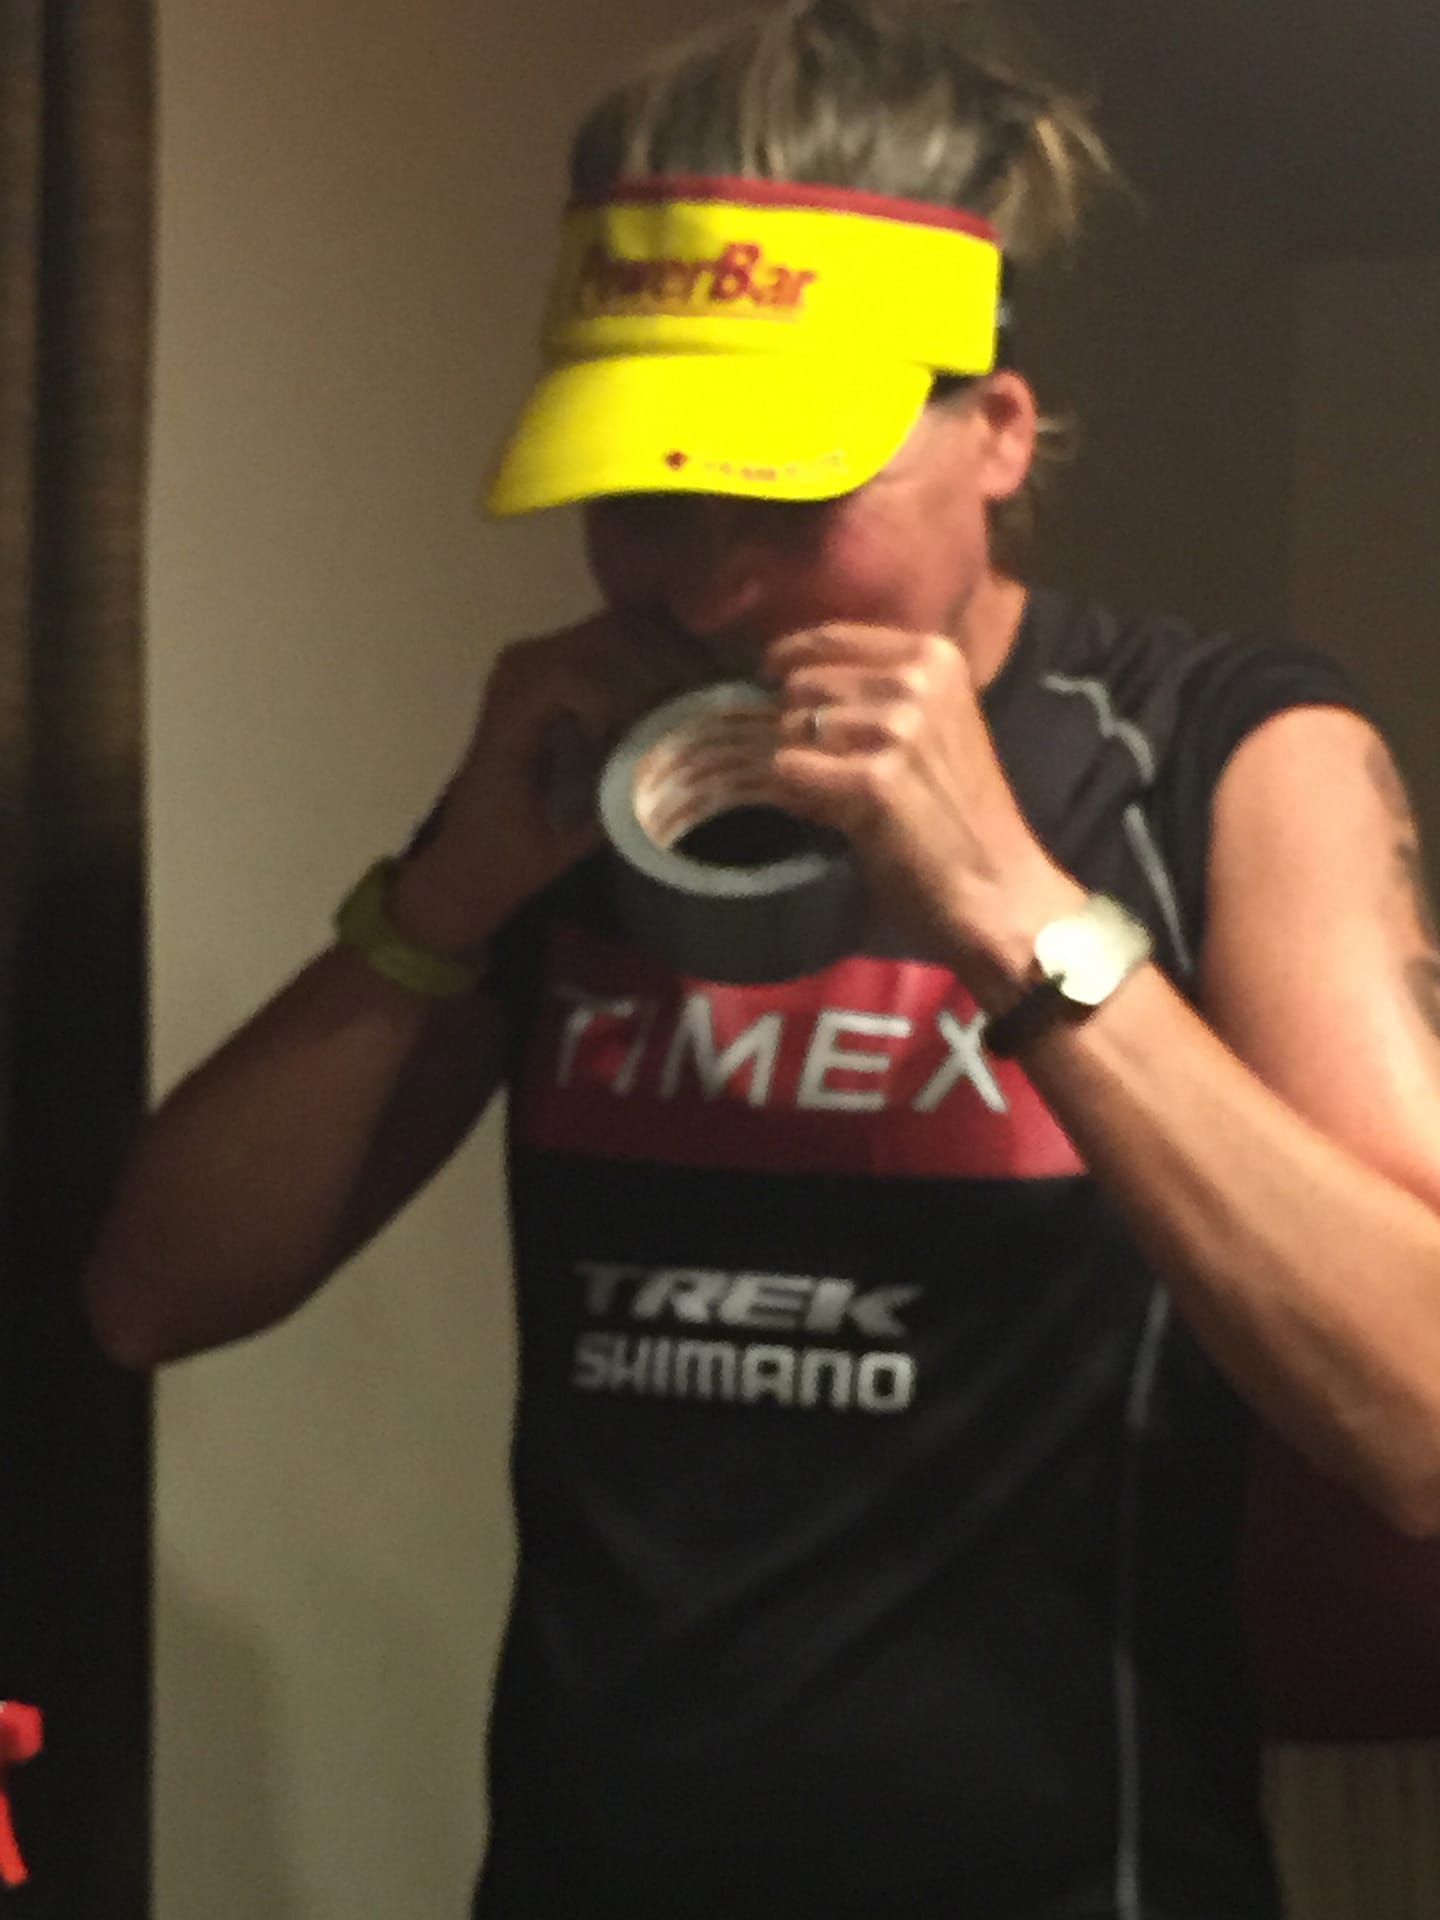
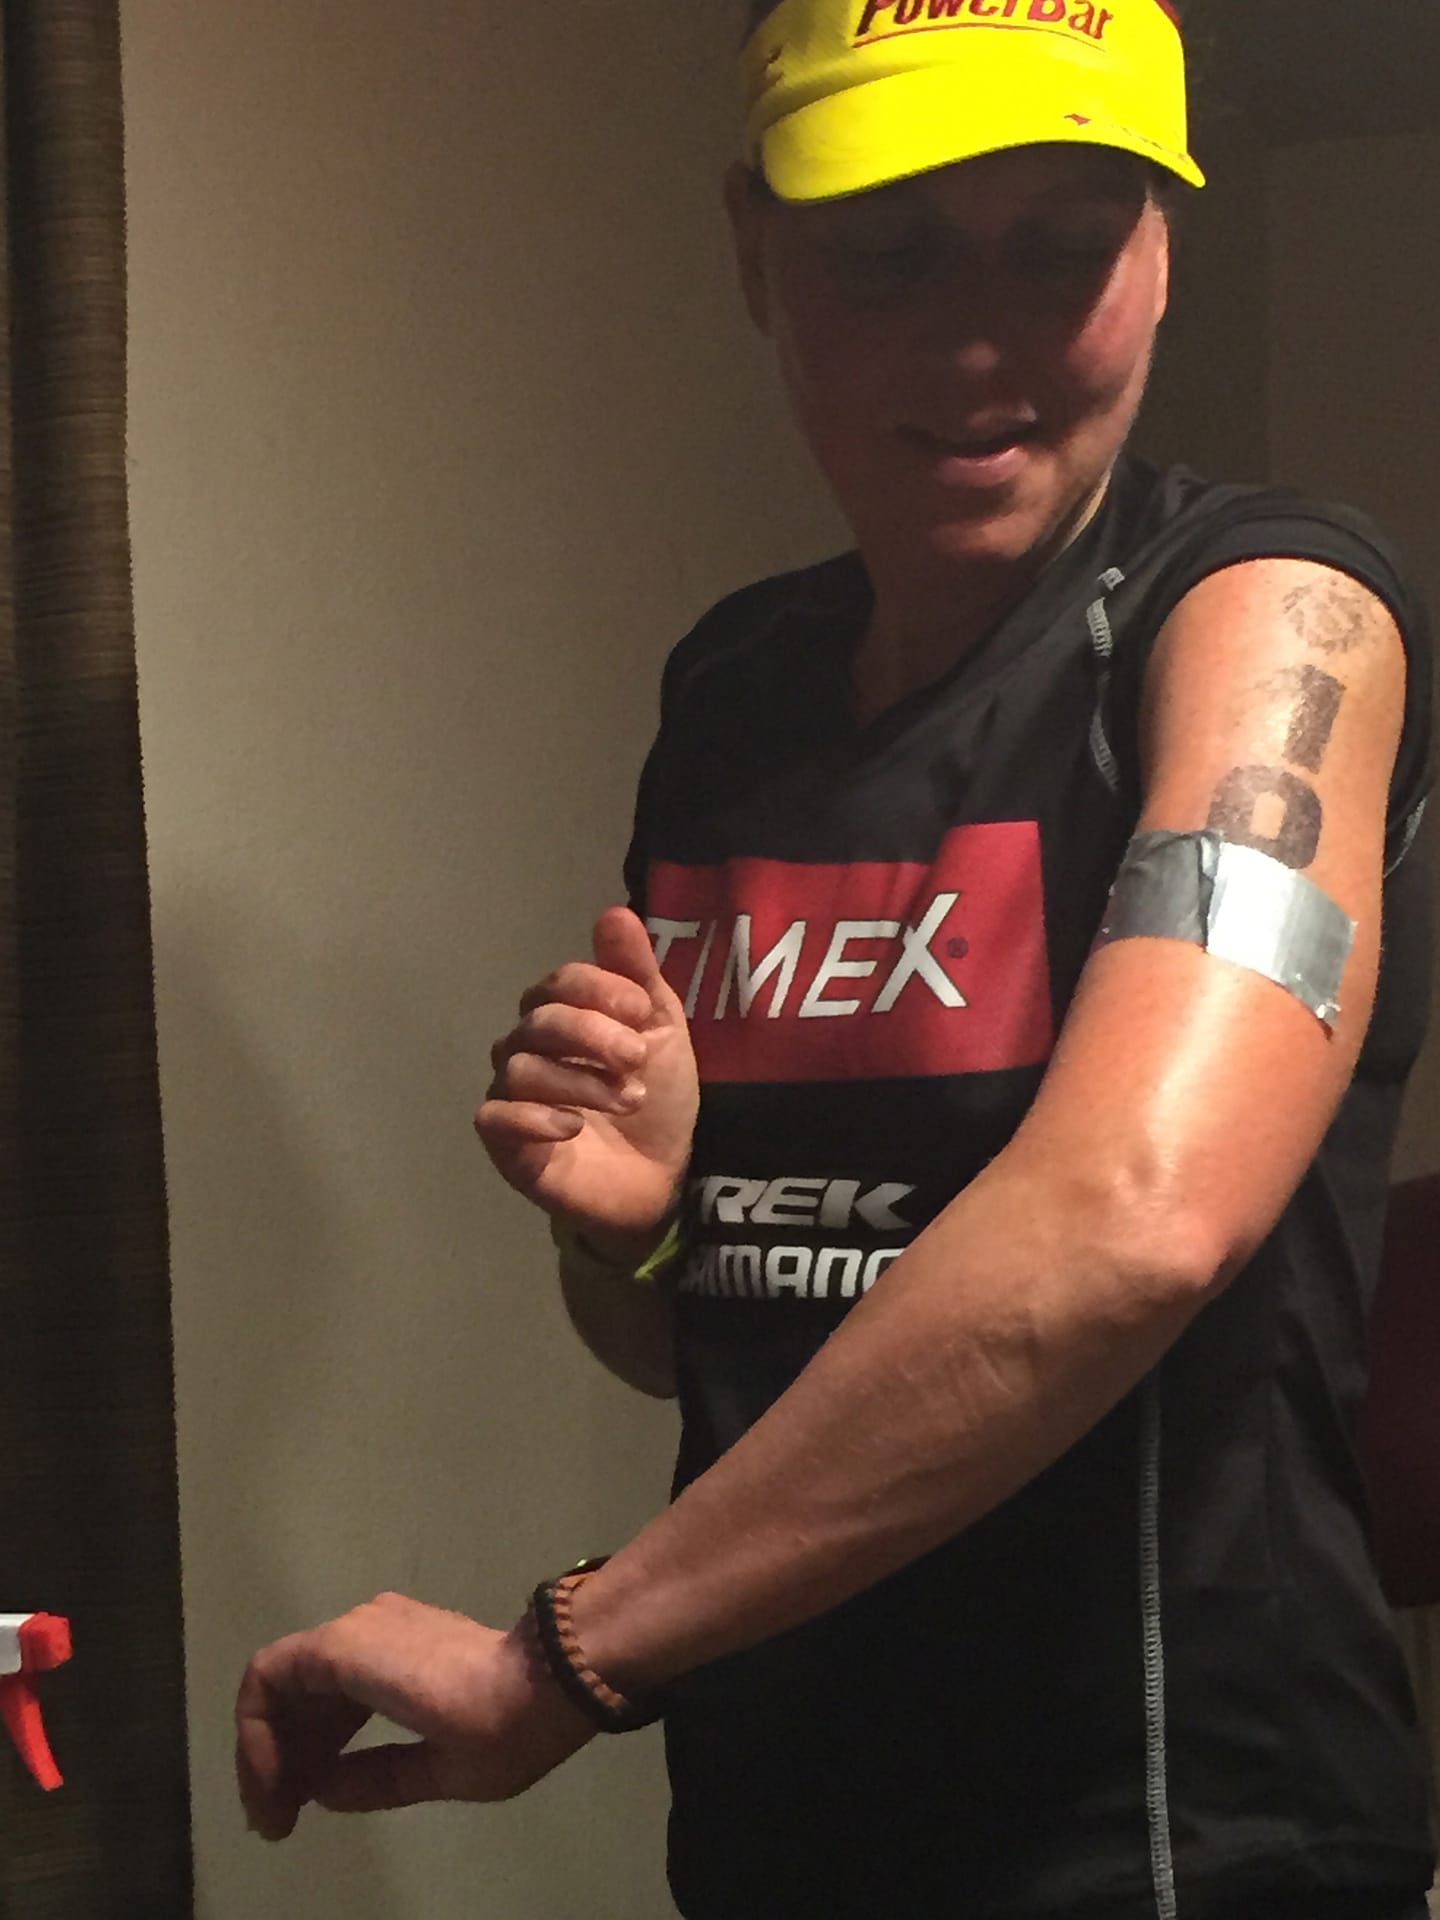
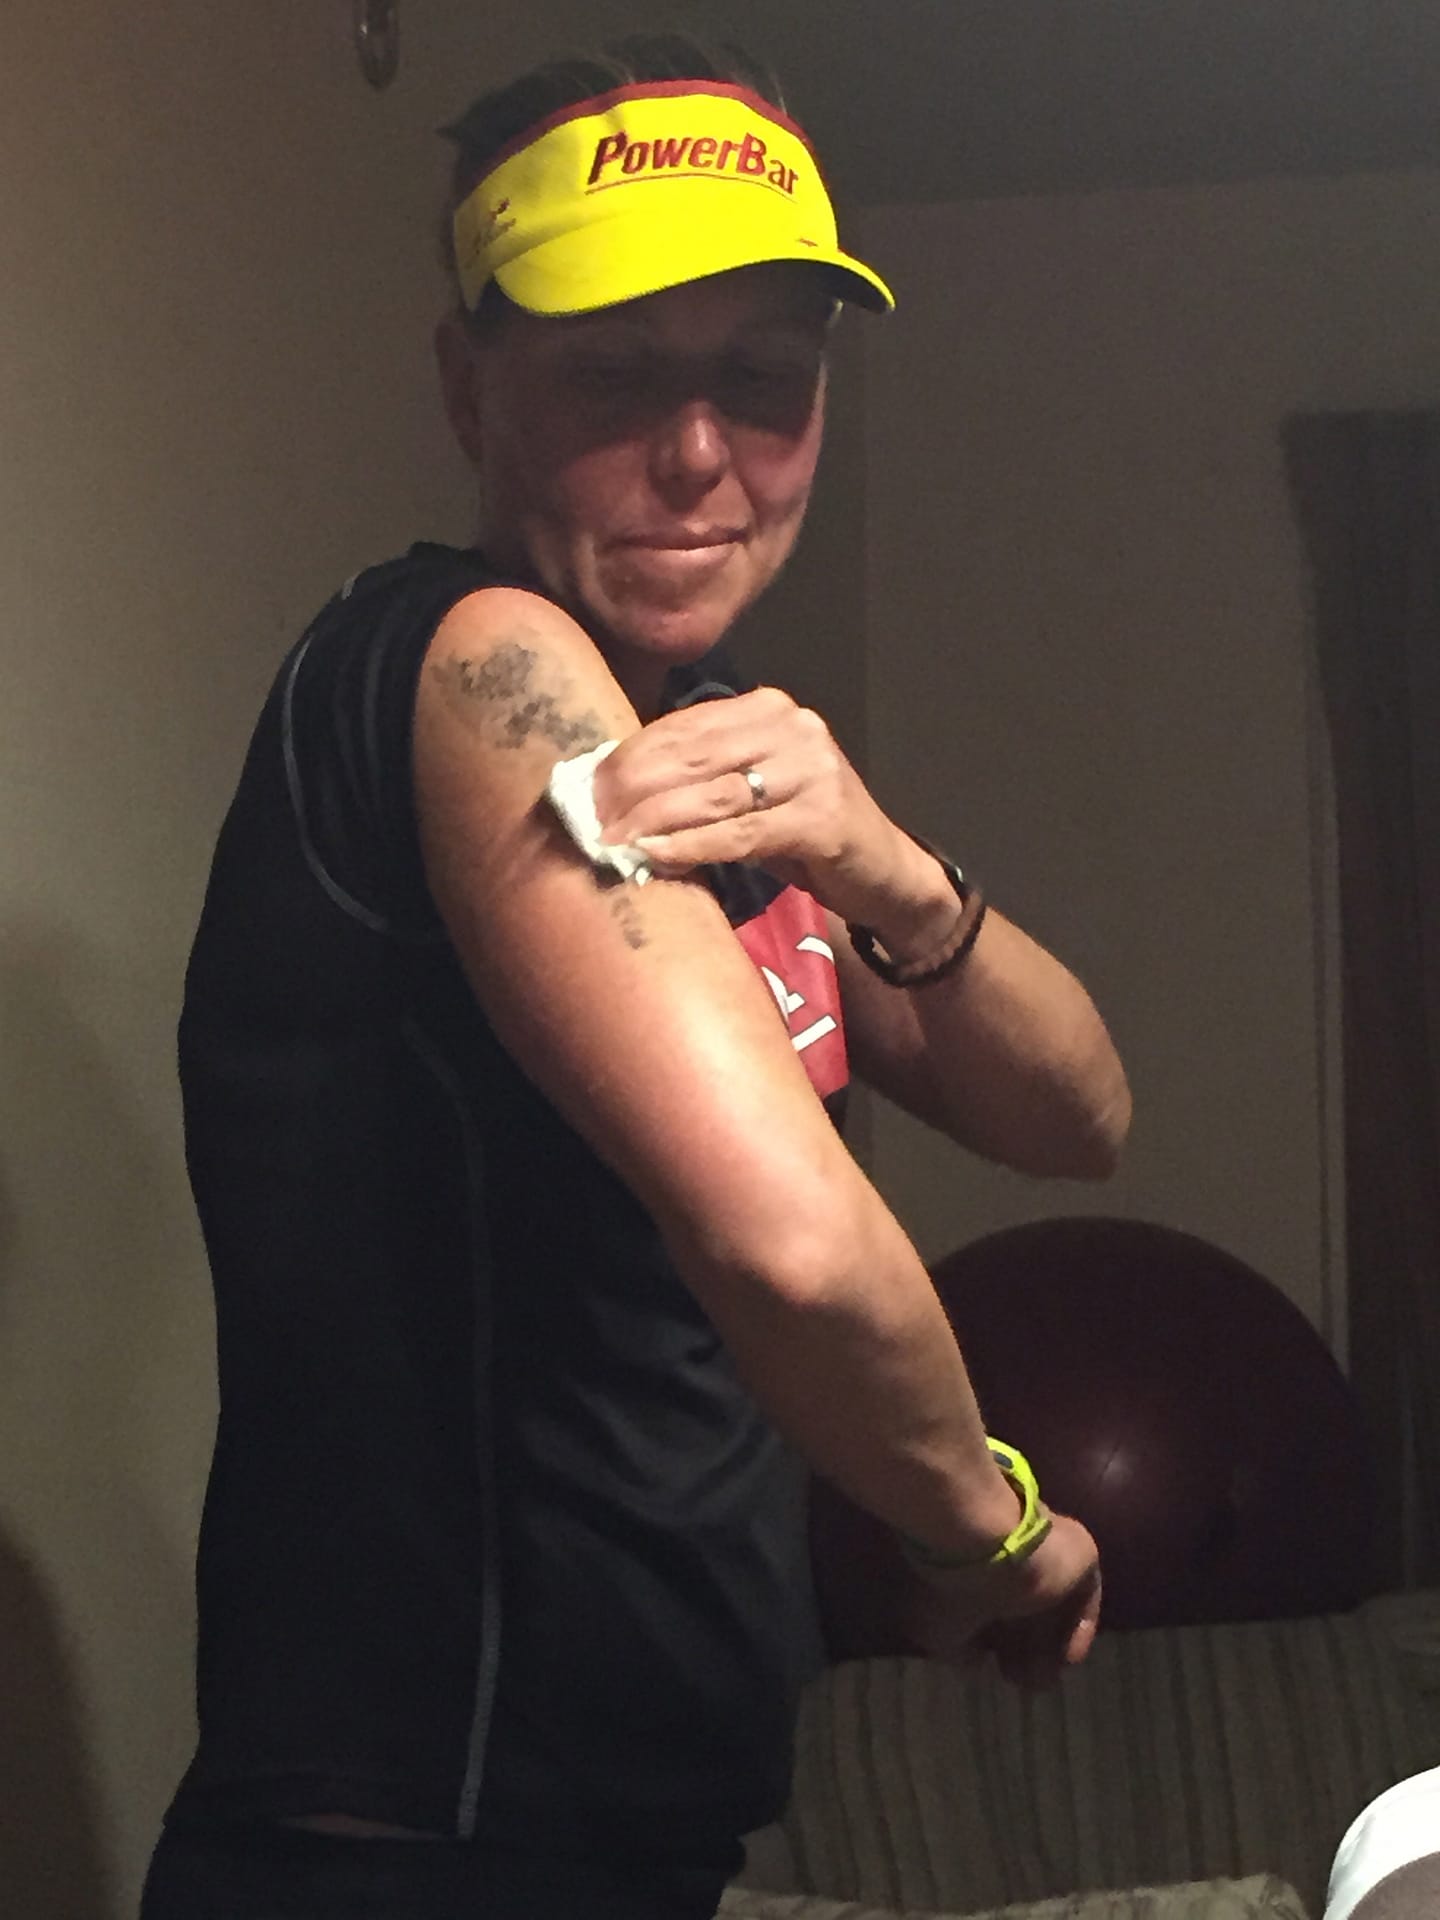
In the aftermath, at the base of a staircase, frustration, anger, and the weight of the journey loomed large. I immediately went to urgent care for an X-ray as I didn’t to want an underlying left knee fracture to worsen and split like my right patella 19 weeks previously. The next week, after seeing my physical therapist and chiropractor to rule out potential injuries I accepted the best choice in recovery is the one that involves reflection, adaptation, and a resilient mindset. I am in this for the long haul. 
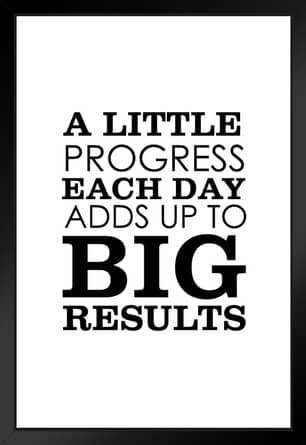
Setbacks are an inevitable part of any journey, whether it’s on the triathlon course or in life itself. Embracing setbacks as opportunities for growth can lead to transformative outcomes. Here are a few key lessons:
  1. Resilience Trumps Perfection: The path to success rarely follows a linear trajectory. Embrace setbacks as opportunities to build resilience, adapt, and emerge stronger.
  2. Mental Fortitude Matters: Developing mental strength is as vital as physical training. Navigating setbacks with a positive mindset and determination can yield incredible results.
  3. Listening to the Body: Our bodies communicate with us. Pay attention to signals and seek professional guidance to avoid overexertion or injury.
  4. Embracing the Journey: Triathlon, like life, is a journey filled with highs and lows. Embrace the process, learn from setbacks, and celebrate victories – big and small.
As we continue on our individual triathlon journeys, remember that each setback holds within it the potential for a comeback. It’s through these challenges that we gain determination that characterizes us as athletes. So, whether it’s the echo of a setback or the triumphant roar of success, let’s keep moving forward, one stroke, pedal, and step at a time.

Functional and Non-functional OverReaching

The understanding of overreaching, overtraining, and the importance of finding a balance in training has evolved significantly over the years. In the past, I often faced challenges related to overtraining without even realizing it or having the necessary knowledge to address it effectively. The concept of overreaching, which involves pushing the body to a temporary state of fatigue and performance decline followed by proper recovery, was not widely recognized or understood. As a swimmer, K-College I unknowingly experienced overtraining syndrome, which hindered my ability to reach my full potential. When I started triathlon in 1992, for many years I did not have adequate fueling and did not balance training load to incorporate recovery. I would show up to races “fit and fatigued” Functional overreaching is a deliberate and planned phase of training where an athlete intentionally increases training load via volume and intensity for a defined period. The goal is to create a temporary state of fatigue and performance decline to stimulate adaptations in the body leading to improvements in endurance, strength and speed achieving a higher level of performance and fitness. Non-functional overreaching occurs when an athlete continues to add training load without adequately recovery and is characterized by prolonged and significant declines in performance, persistent fatigue, and an increased risk of injury or illness. One reason I became a coach to to help athletes not make the same mistakes I did and to learn the delicate balance between training stress and recovery. Guiding athletes to find the border of overreaching without crossing into overtraining territory. This involves periodization, careful monitoring of training load and implementing proper rest and recovery strategies based on each athletes previous experience, time available to train and goals. Coaching requires a deep understanding of an athlete’s physical and mental states, ongoing communication, and adjustments to training plans based on feedback and observations. By finding the right balance, athletes can maximize their potential and achieve optimal performance without falling into the trap of overtraining.

#1 Tip when Choosing Events

Quote of the week: “Let adaptation drive your training, not your wants or needs.” Steve Magness, The Growth Equation. What does “Let adaptation be the driver, not want or need” mean? It emphasizes the importance of prioritizing adaptation in training rather than being solely driven by personal desires or external pressures. Long-term development involves avoiding the fixation on specific events. Many athletes, including myself in the past, make the mistake of selecting a prominent race they aspire to participate in or succumbing to peer pressure, and then molding their training to fit that event. This approach anchors training decisions solely to the demands of the race date rather than focusing on training adaptation. For instance, imagine signing up for an Ironman race with several shorter races along the way as part of your preparation. You start planning your training backward from the event date, determining the training load you need to build up to meet the event’s demands. When you organize these numbers into your calendar for the months leading up to the race, it may seem like a clear progression from your current training to what you should be doing in the final weeks. Essentially, you create a training map that goes from point A, representing today, to point Z, the race day. However, the problem with this approach is that it is uncommon for your body to follow such a linear path. Training is not a straightforward, linear process, as your body can only progress at a certain rate. By anchoring your training to the event, you unintentionally create an unrealistic training progression that may not align with your body’s capabilities. Recognizing this mistake has come with experience. To start off correctly, a better, sustainable approach, is to map out your training first and then fill in the events accordingly. If your primary focus is running, choose running events that align with your current capabilities. If swimming is a challenge for you, participating in an Ironman or Triathlon might not be the best choice at this moment. Write down the frequency and duration of training that you currently cannot handle comfortably. If you are already training enough for the events you want to participate or compete in, then there is no need for significant changes. You can start signing up for those events. However, if the events that excite you are beyond your current abilities, take a realistic approach. Ask yourself, “How much more could I realistically handle next week and next month while comfortably adapting to the increased load?” It’s crucial to ensure that you can handle the additional workload and adapt to it, so that you can repeat it the following week and gradually progress from there. Next, create a list of events and races that align with your expected training level for any point in the upcoming year or two. Consider your realistic expectations of training load and fitness level on those future dates. Contemplate how you will handle setbacks such as illness, work or family emergencies, injuries, or any other unexpected circumstances. When you face significant interruptions in your physical training, be flexible in shifting your training plan and adding new events accordingly. It’s okay to revise your goals for a particular event and still participate if the new goals excite you. Celebrate your knowledge and progress even if you decide to withdraw from a race because your goals no longer align with the original plan. By mapping your training and then finding events, races, or adventures that naturally fit into your plan without forcing adjustments, you keep the focus on what truly matters—you. This approach ensures that events align with your body’s capabilities rather than forcing your body to conform to events. It is the only approach that can provide a lifetime of healthy and sustainable progress in running. As a coach, I adopt a collaborative and athlete-centric coaching style. I work closely with athletes to determine the training plan, methods of communication, goals, and more. If you’re interested in discussing your training journey further, feel free to contact me

Ultimate Guide to Post-Triathlon Recovery: Techniques for Optimal Healing and Performance”

If you want to get back to training after a race, post-training and race recovery should be the most important part of your training program. However, it’s important to be smart and avoid adding too many miles back in too quickly without allowing your body to recover fully, which can lead to injury, increased fatigue, and slower race times in your next adventure. Here are my top recovery practices in order of priority:
  1. Nutrition: Refuel immediately after your workout or race with a combination of protein and carbs to rebuild and restore glycogen stores. Protein synthesis can continue long after your workout if you refuel properly. I recommend having both pre- during and post-workout fuel prepared.
  2. Sleep: Being disciplined about your bedtime can make a huge impact on your training. Lights out at the same time each night, I recommend no later than 10:00 pm can help you feel more restored and ready to hit the pool, trainer, or treadmill (or outside). Research suggests taking a quick 10-20 minute nap can also leave you feeling more energized and alert.
  3. Active Recovery: Light short activity, like easy swim, spin or walk, after your race, helps keep blood moving through your muscles.
  4. Yoga and Stretching: Stretching out your entire body by doing yoga every evening can help improve your recovery.
  5. Foam Rolling: Applying pressure to knotted areas with a foam roller can help release the muscle from the layer of fascia, boost circulation, and help you get your range of motion back.
  6. Hot and Ice Baths: While there is conflicting research on their effectiveness, hot and ice baths can feel great and potentially aid in recovery. Sitting in a bath for a minimum of 15 minutes with 2 X 10-pound bags of ice after a long or intense event can be helpful.
  7. Bodywork: Physical Therapy, Acupuncture, Massage, and Chiropractic can provide relief from soreness and injuries. Muscle activation technique, acupuncture, and Active Release Technique are some examples of these practices.
  8. Compression: Some athletes opt for compression to help accelerate the recovery process. Recent research shows that these tight garments can accelerate lactate clearance from muscle tissue. Socks, tights, and sleeves are common forms of compression wear.
  9. Recovery Boots: These can provide relief and aid in recovery, but their effectiveness is not clear and may vary from person to person.
Remember to prioritize post-training and race recovery to get back to doing what you love to do, training!

Mastering Triathlon Tapering: A Complete Guide for Peak Performance

Tapering for endurance events can be challenging for athletes that have never experienced what performance feels like after the taper period. Tapering is about unloading excessive fatigue and regain proper form. Your body will feel fully recovered, glycogen loaded (muscles fueled) to perform your best race day. When I started triathlon in 1992, I did not know how to properly prepare for events. I liked to swim, bike and run so I would enter races. As an a collegiate swimmer, I trusted the coach and did the swim training and never thought much about the format of it. Periodization and phases of training did not exist in my vocabulary until 1997 when I read the Cycling Training Bible by Joe Friel. It still took me a few years to understand it all and multiple years before I put together a solid build of training sessions followed by a taper. A typical taper starts with a sharp reduction in training volume and continues to decrease gradually during the taper period, 2-3 weeks. This allows the body to recover while staying mentally focused on the plan. Maintain frequency, while reducing duration of training sessions while maintain intensity to ensure optimal performance. Following a structured approach, reduce load by 25% each week. Taper Vs Rest Week Maintain your high quality nutritional habits. It’s not advisable to cut out nutrients or drastically reduce portion sizes in an attempt to lose weight. Instead, focus on consuming nutrient-dense foods that provide healthy fats, carbohydrates, and lean protein. How to Taper for an Ironman Additionally, prioritize rest, take naps, and maintain regular sleep patterns to ensure proper recovery. The taper period is an ideal time to review your training log to look back and see how far you have some and implement lessons learned into your race plan outline. Reflect on your strengths and incorporate them into your pacing and nutrition strategy. Review important details such as travel plans and course maps. Additionally, use this time to manage pre-race nerves by visualizing the perfect race, reducing uncertainty, and trusting in your preparation. How to Taper Strength Training Remember, tapering is a critical part of the training process that allows your body to reach its peak performance. By following a well-structured taper plan, you can increase your chances of achieving a successful race outcome.

Overcoming a Bad Training Day

A challenging training or race day can be defined as one where our expectations don’t align with reality. It’s important to recognize that not every run or race will go according to plan, and that’s perfectly normal. Here are some recent examples of difficult training days, including those affected by injury:
  1. On my birthday, I had a scheduled 4-hour run but felt like stopping at 16 miles, which was about 2.5 hours. However, I took a moment to consider how I would feel later if I quit at that moment. I realized that completing the full 4 hours in one go would be more beneficial for my confidence, so I made the decision to push through. I slowed down, changed my route, and managed to finish the run as intended.
  2. The following week, I went for a 3-hour run in the mountains. Right from the start, I knew it wouldn’t be a strong day. I was tired, my knees were hurting from a fall earlier in the week, and the trail terrain wasn’t my specialty. Overall, it wasn’t a confidence-boosting experience as I felt slow and hesitant on descents, an area I had been working on for the past 16 weeks. Negative thoughts started creeping in, making me doubt my ability to run on trails. However, I refused to let those thoughts consume me. Instead, I focused on the beauty of being in the mountains and felt grateful for the opportunity to hike that day.
It’s important to remember that everyone has bad days. Various factors, such as weather conditions, stress, and external influences, can impact our performance. Rather than dwelling on the negative aspects, it’s more productive to learn from these experiences and move forward. Here are some key points to consider:
  1. Pace and results don’t define your worth as a athlete. Slowing down or falling short of expectations doesn’t make it a bad session.
  2. Assess the factors that may have contributed to a difficult training day. Factors like cumulative fatigue, challenging routes, and other physical or mental limitations can affect your performance.
  3. Train based on your current fitness level, not where you were or where you want to be. Adapt your paces and workouts to align with your current capabilities.
  4. Each training zone serves a specific purpose and develops different adaptations. Pushing too hard or deviating from the prescribed intensity can hinder optimal progress.
  5. Understand that bad days can occur due to factors such as inadequate fueling, dehydration, or lingering effects from previous activities.
  6. Consistency is crucial for progress. Focus on controlling the factors within your control, such as nutrition, sleep, recovery, and strength training.
  7. Listen to your body and pay attention to its signals. If a run feels particularly challenging, adjust your pace or intensity accordingly. Easy runs should feel easy; if they feel hard, go easier.
  8. Recognize that overtraining exists on a spectrum, and finding balance is essential. Pushing too hard without adequate recovery can lead to fatigue and hinder your performance.
  9. On difficult days, manage your mindset by focusing on gratitude and the bigger picture. Appreciate the journey and the opportunity to improve.
Remember, training isn’t just about the individual sessions you go on. It’s a combination of various factors that influence your long-term development as a athlete. Develop good habits around fueling, sleep, recovery, and strength training to enhance your performance and overall well-being. When faced with a challenging training or race day, embrace the difficulties as opportunities for growth and improvement. Stay consistent, focus on execution, and maintain a positive mindset to overcome setbacks and continue progressing in your running journey.

Triathlon Recovery: The Gateway to Adaptation and Growth

The process of training follows a pattern where your performance may initially deteriorate before you experience long-term improvements. It is crucial to understand that training should involve challenging your body and allowing for proper recovery, as both elements are necessary for progress. While the overall trend of improvement over an extended period may be positive, it’s important to note that not every week will yield personal records or constant progress. Setting personal records every week is not sustainable and can indicate that your training might be too easy or lacking in intensity. Even individuals with moderate training backgrounds should expect some temporary decline in performance before incorporating rest and witnessing further improvements. Here are a few indicators that suggest the need for rest:
  1. Performance declines: If your performance consistently drops by 3-8% in more than two out of the last three workouts, it’s a sign that you have accumulated enough fatigue and should consider a rest phase. Minor performance fluctuations within the range of 3% or less should be expected and don’t necessarily require immediate rest.
  2. Feeling worse for three consecutive days: Pay attention to how you feel during your training. If you notice a progressive decline in your well-being for three consecutive days, it’s an indication of overall fatigue. This can be subjective and may include factors such as higher Rate of Perceived Exertion or a general sense of sluggishness and fatigue. Listen to your body and take recovery time when needed.
  3. Extended training phases: Even if you are not experiencing measurable declines or feeling fatigued, incorporating regular rest phases is still beneficial. Even when your training seems to be going well and you’re consistently seeing improvements, it’s important to cap off training blocks after a maximum of six weeks. Research suggests that it takes around 4 to 6 weeks for training to have a significant impact on performance and physiology. By incorporating rest at the end of this timeframe, you can optimize the natural build and break down processes of your body.
Remember, training is a balance between pushing your limits and allowing for adequate recovery. Understanding the signs that indicate the need for rest will help you maintain a sustainable and effective training regimen.

Consider Adaptation When Choosing Events

Let adaptation drive your training, not your wants or needs.” Steve Magness, The Growth Equation. What does “Let adaptation be the driver, not want or need” mean? It emphasizes the importance of prioritizing adaptation in training rather than being solely driven by personal desires or external pressures. Long-term development involves avoiding the fixation on specific events. Many athletes, including myself in the past, make the mistake of selecting a prominent race they aspire to participate in or succumbing to peer pressure, and then molding their training to fit that event. This approach anchors training decisions solely to the demands of the race date rather than focusing on training adaptation. For instance, imagine signing up for an Ironman race with several shorter races along the way as part of your preparation. You start planning your training backward from the event date, determining the training load you need to build up to meet the event’s demands. When you organize these numbers into your calendar for the months leading up to the race, it may seem like a clear progression from your current training to what you should be doing in the final weeks. Essentially, you create a training map that goes from point A, representing today, to point Z, the race day. However, the problem with this approach is that it is uncommon for your body to follow such a linear path. Training is not a straightforward, linear process, as your body can only progress at a certain rate. By anchoring your training to the event, you unintentionally create an unrealistic training progression that may not align with your body’s capabilities. Recognizing this mistake has come with experience. To start off correctly, a better, sustainable approach, is to map out your training first and then fill in the events accordingly. If your primary focus is running, choose running events that align with your current capabilities. If swimming is a challenge for you, participating in an Ironman or Triathlon might not be the best choice at this moment. Write down the frequency and duration of training that you currently cannot handle comfortably. If you are already training enough for the events you want to participate or compete in, then there is no need for significant changes. You can start signing up for those events. However, if the events that excite you are beyond your current abilities, take a realistic approach. Ask yourself, “How much more could I realistically handle next week and next month while comfortably adapting to the increased load?” It’s crucial to ensure that you can handle the additional workload and adapt to it, so that you can repeat it the following week and gradually progress from there. Next, create a list of events and races that align with your expected training level for any point in the upcoming year or two. Consider your realistic expectations of training load and fitness level on those future dates.Contemplate how you will handle setbacks such as illness, work or family emergencies, injuries, or any other unexpected circumstances. When you face significant interruptions in your physical training, be flexible in shifting your training plan and adding new events accordingly. It’s okay to revise your goals for a particular event and still participate if the new goals excite you. Celebrate your knowledge and progress even if you decide to withdraw from a race because your goals no longer align with the original plan. By mapping your training and then finding events, races, or adventures that naturally fit into your plan without forcing adjustments, you keep the focus on what truly matters—you. This approach ensures that events align with your body’s capabilities rather than forcing your body to conform to events. It is the best approach that can provide a lifetime of healthy and sustainable progress in your sport. As a coach, I adopt a collaborative and athlete-centric coaching style. I work closely with athletes to determine the training plan, methods of communication, goals, and more. If you’re interested in discussing your training journey further, feel free to contact me, t2coachwendy@gmail.com

Key Components to a Race Plan

To enhance the likelihood of success, it is beneficial to create a well-defined race plan based on your training. This eliminates any uncertainty on race day. Do you typically adhere to your plan? Below is a form I utilize as a reference for my race plan. I fill it out approximately 4-6 weeks before a significant race, during my build-up and race-specific training phase. This timeframe allows me ample training sessions to practice my pacing, mental strategies, and nutrition tactics intended for the event. Putting it down in writing often alleviates any anxiety I may have. Having a plan serves as a reminder of all the preparation I have undertaken and helps me confirm or reassess the SMART goal I set in the previous months. I feel fully prepared for an enjoyable experience on race day. Key elements of a race plan: The first step in formulating your race plan is to review your personal goals for the race. These goals should align with the SMART goal acronym. Once you have established your overall race time goal, you can then determine time goals for each segment of the race based on training performances or recent achievements. It is important to work with your coach, if applicable, to create realistic yet challenging pace goals for the race. Next, it is crucial to develop your personal race day nutrition strategy, even if it is your first event. This involves deciding what you will consume before, during, and after the race, taking into account scientific principles and your own practice and preferences. Race fueling is highly individual, so it is essential to create a plan that works for you and practice it. You may also find it helpful to listen to insights from experts like Cindy Dallow, Ph.D., R.D., who can provide valuable guidance on training and race day nutrition. Finally, you should outline your mental strategies, including self-talk, visualization, and other techniques to keep yourself focused and motivated. Reflect on past experiences to generate a list of mental traits or approaches that have proven successful for you. Incorporate these strategies into your race plan. To make your race plan more ingrained, it is important to practice it during your training rides and runs until it becomes second nature. By having a well-prepared plan for the race and practicing it thoroughly, you will be better equipped to manage your emotions and make optimal decisions on race day.

Customizing Training Plans

I enjoy creating personalized training plans based on an athletes experience, goals and time available to train. Not everyone can afford coaching and still want a guideline to follow, the reason Dave and I created training plans on training peaks with educational videos for endurance athletes of any level and type. While we try to offer a wide range of training plans, self coached athletes will still try to customize them to fit in with their life schedule. The most common reasons for customization include a mismatch between the athlete’s schedule and the plan’s schedule, the need to adjust the plan length, the inclusion of additional races, and scheduling conflicts. To customize a training plan, there are several principles to follow. First, avoid scheduling challenging workouts on consecutive days and make sure to include lighter days in between. Second, distribute various workout types evenly throughout the week to maintain balance. For example, if you swim Monday, try to swim again by Thursday. If there is a gap between the purchase date and when the plan’s start date is, consider starting hte plan and repeat the first few weeks and use that time to gradually get ready to be able to do the training load if you are not at the fitness level yet as well as focus on other priorities that can help set you up for success like sleep and nutrition. If you purchase a 24 week plan and your event is 20 weeks away, skipping the first few weeks of the plan is an option, make sure you review all the educational content, if you do not have enough time to complete the entire plan. If your recent training is not similar to the weeks you are skipping. you should modify the first few weeks of the plan to avoid injury. I can help you do this. All our plans have suggested race dates or race simulations. Scheduling additional races can be simple if they fall within recovery weeks, but it can get complicated if they do not align with the plan’s recovery weeks. In these cases, half-recovery or partial-recovery weeks can be used to adjust the training load and obviously release the training that weekend to race, dont do both.

Exercise for Health, not just Performance

On days when you’re feeling too busy, stressed, or exhausted to exercise, it can be helpful to remind yourself of the many reasons why working out is so important. Keep this list of 10 reasons handy, and refer to it when you need some extra motivation:
  1. Prevention of disease: Regular exercise has been shown to reduce the risk of many serious health conditions, including stroke, heart disease, cancer, osteoporosis, and type 2 diabetes.
  2. Improved appearance and self-esteem: By building muscle, increasing metabolism, and improving posture, exercise can help you look and feel better, which can translate into greater confidence in all areas of life.
  3. Weight maintenance: In conjunction with a healthy diet, regular exercise can boost your metabolism and turn your body into a fat-burning machine.
  4. Increased energy: Those who exercise regularly often report feeling more energetic and less stressed, leading to better moods and improved productivity.
  5. Better sleep: Exercise can help regulate sleep patterns, leading to more restful and rejuvenating sleep.
  6. Slowed aging process: Regular exercise can help combat the natural loss of muscle and bone that occurs with aging, as well as reducing inflammation in the body.
  7. Improved joint health: Strengthening bones, tendons, and ligaments can help reduce chronic joint pain and improve overall mobility.
  8. Better cognitive function: Exercise has been shown to improve memory and other aspects of cognitive function, helping to keep your mind sharp as you age.
  9. Enjoyment of life: Being fit and healthy can enhance your enjoyment of activities like spending time with loved ones, traveling, playing sports, and pursuing hobbies.
  10. Increased confidence: Feeling fit, healthy, and energetic can lead to greater self-confidence and a more positive outlook on life.
Regular exercise can bring incredible benefits to your life, as you can see from this list. If you’re ready to get started on a life-changing exercise program, contact me today via phone or email.

An Ironman Coach’s Swim-Strength Workout, No Water Required

Article in Wall Street Journal and Check out the Endurance hour YouTube Channel

Racing on a Budget

The triathlon world is exciting but can be expensive, with basic gear such as running shoes, a bike, helmet, swimsuit, cap, and goggles being just the beginning. Additional expenses include aero gear, wetsuits, race wheels, and race registrations that can be significantly higher than running event fees. Even experienced triathletes may opt for running events to save money. To make tough budget decisions, one must evaluate “want” versus “need.” While there are many “wants” in the triathlon world, few items are truly necessary. Investing time and effort in training rather than purchasing expensive gear can yield results to be proud of. There are always alternatives to expensive purchases, including used gear found on eBay, Craigslist, and Slowtwitch or off-season deals at a local tri store. When considering gear, it’s important to prioritize what’s truly necessary versus what’s nice to have. For example, a road bike is more versatile than a tri bike, and a fit that feels good is more important than the cost of the bike. Borrowing or renting race wheels instead of purchasing them is also an option. For those on a budget, choosing a race with a pool swim or a warm-water open water swim can save money on wetsuit rental or purchase. Running shoe fit is most important, regardless of brand, and specialized clothing is often unnecessary. To save on race fees, volunteering at an event can earn a free entry, and registering early can prevent fee increases. Participating in local or non Ironman branded events can also be more affordable. Planning a race calendar early and researching when fees go up can help save money. Joining a tri club may also offer discounts for members. Training races may be competitive and low cost or free, and racing closer to home can save money on travel expenses. Regarding nutrition, buying top-name products in bulk and only using them during training, not as meals or snacks, can save money. Real food such as fruit, sandwiches, and fig newtons, dates, can be cheaper alternatives to brand-name energy products. Chocolate milk can be used for recovery, and water with electrolyte tabs is often cheaper than bottled drinks. Ultimately, one should consider why they enjoy triathlons and prioritize spending accordingly. Socializing, training, and a healthy lifestyle can be enjoyed without spending much money, while those focused on racing and winning may spend more. I find value in the training experience and social scene of triathlon, rather than just racing.

Prepare for Triathlon Race Day Success

Are you feeling nervous or excited about your upcoming race? Whether you’re a seasoned athlete or a newbie, race day can bring a mix of emotions. To help ease your anxiety and prepare for possible setbacks, it’s important to review your SMART goals, focus on how far you’ve come, and write out a race plan. When it comes to the swim portion of the race, the mass start can be the cause of anxiety. Training in open water beforehand can be difficult, but it’s important to simulate open water swimming in a pool. Pre-swim the course to build comfort and familiarity, take note of buoys, landmarks, and the swim entrance and exit. When you arrive at the venue keep an eye on the weather since that might influence your goggle and wetsuit choice. The bike portion can also bring anxiety, especially if you have to deal with a flat tire or bike mechanic. Practice changing a tire at home and know what to do if a bike mechanical issue arises. A successful triathlon run is not all about how well you ran in training. Lots of things can go wrong on the run portion of the race that could have been prevented by proper pacing or nutrition on the bike. Don’t try anything new on race day, and carry backup nutrition as aid stations may not have everything you need. Finally, be prepared for the run portion of the race by dressing for comfort, wearing socks, and using aid stations to psychologically shorten the run. My philosophy is never walk between aid stations. The distance between aid stations is very achievable. Protect yourself from the sun by applying sunscreen, wear a visor or cap. If you get stomach trouble, slow down! Your problems will resolve if you give your body the chance to recover. Remember, it’s important to assess any pain or injury that occurs during the race and determine if it’s best to save the race for another day.

Triathlon Success Starts with Preparation: Avoid Failure, Embrace Readiness

Preparing for an Ironman (IM) race involves pacing and nutrition, which can determine if/when and how much you struggle. To achieve the best outcome, you need to be economical in your effort during the race. Pacing on the bike is a critical aspect of the race that can impact your performance positively or negatively. A pacing strategy that you plan based on your training and fitness going into the race, can help you build mental and physical strength, particularly in the marathon stage. Proper pacing also helps with easier digestion and fuels your body to keep you energized to the finish line. When preparing for the swim, beginners can use pace per 100 in the pool + 10 seconds. They can also use the rate of perceived exertion (RPE) of 4 and gradually build up to RPE 6. Over the distance, to maintain a pace, means your RPE will increase. I dont remember have a stick time goal because pace will be dictated by the wetsuit and current water conditions. As an advanced swimmer, the swim in my warm-up for the bike and I swim at an RPE of 6-7. Pacing and fueling on the bike is crucial in setting you up for a strong run. Disciplined and consistent pacing and fueling on the bike is key, even if cycling is your strength. If you are cycling with power, your most recent Functional Threshold Power (FTP) or heart rate (HR) should be used along with RPE, as your intensity guide. Riding at an RPE of 3-6 on a scale of 1-10. Practice your IM pace in training on a longer ride and above pace, aiming for 60-80% of your overall time, with a lower range for beginners and a higher range for experienced athletes. If riding with heart rate, stay in 70-90% of your max heart rate. How well you paced the bike with determine your marathon outcome. When you start the run, keep a steady pace and plan for structured walk breaks at aid stations. You might also plan a run/walk ratio strategy to follow from the beginning. Your RPE should be low relative to the marathon, with a HR of 70-80% of your target heart rate (THR) or pace zone 2. The RPE should be 3-5, accounting for effort, which differs from fatigue levels. Experienced athletes may need to adjust their effort based on changes in conditions, such as heat and hydration. To prepare adequately for an IM, it is essential to be aware of your effort during training, which should not change on race day. Pacing should be specific to the build phase of training, including race simulations and B and C races to help you develop your pacing strategy and maximize your chances of success. For a 70.3, the pacing guidelines are as follows: Swim – 6-7; Bike power – 83-85% FTP, 88-92% THR HR and pace, RPE 6-7, 75-85% 80-85% of THR pace; Run – 90-92 pace, with an experienced RPE of 5-5k over the course build-up to 7-8. Metric data should be used as feedback and may vary due to heat and hydration. It is advisable NOT to join Facebook group chatter, some YouTube videos and podcasts are helpful, and seek advice from professional coaches to help you prepare adequately for an IM. Additionally, the day before the race, the pacing strategy should be ready, with pacing for each stage outlined. On race day, ensure that you are well-rested, fueled, and hydrated to give your best performance

Core Stability and Hip Mobility Phase of Strength Training

The offseason season is a great time for triathletes to set the foundation and create muscle balance and injury prevention strength training program that focused on bodyweight movements and stabilizing muscle groups. I know from 28 years of experience that injuries are part of the deal when you train for endurance sports since I was always dealing with some sort of lower leg or hip-related issue the first 17 years in the sport. It was not until 2010 that I realized the missing component to my program was strength training. I continue to educate myself on the topic for me as an athlete as for athletes I coach. Typically, if your core strength or stability is lacking, it shows through towards the end of races when running and even biking form breaks down. If you are already into your based or race season and have not done any consistent strength training program, it is never to late to start an injury prevention program. For endurance athletes, time is one of the most limiting factors and strength training tends to get skipped. Everyone should prioritize at least one strength training session into your training plan each week that targets your core area.  The vast majority of injuries occur either at the lower leg, hip, or sometimes the scapulothoracic region (shoulder/upper back). These injuries are often avoidable with the consistent and proper application of strength training, mobility, and core stability movement patterns. There are so many types of strength training programs for athletes that vary in the number of repetitions, sets and amount of weight. I do periodized my strength training program (vary the amount of weight, sets, reps and movements I perform) I wanted to focus on what I believe the most important, one that does not take time and focuses on injury prevention. Primary muscles, (pecs/lats/quads/glutes/hamstrings) get stronger by the repetitive nature of swimming, biking, and running, while your smaller stabilizer muscles (the 26 muscles that make up your core and that help generate power) become weak. Your core muscles in the front extend from the base of your ribs all the way down through your abdominals, pelvic girdle and upper quad. In the back, they go from your upper hamstrings and glutes to your low and mid back. Your core includes the areas around your hips that allow extension, flexion, and rotation oblique. Core stability is what helps support your spine, allowing you to sit and stand tall instead of slouching. The muscles in your middle and upper back and your rear deltoids often become weak as you develop stronger pecs from swimming. This can create a slough instead of a smooth, flat back when running and cycling.   Having a strong core and hip stability helps lengthen your body and create an ideal position for swimming, biking and running. You begin the Stability phase, when you start your  program. I have found that early in a training plan, you need to work on your stabilizers so you can hold your body in the correct position while swimming, biking and running.The Stability phase lays the foundation for the next phases and fits perfectly with the workouts early in your training plan. Goals of the Stabilization Phase or Preparation Phase
Goals: Phase Length The goal of this phase is to develop neuromuscular efficiency, stability and functional strength.2-4 weeks
Frequency 3 days per week as your are not doing much of swim, bike and run
Reps 15-20 reps
Sets 2 sets
Rest Periods s (60–90 seconds) Short rest periods (less than 30 seconds) Light weight (40–60% 1 RM)Purpose: Adapt general body muscles and tendons to the stresses of strength training in preparation for the greater loading of the Maximum Strength (MS) phase to follow.
Load Resistance Load/Resistance: 40-60% of 1RM or the greatest load possible for 20-30 reps per set.
You begin the Stability phase, when you start your  program. I have found that early in a training plan, you need to work on your stabilizers so you can hold your body in the correct position while swimming, biking and running.The Stability phase lays the foundation for the next phases and fits perfectly with the workouts early in your training plan.

Strength Training for Triathletes

Many athletes wait till they are ‘out of season‘ to engage in a strength training program. They may be confused with what movements, sets and reps to do which is understandable. Google Strength Training for Endurance athletes and you might find it overwhelming on where to start. Due to the repetitive nature of triathlon training, a triathlete’s dominant muscle groups the pecs, lats, quads, glutes, and hamstrings,  every time you head out for a swim, bike, or run, you are strengthening these muscles. While strengthening these key muscle groups is essential for building power and strength, it is important not to neglect your smaller stabilizer muscles which are responsible for core stability. Starting A Strength Training Program If you are new to strength training or re-starting, I recommend going with the basics, learning movement patterns, and adapting your tendons, bones, and ligaments, focus on hip mobility and core stability to set yourself to build more strength with heavy lifting. A strong core and hip stabilization are important as it sets the foundation and muscle balance and ability to add muscular strength, lift a heavier weight or do more intense bodyweight movements. Also, core and hip strength help prevent injuries. Why A Strong Core Is Important Your core is the center of all your swim, bike, and run training. Spending some time on focused stabilizer muscles that make up your core  is critical for injury prevention while also strengthening your dominant muscle groups (pecs, lats, quads, glutes, and hamstrings is important, Athletes think the “core” is primary to their abdominal muscles and it is a complex series of muscles that extend far beyond just your abs. At the front, they go from the base of your ribs all the way down through your abdominals, pelvic girdle, to the upper quad. At the back, they extend from your upper hamstrings and glutes and the areas around your hips that allow the extension, flexion, and oblique rotation. Core stability is what helps you to support your spine, allowing you to sit and stand tall instead of slouching. Strengthening your core muscles will not only prevent injuries but will also improve your triathlon performance by increasing flexibility and allowing you to generate power in a wider range of motions. Having a strong core and hip stability also helps to lengthen your body and creates an ideal position for swimming, biking, and running. This will allow you to complete each section of a triathlon more efficiently so that you can finish races stronger. Typically, if your core strength or stability is lacking, it shows through towards the end of races when running and even biking form breaks down. Strength Training and Injury Prevention 7 Common Running Injuries  I know from 28 years of experience that injuries are sometimes part of the deal when you train for endurance sports. During my first 17 years in the sport, I was always dealing with some sort of lower leg or hip-related issue. It was not until 2010 that I realized the missing component to my program was strength training. The vast majority of injuries occur either at the lower leg, hip, or sometimes the scapulothoracic region (shoulder/upper back). These injuries are often avoidable with a consistent and proper application of strength training, mobility, and core stability movement patterns. Having realized the importance of strength training for triathletes, I continue to educate myself on the topic. This not only helps me as an athlete but also the athletes that I coach. My strength training program is a periodized program in which I vary the amount of weight, sets, reps, and also the movements I perform during different phases. General Preparation The goal of this phase to develop the movement patterns associated with higher intensity Athletes should address strength imbalances and muscular weaknesses that predispose the athlete to injury. Strength for Injury Prevention The following are characteristics of a training session in this phase.
  • Moderate rep counts (10-12)
  • Low set counts (1-2)
  • Conditioning exercises (30-60 seconds)
  • Rest periods longer to allow for recovery and safe movement pattern (60-90 seconds)
  • Light or body weight (40% 1 RM
The Stability and Endurance Phase The goal of this phase is to develop neuromuscular efficiency, stability, and functional strength. To adapt general body muscles and tendons to the stresses of strength training in preparation for the greater loading of the Maximum Strength Phase to follow. Equipment needed: Bodyweight movement patterns, TRX, stability ball, dumbbells, optional machines, and cables. The following are characteristics of training sessions in this phase
  • High rep counts (12–20)
  • Low set counts (2)
  • Conditioning exercises (60–90 seconds)
  • Short rest periods (less than 30 seconds)
  • Lightweight (40–60% 1 RM)
Although there are many types of strength training programs available, many athletes find it difficult to find a program that fits into their overall training plan.  The off-season is a great time for increasing frequency. This can get you to much greater strength gains which you can then maintain during the next season. What I generally recommend is to three sessions per week. Prioritize strength training now, to get you in the habit to maintain it as your season progresses. Designing your program A well-designed strength training for triathletes program should include the following components: 1) Warm-Up & Dynamic Stretches A good warm-up will prepare the body for exercise and reduce the risk of injury. I like to warm up dynamically with running drills and a variety of jumping jacks. I use different arm motions during the jumping jacks to get the upper body loosened up. 2) Activation Movements The activation movements extend the warm-up and help muscle stabilization. They also increase neuromuscular proprioception. These exercises target the glutes, core, and shoulders to ensure the correct muscles are being recruited during the resistance exercises. 3) Main Set – Resistance Training (Primary Strength Movements) Primary resistance exercises should progress from multi-joint movements involving large muscle group (requiring large amounts of energy), to smaller movements that are less fatiguing. You may begin with resistance exercises that target muscles in the lower body and then transition to upper body resistance exercises. 4) Auxiliary Exercises After the main resistance training, as the cooldown process begins, I like to include auxiliary exercises that target sport-specific movements and isolated underused muscles. These exercises typically are used to support and supplement primary exercises. 5) Core Primary movements occur during activation, the main set, and auxiliary exercises, but strength and conditioning sessions should conclude with three to four exercises that target the various parts of the core. 6) Cool Down Static stretching is a form of stretching used during this portion of the session to aid with relaxing muscles. Stretches should be held for 20–30 seconds Remember that even the most well-developed strength training for triathletes routine requires regular adjustments. The best way to tweak your workout routine is to constantly monitor how you feel by recording performances and effort levels in your log. After spending a period of time strengthening your core and improving balance, your smaller muscles will be strong enough to support your advanced exercises and power moves such as squat, lunge, plyometrics, and exercises designed to improve speed and agility. If you are already into your base training or race season but have not done any consistent strength training, it is never too late to start a program. Incorporating some key movements that target your core can be introduced at any time. Reach out to me with questions and make it a great day.

Increase Hip Mobility and Core Strength to Prevent Injuries

When it comes to one thing I wish I know when I started triathlon back in 1992 what the benefits of core stability and hip mobility for sustainability in the sport and injury resistance. Coming from a swimming background, my heart and lungs were ready to go, my muscles, tendons, and ligaments used for running were not. I was injured on and off the first 16 years while training for a triathlon. I never sustained an injury that I could not continue biking and swimming, just ones that forced me time off running.  From hip to ankle,  I  struggled with IT band syndrome, posterior tibias tendonitis, plantar fasciitis, groin, and hip flexor pulls, shin splints, as well as a second metatarsal stress fracture. Read more here about these types of injuries.  Nothing that kept me out of my sport, even with the stress fracture, I could always swim and bike while forced rest from running. Fast forward to 2009, after my sustaining calcaneus bursitis which kept me off running for about 7 months ending with walking the marathon in Kona, I decided I will do whatever it takes to not get injured again. What was I missing in my training program? It was CORE STRENGTH and HIP MOBILITY and I spent the last 3 months of 2009 educating myself about core functional strength training. I took a MovementU class, started working out  TRX, and Beachbody programs, P90X, and Insanity and attended yoga and pilates. All of these programs focused on my core stability and hip mobility. What is your “core”? Your core muscles compose the front and back area between your shoulders and hips, not just your abs and lower back. Your core includes the areas around your hips that allow extension, flexion, and rotation oblique. Core stability is what helps support your spine, allowing you to sit and stand tall instead of slouching.  As an endurance athlete, your dominant muscle groups (pecs/lats/quads/glutes/hamstrings) get stronger by the repetitive nature of swimming, biking and running, while your smaller stabilizer muscles (the 26 muscles that make up your core and that help generate power) become weak. After you take a seasonal break, it is important to rebuild your core strength and hip mobility to help set the foundation for endurance, become more efficient and to create muscle balance before you start building muscular strength and base miles in your sport.  Having a strong core and hip stability helps lengthen your body and create an ideal position for swimming, biking and running. I am not a therapist, I just know from my experience as an athlete and working with my physical therapist in Fort Collins CO, Paula Nickel, click here to listen to her on the Endurance Hour Podcast, and now my A.R.T, Dr. Scoville, in Georgia, I understand that the root cause of endurance athletes injuries are a weak glute medius. When the glute medius is “shut down”, turned off, not activated, other muscles take over, get overstressed, overworked, therefore, the root cause of all of the injuries. Based on my experience, Muscle Activation therapy, and Active Release Technique along with movements I can do on my own after I am activated, to stay functional. Below are some of my favorite core stability and hip mobility (glute medius strengthing) programs and movements that have helped me stay injury free since I started implementing them into my program in 2010. I have still struggled with minor injuries since, and it is usually during periods that I stop doing my glute movements If you want to follow the instruction in the comfort of your how home, or anyplace with WIFI and app, I recommend Beachbody on Demand with the following programs:
  • P90x2. The first phase of P90X2 involves 4 weeks of mobility exercises utilizing the foam roller, stability ball and medicine balls.
  • PiYo is a flowing combination of Pilates and Yoga moves
  • MaxInsanity:30 workouts offer dynamic lateral and balance movements, running drill and plyometric focused
Another in Home Favorite of mine is TRX If you are not into the TRX or Beachbody programs, click here to learn more about my injury prevention program. After I master the basics, I do vary the movements, advance the intensity and difficulty every few weeks for variety while keeping then general movement pattern similar. Mobility is influenced by your fascia,  nervous system, soft tissues (muscles, tendons, and ligaments), and your joint structure (how the bones interact). Spend 5 to 10 minutes before and after your workout, using a foam roll, massage stick or a baseball and activate your muscles with dynamic movements to remain injury-free “If you always do, what you always did, you will always get, what you always got.”  As an endurance athlete, it is inevitable that strength training/cross-training is a must—whether it’s due to an injury, recovery from a race, or rest after a long season—core training will be a necessity in any serious athletes life and should be included in a well-rounded endurance training program.

Body Weight Movements to Maximize your 30 minute workout

Training with your bodyweight is a great way to stay in shape. Freeing yourself from all those tiresome machines and payment plans, you can get a great workout from the comfort of your own home. When you think about how people stayed in shape before gyms and fancy workout equipment were the norm, bodyweight training makes a lot of sense. The benefits of working out are well-known. Getting regular exercise will benefit your heart, metabolism, hormones, weight, and help to prevent and manage disease. It’s less commonly known that that intense cardio workouts can actually impact your metabolism. And did you know that working out releases “feel-good” hormones that ease depression and fatigue, and decrease appetite? The best news of all is that you can more easily get that great workout feeling, as well as the amazing health benefits, by training hard simply with what your mamma gave you; your own body! Working out with your bodyweight is so fast and easy, you don’t need to schedule time to travel to the gym! You can even adopt high intensity interval training (HITT) and get yourself in shape without ever leaving your home! Some examples of these exercises are fast mountain climbers, squat thrusts, burpees, high knees, jump squats, jump lunges, tuck jumps, butt kickers, side shuffles, and more! Read our bodyweight workout infographic for everything you need to know about these intense bodyweight workouts. Read more here

Cross Training and Muscle Confusion

Muscle confusion, or the practice of regularly changing up a training program, is a topic of heated debate in the fitness world. Some people swear by its ability to challenge the body and keep it guessing, while others believe switching gears too much makes it difficult to make progress with a certain lift, sport, or activity. Cross training—which means mixing different forms of conditioning, strength training, and flexibility—is all about balance. By practicing yoga one day and running the next, for example, it’s easier to stay motivated. Incorporating different equipment and levels of intensity can reduce injury risk, improve overall fitness, and even increase weight loss. Check out the infographic below to learn more about cross training and how you can get started. click here to read more

Finding your Fitness-What Aspect of Training Will Benefit You Most

While training and or racing I think about the most important component for my sport. Is it endurance? Speed and power? Nutrition? Technique and skill? Mental toughness? The reality is that they all are important. Any given one can be the weak link that ruins your performance. First and foremost, you need endurance to be able to cover the distance. It’s not necessary to complete the distance before the race or event, but it is important to do 50 to 75 percent before race day. Most marathoners run 18 to 20 miles as their long run to get ready for a marathon. The important thing is that you get substantial training time under your belt. Speed and power also are required to go fast or just get to the finish line. You may need more power just to be able to make it over some of the tougher climbs. The offseason, when it’s cold outside, is a great time to focus on building power through strength training. Nutrition is important to achieve optimal body composition, fuel, recover from workouts, and most importantly, power you through races. Race nutrition can be especially tricky during long races since eating too much can be as much of a problem as eating too little. Get nutrition right and you are almost guaranteed to make it to the finish line. Get it wrong and no matter how fit you are, you might be staring at a DNF (did not finish.). Contact Cindy Dallow, Ph.D, RD with nutrition questions. Technique also cannot be underrated. When most people think of technique in regards to endurance sports, they usually think of swimming. But swimming isn’t the only sport where you can benefit from strong technique. Running, road and mountain biking can all require high levels of technique and practice. Good form will lead to better speed and efficiency. The last component is mental toughness. The central governor’s theory includes the idea that the brain regulates your energy supply and that when your brain feels you are in danger of running low, it signals pain and tells your body to stop. Part of successful racing is visualizing how you are going to deal with the inevitability of pain. Knowing that you can push through it will help you manage these negative feelings. You might be asking where one finds the time to work on everything. You should periodize your workouts and work on different aspects of training at different times of the year. You can maintain endurance throughout the year by conducting one two-hour or longer workout a week. In addition to strength training in the offseason, use that time to focus on body composition. It’s likely you’ll be doing less intensity so you can afford to eat less and lose weight. This also is a good time to focus on technique. Drill-based workouts don’t require the level of energy that more difficult workouts require. It can be overwhelming to prepare for endurance events. The best thing you can do is start to plan now, develop a base and go from there.

Ask Coach Wendy: Balance and Flexibility Exercises for Triathletes

The “Ask Coach Wendy: Balance and Flexibility Exercises for Triathletes” video discusses the following:
  • BOSU-ball workouts for a stronger core
  • How you build balance in the off-season for triathletes
  • Balances exercises for triathletes
  • Core stability movements can make you a better swimmer
  • Balance exercises that will make you a better triathlete
  • Adding trail running and basketball can help prevent injuries for triathletes
  • Triathletes can find huge benefits with TRX exercises

My “spa” weekend Age 42

PISCES – The Partner for Life (February 19 to March 20) Caring and kind. Smart. Likes to be the center of attention. Very organized. High appeal to opposite sex. Likes to have the last word. Good to find, but hard to keep. Passionate, wonderful lovers. Fun to be around. Too trusting at times and gets hurt easily. VERY caring. They always try to do the right thing and sometimes get the short end of the stick. They sometimes get used by others and get hurt because of their trusting. Extremely weird but in a good way. Good sense of humor!! Thoughtful. Loves to joke. Very popular. Silly, fun and sweet. Good friend to others but needs to be choosy on who they allow their friends to be. 5 years of good luck if you share this post. Since I turned 40 years old I celebrate by Birthday with some sore of “Epic” workout. When I turned 40 I was training for a 100 mile trail run and my goal was to run 40 miles on by Birthday. Weather was not optimal so I completed 40 miles alternating 8 miles on the step mill with 8 miles on the treadmill, read more about it here. When I turned 41, the year I finished 100 miles, I road 41 miles, ran 4.1 and swam 41X 100s. This year I am celebrating the month with a variety of fun workouts. March 1st-8th I was focused on the number 43. For example Monday I completed 4.3 pull-ups, 4.3 minute plank, Tuesday I road 43 miles and ran 4.3 miles, Wednesday I got in 43000 steps. I am grateful I was born 42 years ago and my body and mind still enjoy everything fitness related. The age of 40 seems to be when my athletic friends start to do “epic” training on their birthday.  When I turned 40 (1 year into training for Ultras) I wanted to run 40 miles on March 9th. The forecast on March 8th called for the snow storm of the century, so I changed my plans. I was not one to run 40 miles in a foot of snow (now I am that person), so I went to the club at 6am on March 9th, 2013 and did a 40 mile workout alternating between 8 miles on the treadmill and 8 miles on the step mill. In September, I completed my first 100 mile run at Run Rabbit Run in Steamboat! My word for 2013 was EPIC! The age of 41 is not considered a milestone age like 40 and 50. I wanted to do a non-fitness related challenge so I started a Birth Month Gratitude group. My goal for 31 days was for me and my friends to post at least 41 things we were grateful for. My gratitude group  still continues 1 year later. On my birthday I remember completing 4.1 hours worth of biking and running. My word for 2014 was GRATITUDE  My word for 2015 is MINDFULNESS.  I started promoting mindfulness when I created a Mindful Eating Support Group to encourage others to be mindful of what they are putting in their month. We learn portion control and how the food makes us feel before, during and after eating. I use the word everyday with clients. I had full days planned for my birthday weekend and being mindful was important. Friday March 7th at Barcelona Salon. My annual hair do.   Since my birthday fell on a Monday this year,  I focused on my last 2 days at a 41 year old Saturday and Sunday. Saturday I set out to ride 41 miles (I had to stop at mile 10 to delete some files, watch memory full) and ran 4.1 miles with my dogs. While riding my goal was to have an average heart rate of 141 beats on the bike   Sunday I ran 14.1 miles in the morning. Then I celebrated daylight savings and enjoyed a walk with my dogs to total 41000 steps for the day (I forgot the photo). As I was riding and running on Saturday and Sunday, I was thinking about my activities for March 9th, being mindful doing what I love, and loving what I do! I made a list that involves a variety of my weekly challenges I post in my Health, Fitness and Sport Group. Part of my daily challenge is a plank a day Q and A.  Here is a link to my March 7th Plank a Day video that I express more about why I do what I do.  Video 1 then Video 2 cause the first one got cut off. Sunday I prepared enough healthy food and water to keep me fueled and was very mindful about wearing my activity trackers to keep me honest    Monday My 42nd Birthday plan was to expend 4200 calories doing a variety of activities during the day between coaching and appointments. 4.2 minute plank—-done at 6:45am 42 x Burpee Pull up—-done between 8:45-9am 42x leg press on machine—done between 8:45-9am 42 x asssisted dips—done between 8:45-9amdone between 8:45-9am42 x lunges 42 ounces of water (this was easy since I usually drink a gallon) Bonus was 42 minutes with 4200 steps on the step mill because my 8am appointment no showed        42 x mile bike with 42 variety of 42 “intervals” at least :42 seconds long—started at 6:45-7:45am and finished between 10:30-noon I love working while I ride my trainer so it was no big deal for me to ride my 42 miles indoors  between appointments and coaching. I started at 7am-7:45am then finished 10:30-noon. I included 42 “intervals” and kept track on my phone. Odds were hard, evens time recovery. 4.2 mile miles walking back and forth to the Fort Collins Club and with my dogs. done at 1pm. I love walking and working too. I am my own treadmill desk and often walk miles while answering emails and talking to clients on the phone. Today I accumulated 4.2 miles while walking to and from the club (1/2 mile round trip) and with my dogs                 It would not be a birthday with out a birthday swim. 4200 yard swim— Coach Rob created a workout I swam with the Rocky Boys swim team. My Birthday 50 yard butter fly Swim Video. Accumulating at least 14200 steps (easy) 4200 calories expended. Got pretty close at the end of the day based on my fit bit activity tracker The day ended with a Birthday massage from my husband and RAW Carrot Cake from Tasty Harmony Pull up Burpee video here 4.2 minute Plank A Day Q and A video here Ah, the technology kept me Accountable and Mindful! 1. Making sure I had my Timex One GPS with me when I walked to and from the club for appointments (I forgot on first round trip which is 1/2 mile). 2. Carrying my phone, and wearing my Timex Move20 with me to keep track of my steps and caloric expendure. 3. Carrying my little white cup with me, it holds about 1/3 cup of water so I could  drink 42 of them. 4. Mindful 0f having plenty of snacks and meals prepared so I did not let nutrition and keep me from my goals What do you do to celebrate your Birthday?

Run Hill Training

“Hills are speedwork in disguise” -Frank Shorter I often hear the question “should I sign up for that race, it is really hilly”. Or, “since my A event is not hilly, do you think I should run hills in training?” Many runners avoid regular hill training or racing hilly courses because, well, it’s hard. Depending on the grade of the hill, lactic acid builds quickly, our heart rate shoots up, several muscles fire all at once, and we tire quickly. Fortunately, you can become proficient at ascending and descending hills by adding a specific workout to your training plan. Hill workouts are hard. They challenge mind, endurance, strength and speed. They can be unpleasant in events if you are not prepared. Every runner can benefit from hill workouts Hills will increase the intensity of your workout. When you increase the intensity of your workouts you expend more calories / unit of time. Benefits of hill training
  • Running uphill stresses your body that you can’t mimic on flats.
  • Hills will increase the intensity of your workout. When you increase the intensity of your workouts you expend more calories/unit of time.
  • Hills will strengthen your legs (especially your quads, butt, and calves). Strength precedes speed, so hills incorporated into a progressive training program will lead to more efficient and faster running
  • Hills will strengthen your lungs and heart
  • Hills Provide some variety to a traditional routine
  • Less impact, easier on joints and connective tissues.
  • Hills force you to run with proper form providing a more efficient running stride, driving knee forward while running up and butt kick while descending
  • Running up steep grades build power much safer than running fast on flat terrain
  • Provide specificity with strength work (I encourage you to also develop strength and injury prevention with specific core stability and hip mobility movements)
Training sessions include hill repetitions, both short and long, as well as running over a hilly course on the road or trail. They are so versatile and should to be used during all phases on the training plan (early base and competition) Types of hill workouts
  • Hills sprints are effective during all training phases. Short reps of 10 seconds are great for neuromuscular training done at the beginner phases of training. Or in the middle stages as a precursor to longer hills 30-90 seconds, or incorporate in middle or late season when you are focused on power. Completed at 3k -10k race intensity with a rest interval of jog downhill for recovery.
  • Longer reps of 2-4 minutes in the early and middle phases of the training phase, develop strength and aerobic fitness can be as a precursor to longer hills. These reps used at a type of tempo workout, done at 85-95% effort, recovery easy descent
  • Longer 5 + minute hills done as repeats or over a challenging hilly course and used at the beginning phases of your plan to develop strength and endurance or in the later phases of training is you are preparing for a hilly event at race pace intensity
  • Hill circuits involve a shorter recovery jog and are more aerobically demanding. Used on the later phases of training and simulatulate cruise intervals done at the track.  For example 8X 2 minutes uphill at 5-10k pace, with rest interval done at half or full marathon, so not complete recovery
  • Hill strides/drills. Done at the end of your workout. 8-10 seconds long, done at max effort on a steep hill with full recovery.  Benefits include vast recruitment of muscle fibers, increase stride power, running economy and strengthens connective tissues that help with injury prevention.
Tips while running uphill
  • Start with a warm-up to gradually get your legs loose and heart rate elevated (10-20 minutes)
  • If you are new to hill training, progress gradually. It can be quite challenging on your body when you’re not used to it, don’t worry about pace
  • When running uphill, shorten your stride and pump your arms more to help you attack the hill
  • Mix up the grade and length of each hill you run on for maximum results with fitness, strength and speed.
  • Always Finish any hill workout with easy jog or spin to flush the legs and cool-down.
  • Stretching – focus on the calves, quads, hamstrings, glutes and lowback.
Every runner with the proper base fitness will benefit from running hills. Including hills all year into your training plan by varying pace, length of hills and number of reps changes the dynamic of the workout. Whether you’re building strength or going for a personal best, hill training will complete a well-rounded training regime and help you to become a more complete athlete. What is your favorite type of hill workout?

t2coaching: Focus on Run Technique and core strength to maintain a healthy body

If you are a runner or triathlete and want to stay healthy and injury free, besides strength, focusing on running form is an essential component to maintaining the health of your muscles, tendons and ligaments  Most of us, whether new or experienced, either don’t know or neglect to work on proper running technique Why focus on run mechanics? • It is a critical part of running speed and strength • It will improve your economy and efficiency. • It will help with injury prevention Poor running mechanics will slow you down, decrease your efficiency and can even be the an underling cause of many running injuries: shin splits, runners knee, ITB, piriformis, and many other common running injuries. I started running my soft more year in high school. As a competitive swimming since the age of 4, I was going though a softmore swimming slump and my coach suggested I take a break and join track.  I was injured within the first month with skin splits due to having the heart and lungs and no leg strength or technique.  I continue running my junior and senior year track season, always resulting in injuries. When I decided to commit to training in 1992, I was grateful I had the high school track experience, yet still did not know how to train for triathlons, injuries continued. Finally I started to educate myself with running form in 1996 after I DNFed my first Olympic Distance Triathlon due to a pulled groin/adductor about 3 weeks from race date. At the time I  focused on run cadence and stride. I was running about 80 one foot strikes a minute while lengthing my stride to run faster which explains why I had shin splits and hip injuries. Still running and completing for the past 25 years, maintaing the health of my body is priority.   I am still continually making small adjustments to my form. Like swim technique, running technique is a learned skill. Despite the variations in running styles, their are 4 main areas of focus while running. The most common form flaw I observe in runners I’ve coached is over striding and running with a low cadence, less then 170 foot strikes a minute and running upright with robot arms.  Posture, foot strike, arm swing,  and rate (cadence + stride) are 4 main areas I look at when evaluating someone’s run technique. Posture New runners tend to run upright. Many are not aware until they see themselves on video. Despite knowing the importance of a forward lean, I had no idea I was still running upright until I saw a video. I attribute my posture to years of running with my dogs, who often pulled me forward, which causes me to lean back to keep them closer to me. The most efficient posture is one that is upright and relaxed, with a slight forward lean. Your shoulders pulled back and down your spine. A backward lean can cause you to over stride and land heavily on your heel, stressing your knees, hips and back. Keep your hips pressed forward and your butt tucked in. Visualize standing face first against a wall. Press your hips forward so that the bones of your hip touches the wall. Running with your hips forward will help you lift your knee higher with less effort. Concentrate on keeping your shoulders, jaw, torso and legs nice and loose. Keep your head and chin up, don’t tuck your chin and look down. Keep your focus forward, toward the horizon. Foot strike One of the most important phases of running mechanics is the position of your foot when it lands on the ground. When you foot strikes the ground, you can land in a variety of ways – toes first, ball of the foot first, flat footed or heel first. Foot strike often creates one of the injuries listed above.have someone video you from the side while you are running and you’ll see if you are landing far in front of your body (overstriding) or nearly under your body (correct landing).
  • Heel strike Heel strikers often overstride when reaching out in front of their body. Landing heel first is like putting on the brakes with each step, as if you are trying to drive your car while pressing on both the gas and brake pedals at the same time. This wastes energy and makes your running harder than it should be. Heel strikers often develop shin or knee painIn addition to being inefficient, heel striking can cause of a long list of injuries. When you land on your heel, your leg is straight and extended in front of your body. The combination of a straight leg and a hard heel landing transfers a lot of impact through your heel and up through your knee to your hip. The excessive stress that a heel strike places on your joints can cause pain and injury to your hips, knee, ankle and foot. Shin splints (pain of the front of your lower legs) is one example of a common running injury that can be caused by heel striking and over striding.Ball of foot (toe strikers)Where toe strikers tend to leap or bound forward and push off vigorously, landing toey can lead to calf and achilles strains and tendonitis
  • Toe strikers Toe first landings result in a lot of up and down motion in your stride and puts a lot of stress on the calf muscles. Toe running is more appropriate for sprinting than for distance running.
  • Flat foot (mid foot)a midfoot strike with a high cadence and a forward lean propels you in a subtle, forward falling way. You land on your foot in the way it and your body were built to move, and efficiently use and conserve your energy and momentum.Mid-foot strikers The most-efficient footstrike is one in which your foot lands directly under your hips or your center of gravity. This is when you land on the ball of your foot or flat footed. Doing some barefoot walking and running will help strengthen the ankle and foot muscles that stabilize your lower leg. Doing exercises and drills on an unstable surface such as a wobble board or stabilization pads can also help with this problem. The Newton Running website is a great resource of information on running form. The offer video tips every Friday and run clinics Saturday mornings at their store in Boulder. I also can meet with you with a video camera and discuss more in person.
Stride and Cadence In a proper stride, your foot should land directly under your body with every step. You should run at a rate of about 180 footstrikes a minute before you focus on your lengthening your stride. Do not sacrifice quick rate for a longer stride. The quicker rate will allow you to land flat foot or midfoot, underneath your center of mass. You can count your steps in one minute to get your cadence or most GPS monitors now do this for you as well. If you do find you need to increase your cadence, just make sure you aren’t sacrificing stride length by shortening your stride too much. Understriding to achieve an optimal cadence will slow you down. We want an optimal stride rate (cadence) and an optimal stride length. They both go together to create our speed.Where toe strikers tend to leap or bound forward and push off vigorously, and heel strikers reach out and almost pull themselves forward, Arm Position and swing The main purpose of an arm swing is to provide balance and coordination with the legs. Arms should be loose and relaxed, close to the body. Relax your shoulders and down through your back – no shrugging! Your wrists and hands should be loose, not clenched. Keep your arm swing compact and your elbows at about a 90 degree angle. Drive your elbow backwards with each stride. Avoid “robot arms” where you drive your arms forward causing over striding. During the arm swing, your hands should not travel above your chest or behind the midline of your body. Avoid crossing your hand in front of your body, as any lateral movement across your body robs you of forward momentum. When running, your arms should be bent at roughly 90 degrees (slightly more or less is also okay). Your hands should be lightly clasped and when your arm swings, your hands should brush between your lowest rib and your waistband. The swinging action itself is front to back and relaxed. Any abnormal swinging (crossing the body, elbows wide, shoulders high) will have consequences in your mechanics. Race photos often illuminate any arm swing issues and you can have someone video you while running from the front and back to evaluate your arm action. Again, as Lemon demonstrates, imagine there is a box or picture frame from your shoulders to your hips. Your arm swing should be within this box and your hands should not cross the midline of the body. Don’t be rigid but just make sure your arms stay within the box Putting It All Together Head up, your body is loose and relaxed from head to toe, with a slight forward lean. Shoulders are back, chest is out/forward. Arms are close in to your body, elbows are at about a 90-degree angle. Tuck your glutes underneath you and press your hips slightly forward. Drive your knees forward and up, and follow through with your foot/leg as you finish each stride. Land midfoot, and you heel will make contact with the ground. Keep your cadence high – about three strides a second. Like any complex movement, it can be difficult to pay attention to everything at once. Through a proper warm up, some specific exercises to focus on specific parts of the movement, and staying focused as you run, you can put the pieces of a fast, efficient, comfortable running technique together. Here are some great videos from the Newton Running Form Friday series Send me a video of you running and I will send you a FREE analysis. As always, reach out to me if you have questions, comments or concerns about your Health, Fitness or Sport. t2coachwendy@gmail.com

Surviving Open Water Swimming

When I raced my first triathlon in 1992 in the warm brown Michigan water, I swam as fast as I could to get out, it felt gross. I did not wear a wetsuit and don’t remember how I sighted, did not have any guidance. Since then I have completed over 1500 events including practice swims adds up to many open water swim experiences Surviving open water swimming can be a challenge, especially for beginners. Here are some tips to help you navigate the unique aspects of open water swimming and overcome any anxiety or obstacles:
  1. Address anxiety in the pool: Before venturing into open water, work on building confidence and comfort in the pool. Focus on basic swimming skills, floatation, balance, and stroke technique. Improving these skills will help you conserve energy and feel more at ease in the open water.
  2. Practice taking off and putting on goggles: It’s common for goggles to get hit or knocked off in open water swimming. In the pool, practice treading water or floating while taking your goggles on and off to simulate real-life situations and ensure you can quickly adjust if needed.
  3. Simulate swimming close to others: In open water races, you’ll often swim in close proximity to other athletes. Simulate this by swimming with others in a crowded pool lane. Practice swimming in close quarters, dealing with contact, and maintaining your composure in a crowded environment. How to Survive and Open Water Swim Start
  4. Swim with closed eyes: To simulate lower visibility that you might encounter in open water, try swimming the length of the pool with your eyes closed. This exercise will help you rely on your other senses and develop confidence even when you can’t see clearly.
  5. Get comfortable in a wetsuit: If you plan to wear a wetsuit during open water events, invest in one and practice swimming in it. Wetsuits can feel constricting at first, especially around the chest during breathing, so familiarize yourself with the sensation and adapt your technique accordingly.
  6. Warm up properly: If allowed by the race venue, warm up in the open water before your wave start time. Spend at least 10 minutes acclimating to the water temperature and getting your heart rate up. This will help prevent a sudden increase in heart rate and breathing during the race.
  7. Practice sighting: Sighting refers to lifting your head out of the water to spot buoys or landmarks. Use the “alligator eyes” technique by clearing your goggles from the water and looking forward while exhaling, then turn your head to the side to inhale. Sight frequently to stay on course and conserve energy by swimming in a straight line.
  8. Position yourself strategically: Choose your position in the swim wave based on your ability. Strong swimmers can benefit from swimming behind faster swimmers to catch a draft and conserve energy. Beginners may want to line up on the outside edge of the wave for a clearer view and wait a few seconds after the start to avoid collisions.
  9. Practice swim-to-run transitions: If you can’t practice open water run transitions, simulate them in the pool. After a race pace swim segment, immediately hop out of the water and jog in place to simulate going from a horizontal to a vertical position with an elevated heart rate.
Remember, each time you practice open water swimming, you gain valuable experience that will contribute to your performance on race day. Stay consistent, keep learning, and enjoy the journey. I

Reasons to Defer, Not Start and Not Finish

The decision to defer, not start (DNS) or not finish (DNF) your goal race requires backup planning and adjustments to your race day goals. It is essential to know when you should or should not start and how to overcome the emotional “fear of failure” that might happen . Racing, even if you are not going to set a personal record, is important, but you should also know when it is appropriate to DNF (Did Not Finish) for safety reasons or poor planning/execution. Understanding how to avoid a DNF is the reason we prepare physically and mentally. An athlete may choose to defer a race due to pregnancy, injuries that cant be managed like a broken bone, unexpected expenses, change in race date, or for personal reasons, when you just don’t feel like doing it. It is not necessary to explain your reasons for deferring if you think that is the best for you mentally and physically. Because you register for events so far in advance, sometimes goals change, which can lead to a deferral. Before you decide to defer or not start, consider making adjustments to your race day goals. For example, running the half marathon instead of the marathon if that is offered, or changing how you execute the race to finish without any expectations. Reasons to DNS  include the deadline to deferral has passed. Deciding not to start can often be an event day decision, unlike a deferral that is done in advance, like over-registering and blowing off a C event like local 5k fun runs. Another reason could be when you add up the cost of lights, hotels, and registration fees, coupled with the inability of the race to offer a deferral. And, of course, if you are injured, starting the race can worsen the injury and cause long-term health problems. Reasons Not to Defer or Not start include fear of underperforming. When you feel like you are not going to PR. Failure is a learning opportunity, and athletes should race even when they do not expect to PR.Addressing that fear of underperforming is essential because avoiding what makes you anxious is not a solution. Pushing yourself out of your comfort zone is necessary to build your confidence, and toeing the line might hurt your confidence in the short term, but you’ll regret not starting if you don’t. Another reason to adjust your goal or execute your race plan differently that originally intended to avoid a DNS is when you qualify for an event like Boston or the Ironman World Championships, it is a once-in-a-lifetime opportunity, and you should get to the start line as best as you can. Reasons to DNF There are several reasons why you should not finish, including prioritizing safety and making smart decisions to avoid worst-case scenarios. Understanding that some injuries and dehydration are valid reasons to DNF and that it’s okay to drop out if you understand the emotional consequences. I recommend that if you can walk to the finish line, you should cross the finish line. It is better to slow down and finish the race instead of quitting due to poor execution. It is also essential to manage your fears and mental blockages, such as the fear of not making it to the podium, and have realistic expectations regarding the pace and outcome of the race. Overall, it is vital to manage expectations and have a plan in place, such as adjusting goals, dropping down in distance, or having plan A, B, and C in place during the race.  

Advice on Choosing Your IronDistance event

Throughout my three decades of training for triathlons, I have completed 21 Ironman events. My first Ironman was Kona in 1997, followed by Ironman Canada in 2000, the 5430 Sports Iron-Distance in Boulder in 2001, IM Lake Placid in 2002, Kona in 2003, Ironman Arizona and Kona in 2007, IM Coeur d’Alene/Kona in 2008, Kona/Arizona in 2009, Kona in 2010, and IM Lake Placid in 2011. I took a break from Ironman in 2012 and 2013 to focus on running and finished a 100-mile trail run. Then, Ironman Boulder, Kona, Cozumel, Texas, Kona, Chattanooga, Florida and my final Ironman in Kona 2022 My primary goal for each year during these Ironman events was to qualify for Kona. I did not have a coach to guide me on how to choose or train for a race. My selection criteria were to travel with my friends who were also participating in the event. Ironman Canada and Lake Placid suited my weakest area, biking. The 5430 Sports event was local, and I didn’t want to miss out on a full-distance race in Boulder. Arizona was an “easy” flat course, while IM Coeur d’Alene was a favorite destination with an excellent course. However, training for it in late June was challenging based on my schedule. As a coach and athlete, I have learned that everyone’s reason for participating in an Ironman varies, and selecting an event depends on four factors: the time of year of the event, destination/travel, your strengths and weaknesses, and whether an Iron-distance race is sufficient or it has to be branded World Triathlon Corporation Ironman. When choosing an Ironman, consider when the event is taking place. The big block of training takes place 12 weeks before your race. Early springtime events such as Ironman St. George or IM Coeur d’Alene may not be suitable if you prefer not to train much in cooler outdoor temperatures or have a busy schedule during that period. Fall Ironman events such as IM Cozumel or Arizona may be suitable if you have kids who have gone back to school. It is also worth noting that early spring and late fall Ironman races do not sell out as quickly as destination Ironman events. If you intend to participate in an Ironman race as a way of traveling to a new location, then the time of year may not matter as much. However, keep in mind that destination Ironman races tend to sell out quickly, so register early. Your strengths and weaknesses may also affect your choice of Ironman race. Hilly bike courses such as Ironman Lake Placid, St. George, Coeur d’Alene, and Canada cater to cyclists, while flat bike courses suit strong runners. World Triathlon Corporation owns the Ironman brand, and entry into an Ironman event costs over $1000. However, there are companies that organize Iron-distance events that are less expensive and will not fill up quickly, such as the HITS series, Great Floridian, and Vineman. If you are not committed to racing an Ironman, consider these options. After a mechanical in Chattanooga 2018, I needed a break and returned in 2021 with the my intention to qualify for Kona one last time. Florida was the perfect location and time of year for me to train and I took all my experiences from the previous 19 Ironmans to put together another “perfect” event in Panama City. As a beginner triathlete, ensure you have prior racing experience, give yourself at least six months of specific preparation, seek advice from a qualified coach, and follow a slow, steady approach to training and nutrition.

DNS, DNF, or Defer? How to Make the Right Race-Day Decision

The decision to defernot start (DNS), or not finish (DNF) a goal race is never easy. It requires thoughtful planning, emotional maturity, and a willingness to adjust expectations. Knowing when to toe the line and when to step away is essential for long-term success in endurance sports.
I have been in a few events the past 33 years since I started triathlon and have had one DNF, 1996 age group Nationals in Orange County California. I was injured and struggling running the swim to the bike, t1, and while biking the hilly terrain, and then when I exited t2, I decided to quit. Looking back, I should have walked the 10k to finish. Racing, even when you know you won’t set a personal record (PR), is still a valuable experience. Having the tools to navigate when to defer, DNS, or DNF can help you make the best choice for your physical health and mental well-being.

Reasons to Defer a Race

Deferring a race means postponing participation, often due to circumstances outside your control. Common reasons include:
  • Pregnancy
  • Injury (e.g., broken bones or unmanageable pain)
  • Significant life changes (family, finances, or work)
  • A change in race date
  • Loss of motivation or a shift in goals
Because races are often registered for far in advance, your personal goals or life circumstances may change. You don’t owe anyone an explanation—if deferring supports your mental and physical health, it’s the right choice. Before deferring, consider options like switching distances (e.g., opting for a half marathon instead of a full) or adjusting your race day goals to align with your current fitness level.

When to DNS (Did Not Start)

Unlike a deferral, which usually happens ahead of time, a DNS is often a race-day decision. Common reasons include:
  • The deferral deadline has passed
  • Cost concerns (travel, hotel, race fees)
  • Minor injuries or illness
  • Over-registration or treating the race as low-priority (like a local 5K fun run)
Starting a race injured or unprepared can lead to more harm than good. If racing jeopardizes your recovery or overall health, it’s smarter to sit it out. However, DNS should not be your fallback because of fear. Fear of not performing well—or not PRing—is not a valid reason to avoid the start line. Racing when you’re not at your best teaches resilience and builds confidence.

Addressing the Fear of Failure

One of the biggest mental blocks athletes face is the fear of underperforming. It’s tempting to avoid racing when you know you won’t hit a goal time. Failure is part of the process. Racing outside your comfort zone, even when it’s scary, leads to mental growth and success. You may not PR, but showing up is a win in itself. If you’ve qualified for a once-in-a-lifetime event like the Boston Marathon or Ironman World Championship, don’t let perfectionism rob you of the experience. Get to the start line with the best version of yourself on that day.

When It’s BEST to DNF (Did Not Finish)

Valid and smart reasons to stop mid-race include:
  • Heat exhaustion or dehydration
  • Injury or sharp pain
  • Signs of serious medical issues (dizziness, blurred vision, chest pain)
Your safety comes first. Know the difference between discomfort and danger. If continuing the race could lead to serious consequences, DNFing is maturity. That said, if you’re struggling due to poor pacing or execution, consider slowing down or walking rather than quitting. Many finish-line regrets come not from poor performance but from giving up too soon.

Have a Flexible Race Day Plan

Being mentally and physically prepared includes having more than one goal. Consider building:
  • Plan A: Your best-case outcome
  • Plan B: A realistic middle-ground goal
  • Plan C: A finish-at-all-costs scenario
Also, if available, consider switching to a shorter distance race on the day. Managing expectations is a crucial part of endurance racing. Whether you defer, DNS, or DNF, make sure your decision supports your long-term goals and health. Sometimes, the bravest thing an athlete can do is not race or adapt to a race execution with where you are at. You don’t have to explain your choice to anyone but yourself. Just make sure it’s a choice made with intention, not fear.

Benefits of an Open Water Swim Warm Up

Warming up is crucial before any training session or open water swim in a triathlon. It prepares your body and mind, allowing you to perform at your best. Here are the benefits of warming up:
  1. Gradual Preparation: A warm-up gradually prepares your heart and lungs for increased activity, optimizing oxygen uptake by the muscles. This prepares your body to work efficiently during the upcoming workout or race.
  2. Injury Prevention: By reducing muscle stiffness, a warm-up lowers the risk of injury during and after the activity. It also helps you work out longer and harder without overstraining your muscles.
  3. Improved Performance: Warming up enhances coordination and reaction time by priming your nerve-to-muscle pathways. This results in improved swimming performance and overall race performance.
Additionally, having a familiar warm-up routine helps you mentally and psychologically prepare for the race. By sticking to a routine that has worked well for you in the past, you gain a mental edge that contributes to racing success. It’s important to incorporate your warm-up routine into your regular training sessions, so it becomes second nature by the time you reach your race. If you are swimming in cold water, acclimating to the temperature becomes even more important. When you can’t get into the water, a dryland warm-up can be an effective alternative. Adapt your routine to include dynamic stretches, mobility exercises, and activation drills to prepare your body for the swim ahead. Remember, finding a warm-up routine that works well for you and making it a habit will contribute to your overall racing success. Stay consistent, practice your routine, and reap the benefits on race day. You warm up before to start a training session and should before you start an Open Water Swim or If you are racing in cold water it is especially important acclimate to the water. When you can not get in the water, I suggest as a dryland warm up.

Drafting in Open Water Triathlon

Drafting can be a huge advantage during the swim portion of triathlon or any open water swim event. The general rule is to position yourself behind the feet of another swimmer in clear water. In water where visibility is low, the best position is to the side, off the swimmer’s hip. When you are drafting, and trust the swimmer is not going to go off course, you don’t have to waste energy sighting, which allows you to maintain a streamlined, efficient position in the water. Set up a course 8-10 minutes long 400-700 meters. With 2 others of similar speed. Start in water treading water. Line up side by side, far right number. Start off together. Person 1 counts 100 swim strokes, then slides down so person 2 becomes number 1 becomes person #3. 2 is 1 and 3 is 2. Count 100 strokes. Go through this pattern so everyone gets a chance to swim in the right side, center, left side. Everyone has a preferable side, your comfort side approaching someone and you dont think about it, you just do it. At times in events you will get put into these positions, not by choice. Next line up behind each other feet to feet, drafting 100 strokes, slide to left shut pace to half speed to get to the back. 100 strokes and sighting, drafting and paceline, turn up the heat step it up 85 percent effort. Important to sight frequently

How to Put on and Take Off A Wetsuit

Steps on how to put on a wetsuit for your triathlon and open water swim training or competitions! Give yourself plenty of time and put on a dry body over a swim suit How to Put on a Wetsuit How to Take Off a Wetsuit
  1. Insert one arm at a time into the wetsuit and pull it up from the wrist to the shoulder.
  2. Stretch your arms up and keep pulling the wetsuit up. Flexibility and range of motion can be helpful.
  3. Squat a couple of times to stretch your upper and lower body.
  4. Once the wetsuit is on, zip it up using the cord in the back.
  5. If you are outdoors, put on the wetsuit in the shade to avoid overheating.
Instructions for Wetsuit Removal:
  1. First, unzip the wetsuit.
  2. Pull the wetsuit off one arm at a time, turning the sleeve inside out as you go.
  3. Work the wetsuit over your hips and down your legs.
  4. Take care not to damage the wetsuit by pulling too hard or snagging it on jewelry or sharp objects.
  5. Once the wetsuit is off, rinse it with fresh water and hang it up to dry.
  Triathlon, Then and Now Triathlon Tips, Dont Try Anything New Race Day

How to Prepare for Open Water Swimming

Many beginner and experienced triathletes neglect to practice in the open water before their first race this time of year mainly because it is logistically it’s harder to get to open water and most climates are too cold to practice in them Common experiences after your first event include not sighting the right buoy, not sighting enough, drafting off others who were swimming off course or being pushed by the current. Below are some things you can do in the pool to prepare for your upcoming event

Basic Swimming Pool Techniques

Before a swimmer tackles open water swimming, it is important to address feelings of anxiety in the pool. Fear and lack of comfort with basic skills can often be the first obstacles to a successful swim. There are many techniques that you can practice in the pool which will help prepare you for open water swimming. 1.  Learning to float and improve your balance and stroke technique in the pool. Working on these techniques will result in a smoother swim and less energy expenditure and conserve your energy on race day. How to Swim Faster in 30 days 2. Practice swimming without goggles. During a mass swim start, your goggles might get knocked off. You can prepare for the pool by practicing treading water or floating while taking your goggles on and off. 3. Simulate swimming close to others. Gather your friends in one lane, each with one hand on the wall. Then push off at the same time and race across the length of the pool while pulling on each other’s legs and swimming on top of each other. 4. Simulate the lower visibility by swimming the length of a pool with your eyes closed. If possible, you should also try to do it without lane markers. 5. Don’t wait till your first race to try on your wetsuit, even if you wore it last year. Many athletes find wetsuits uncomfortable and constricting, especially around the chest when breathing. Related:
Swimming Made Easy

Advanced Skills for Race Day

Related: How to Survive and Open Water Swim Start
If you are experienced, you should still prepare for race day warm-up,  sighting the buoy, drafting, and going from a horizontal to vertical position.

Warming Up

If the race venue allows, warm up for at least 10 minutes before your wave starts.  This includes getting in and out of the water 4 times to acclimate to the temperature. The conditions and temperature of the water can cause your heart rate and breathe to increase if not properly warmed up.
Related: Conquer Your Fears and Frustrations in Open Water

Sighting the Buoy

A technique to site the buoy is called “alligator eyes“. While you are swimming, lift your chin so your goggles clear the water and you are looking forward while exhaling. During this time, site the buoy and then turn your head to the side and inhale like you normally do in the pool. It is important to sight frequently as accurate sighting can save you time and energy.

Drafting

Position yourself in your wave according to your ability. If you are a strong swimmer, set yourself up behind faster swimmers to catch a draft. If you swim directly behind (or to the side of and behind) another swimmer, you will expend less energy and have a faster split if you are able to pace behind someone slightly faster than you A newbie should also consider lining up on the outside edge of their wave to get a clearer view of the water ahead. When the gun goes off, wait a few seconds before you start so that more experienced athletes are less likely to run into you when they begin.

The transition from Horizontal to Vertical

If you are not able to practice open water to run transitions, you can simulate them in the pool. An example workout is to warm up 10 minutes and then swim 100 yards or meters at race pace, then immediately hop out of the water and jog in place to simulate going from a horizontal to vertical position with a high heart rate
Related: Practice Makes Perfect: Triathlon Transition

Mental Preparation for Open Water Swimming

Open water swimming can cause a psychological barrier for athletes, especially newbies. Lower visibility, the stress of cold water, swimming close to others, no lane lines, and no floor or walls to rest on, often leads to anxiety.  To mentally prepare yourself, before you get in, assess your surrounding and consider the conditions you are likely to face. Things to consider on race day include:
  • Buoy positions
  • Sighting cues
  • The location of the sun
  • The optimal line-up spot
  • Bottom conditions and water depth
  • Possible currents

Each time your practice swimming in open water, you will achieve a different experience to take with you on race day.
If you are looking for an in-depth analysis of your freestyle swim stroke, click on this link to get the details of how to film yourself in the pool and send it to me. I have been teaching adults how to swim and swim technique for 18 years. My approach is simple and honest.  Let me know if you have questions by leaving me a voicemail on my website

t2coaching: Want to improve your swimming, follow these 6 steps

It’s no secret that swimming is a technique-intensive sport. Whether your goal is to develop a healthy, injury-free fitness routine or perform faster in races, good form is a fundamental prerequisite. Giving advice without demonstrating in person is more difficult. Seeking out a local coach with experience teaching adults is best, one that uses above and underwater video so the swimmer can see that they are doing right and wrong is mutually beneficial. Send an email to wendy@t2coaching.com and I will send you guidelines on how to send me a video so I can evaluate your form. Watching videos is useful cause you can pause and focus on the phases of the free style stroke while watching the video. View me swimming here     If you are looking a step-by-step approach on how to develop a program to fix common faults, check out my 5 step-by-step system I follow when instructing. Breathing The first step is evaluating how to breath. A swimmer  must be comfortable breathing before they can focus on body balance, which is needed before they learn swim mechanics. If they work on mechanics before they are breathing efficiently, they will be frustrated. If they can breathe, we move on to step 2 (balance and kick).Even is the swimmer is comfortable breathing, I still go over the 4 things that cause breathlessness in cause during the course of their training they encounter breathing issues. The 4 things that cause breathlessness are not exhaling immediately before they inhale, lower body dragging, kicking too much and dropping their extended arm while turning to inhale. If someone is having breathing issues typically they cannot swim more then 1-1.5 lengths before they are breathless. I have them use a kickboard and practice inhaling with their face above water and exhaling underwater. The key to breathing is a forceful exhale before inhale. Then they will kick on their side while exhaling under water and inhaling about water. 2. Kick I am not much of a kicker. I propel myself thought the water with my lats, back.  Proper kick for triathletes stems from the hip. Engaging quads and hip flexors, relaxing the lower leg beyond the kick. Flexible ankles help. As mentioned about kicking to much to propel yourself with fatigue you sooner cause you are using large muscle groups and that will increate your heart and breathing rate and cause fatigue sooner. If someone cannot kick (they either show no forward progression or move backwards) we discuss kicking (pushing) from the quad and hip flexor. Once we’ve address any breathing and kicking issues, I evaluate body balance and rotation. If they are dragging their legs on the bottom, if they are not rotating from left hip to right hip, on a few stroke drills to help correct that. 3. Body Balance Rotation When you swim you are either on your right or left hip. When you rotate from hip to hip, your shoulder is in line with your hip. Some swimmers  are taught shoulder rotation, I teach hip rotation, your shoulder follows. If you are a one side dominate breather you are typically always on one hip. For example a right side dominate breather tends to be on their left hip and not knowing that they should complete the rotation cycle on their right hop too, even if they don’t breath to the left, it is still important. Bi-lateral breathing helps with hip rotation. Knowing you should rotate on your hip to breath, helps with getting comfortable breathing to the non dominate side A common problem with most newbie swimmers is poor body position, which can lead to legs sinking.  This brings their legs closer to the surface of the water and produces a “downhill” swimming sensation. Also hand entry will help with body weight distribution Another common theme among newbie swimmers is not rotating on the hip or side they don’t breathe on. Most often, they are right-side-dominant breathers. They consistently rotate on one side to breathe and never fully rotate on the non-dominant side. I discuss the benefits of bilateral breathing, breathing on both left and right hips, and the value that provides with proper body balance and rotation. Basically, when your left fingertips enter the water, rotate on your left hip, when your right fingertips enter the water, rotate on your right hip, whether you are breathing on that stroke or not. Once breathing, body balance and rotation are fine-tuned, I focus on the mechanics of freestyle. There are three main phases of the stroke: recovery, hand entry, and underwater catch/pull. I often see swimmers recovering with straight arms and entering the water with their palm and elbow at the same time. creating a straight-armed pull with no high-elbow catch. In the end high-elbow recovery sets them up for a nice fingertip-angled entry when they rotate which, in turn, sets up a high-elbow catch and pull. 4. Phase 1 Recovery What your arm is doing out of water. Many newbies have straight arms and extend the greatest amount in front of them before entry. High-elbow recovery means leading with your elbow and relaxing the phase of your stroke where your arm exits the water. I frequently remind swimmers to swim with their fingertips below their wrist and below their elbow, and to drag their fingertips along the surface of the water on the recovery.Here are two keys drills I use to create a high-elbow recovery: Thumbslide: https://www.youtube.com/watch?v=b3ID1VtdLG0 Fingertip drag: https://youtu.be/DAxucJPeaUg 5. Phase 2 Hand Entry I believe how the swimmer hand enters the water is the most important phase to set the swimmer up for a strong “catch” and “push”, the pull phase of the stroke Most swimmers that learn to swim at an adult are taught to reach as far as they can either before or after entry. This can put alot of stresss on the athlete shoulder and often creates igniting the pull with a dropped elbow. Entry phase means an angled, deep hand entry, which can help create a high elbow catch and pull phase. Fist drill: https://www.youtube.com/watch?v=mi-4bsv6Psk, https://www.youtube.com/watch?v=b2uUSEkX3v0   Head-out-of-the-water drill is just as the name implies. Swim with your head out of the water, increase your arm recovery rate, and focus on an angled hand entry making sure not to reach and flatten your hand at entry. https://www.youtube.com/watch?v=Mv4E3ocazF0 Attention to body balance, rotation, high elbow recovery and hand entry will set you up to develop a stronger pull and power phase of the stroke. I will discuss that phase next time. If you make stroke drills an integral part of your training, you will be rewarded with fewer injuries and faster times. 6. Phase 3 Catch and pull Now that you are comfortable with breathing, body balance, rotation, high elbow recovery and hand entry, your underwater pull should be set up to put some power below. When working on your pull, hold your breath, look down and watch your hands pull thought the water over the black lane line. Your arms should not be wider then hips and not crossing the center line.  Then the “catch” proceeds the pull and the right place and all your strength and power should be put into the push, past your hips, scrapping your thigh with every arm pull. What to Master the Basics of Swimming? Click here to learn more

How to remove race number tattoos

I posted the question on facebook wall and a group i am in “You know your an Ironman When…” The response was overwhelming, I stopped keeping track over 300 responses. In order of frequency below were the responses:
  • Wear it with pride
  • Why ?
  • Rubbing Alcohol
  • Baby Oil
  • Hand sanitizer
  • Tape (packing, duck, scotch)
  • Nail Polish Remover
  • Olive/Coconut Oil
  • Vaseline
  • Soap and water
  • Skin regenerates as your age so just let if go naturally
  • Chlorine
  • Baking Soda
  • Tea Tree Oil
  • Spray Tan
  • WD40
  • Windex
  • Acetone
  • Dr. Dronner’s soap
  • Color Arm black
  • “Awesome”
  • Goo Gone
  • Loofa
  • Belt Sander
  • Spot Shot
  • Grease Monkey
  • Make up remover
  • Arbonne
  • Mary Kay
  • Gasoline wire brush
  • Billo
  • Sand paper0
  • Pull-UP
My first attempt was a cool shower with soap and water after the race. I did not scrub very firmly since I had a sunburn. My second attempt was the pool water on Monday. My third attempt Tuesday was a pull up, was surprised that did not work :). Then alcohol and hand sanitizer. Nothing. The reason I posted the question on facebook. Even 3 days later, swimming in the Rez, the numbers did not disappear. Wednesday evening I gathered the products listed above that I had in my house and got to work. (I forgot to try the Olive Oil, Coconut oil and baking soda) Alcohol did not work 24 or 72 hours later   The second highest response was baby oil. I see some some number rubbed off  Vaseline was not a winner   I was surprised sunscreen did not work. For ink marked number applying sunscreen takes them off easily Rubbing with billo did not work  Lotion was not a winner    Goo Gone did not do the trick       Although Packing tape, duck tape and scotch tape got many votes, numbers were still on! Baby Oil was the winner!   I am sure that over time, the numbers would have come off naturally with multiple showers, swimming in the lake and chlorine. I did not want to wait that long. To answer the question WHY?, why not leave them on with pride? Leaving temporary tattoos does not equate to pride. Training and racing is personal to me, I do not need to show it off with big numbers on my arm. My results speak for themselves.

t2coaching: You Signed up for your First Triathlon, Now What?

I remember my first race back in 1992 like it was yesterday. It went something like this: Swim: No wetsuit for my first open water swim experience and I wore my swim suit. Transition 1: I had a bath of water to rinse the sand off my feet. I sat down in a lawn chair to put my socks and running shoes on before I mounted my bike. Bike: I rode a $200 mountain bike, wore my mom’s gigantic helmet with a baggy La Palozza t-shirt and cotton stretch pant shorts. I got passed by someone every mile along the 12-mile course. Run: My first-ever “brick” run, the first time I ran after biking, 4.5 miles on a trail. Finish: first in my age group, age 19, 4th overall. I was hooked, and spent the next month searching for a road bike. A friend advised me not to purchase the first road bike I demoed, which, to this day, is my advice to athletes getting into the sport of triathlon. My first road bike was a purple Miele steel frame. During training, I never drank energy drinks or consumed gels. My first exposure to GU was in 1997 at the mile 2 aid station as I was running my first marathon at the Hawaii Ironman World Championships. I learned everything by experience and articles I read in Runners World and Triathlete. Fast forward 20 years later. With countless books and the internet full of triathlon advice, preparing for your first race can be overwhelming. Plan to practice what you will do race day in training. Most of us complete a sprint distance (1/2 mile swim, 12 mile bike, 3.1 mile run) as our first event. Many others with some experience will swim, bike or run as their primary sport may try an Olympic Distance (1.5k, 40k, 10k) as their first triathlon. Very few jump into a Half (1.2 mile, 56 mile, 13.1 mile) or full IronDistance (2.4 mile, 112 mile, 26.2 mile), although there are some athletes that can do that, I do not recommend a long distance (Half or Full Ironman) as your first triathlon. Whatever the distance you signed up for, below is a list of most commonly asked Q and A that will help you prepare for your first event. How many weeks/days and/or hours a week do I need to train? These all are determined by your experience, your strengths and weaknesses, what distance event you are registered for and of course how much time you have to train. For a sprint: I recommend two swims, two rides and two runs a week, with one run done after you bike. Total time each week 4-6 hours for 6-12 weeks For an Olympic: I recommend 2-3 swims, 3 bikes and 3 runs per week. Total training time 6-12 hours for 12-16 weeks For a Half of Full IronDistance: I recommend 2-3 swims, 3-4 bikes and 3-4 runs. Total training time for a Half 10-15 hours, total training time for a full iron distance 10-20 hours for 16-24 weeks How long should my longest swim, bike or run be in training? Often, if you are new to the sport, less is more, meaning you want to do the minimum to complete the event healthy and strong. Your number one goal for your first one, is to complete your event. Afterwards spend some time assessing your goals, maybe to go father or get faster, then create a plan to reach your goals for future races. This time, consider hiring a coach. Below are my general guidelines to build a “longer” swim, bike and run into your weekly training plan. At the minimum you should be able to complete the distance for each sport. For a sprint: 1/2 miles, 12 miles, 3.1 miles. If you are ready to go longer and have more time, the longest swim can be a mile, longest bike 20 miles and longest run up to 5 miles. For an Olympic distance, 1 mile swim, 25 miles bike and 6 mile run 6. I often have experienced athletes build up to a 2000 meter continuous swim, a 40 mile ride and 10 mile run. For a Half Ironman distance Build up and be comfortable swimming continuous 2000 meters, biking 60 miles and running 15 miles. For a Full Iron distance be comfortable swimming 2.4, biking 112 and running up to 18 or more miles as their longest run What type of gear do I need?   As previously mentioned, less is more. I recommend for any distance race you are start with are the basics and build your collection of gear and swag if triathlon is something you will continue to pursue. For the swim: Very few triathletes wear “speedos” anymore. Most of us invest in a triathlon tank top and tri shorts or one piece triathlon suit to wear for the entire race so we do not have to fiddle with changing or putting on clothes over a wet body. Of course a swim cap and goggles, maybe a wetsuit if you will be competing in open water. For the bike: Either a new or used (road or tri frame) that fits, helmet and maybe cycling shoes if you have clip-less pedals. Otherwise ride wearing your running shoes. For the run: A descent a pair of running shoes designed for your type of running gait, hat or visor and sunglasses. Nutrition: Water bottles, energy products or food (to be determined with training) The transition area is secure, you do not need to lock your bike. No NUDDITY, you will be disqualified. Therefore , recommend wearing the triathlon suit or having a top and short to pull on over your suit. Know your ins and outs (where you enter from the swim and exit on the bike and run). There will be tons of volunteers to help answer your questions. T1 and T2 will look different from when you set up your area to when you actually run in and out with your bike mainly as to t2coaching many bikes are still left when you exit the water. I recommend noting a landmark, adding something like a bright towel, or balloon, even mark some colorful tape on the ground to guide you to your space. Your transition area will be the size of a small towel with your run/bike shoes, socks, hat/visor, maybe some water bottles or nutrition and a racing belt. Often athletes pin their bib number to a racing belt for easy access since you must wear your bib number on the front of your body when you cross the finish line. You did it!! You want a nice photo finish so be sure to finish with a smile and arms up in the air and save all your medals and photos so 20 years later you can reflect on how much triathlon has directed your mental and physical wellness. Most importantly, enjoy your experience. There is a reason I have been doing this sport for 20 years and plan to enjoy the next 20 and beyond.

t2coaching: What goes into a training plan

If you are looking for more structure around your weekly workout routine or just getting started with your preparation for the 2016 spring time events, hiring a coach to create a custom training plan based around your goals, fitness and time available to train can help you meet your goals, avoid overtraining and likely have far greater success come race day. What is t2coaching? My full time job is coaching both local and athletes around the world. Coaching out of town athletes involves working from home, creating  new or revising current training schedules via training peaks, communicating via email and phone.  I also meet with individuals for consultations and swim training. I continue my coaching education reading articles and discussing training philosophies with athletes and other coaches. I have developed my own system and outline below what goes into a t2coaching training plan program to help you  understand what needs to be done to prepare for a new season. The art of coaching is the ability to manipulate frequency, intensity and duration to allow that athlete to develop peak performance as they taper for their goal race. When I am coaching an athlete I create their plan based around their schedule. How much time they have to train, workout history, race experience, and current goals. Someone who wants to “finish” an event will not follow the same plan as someone who had more experience with the time goal Below are 5 simple steps I follow to help create the plan appropriate for you. Step 1: Determine your goal event When I start coaching an athlete, before I write the details of their plan, they fill out a detailed questionnaire and we discuss their goals and experience. If you’re new to your sport, your goal is likely to be to finish and your plan will involve building a foundation, skills and drills necessary to cross the finish line healthy. If you’re a seasoned athlete in your sport, your goal might be to set a new PR and your plan will involve more frequency, duration and intensity, maybe even injury prevention and strength training. Step 2: Set up an Annual Training Plan outline I follow the concept of periodization and phases of training to set up an Annual Training Plan calendar. I split the training “year” into phases, as determined by the event you are training for, and how much time you have to prepare. Based on how long they have to train before the goal race, I divide the training season (3,6, 9 or 12 months) into periods or phases which make up their Annual Training Plan. Each phase has a specific goal or purpose and length, depending on the athletes experience, strengths, weaknesses and how much time they can train. The number of weeks/months until race day and the length of the event will determine how much time the athlete needs to train. Step 3: Set up Phases of Training Each phase represents a 4-12 week block of time. Starting with the race date and working backwards. Phase 1: Taper, 7-21 days Phase 2: Build race specific intensity, 4-8 weeks. Phase 3: Base, a foundation, 8-16 weeks. Lower intensity, skills and strength workouts Phase 4: Prepare the body to train, 2-6 weeks. Cross training, strength training, getting into a training groove. Phase 5: Transition, taking some time off at the end of your season. Step 4: Fill in the weekly details. First, I schedule your days “off” from training. Next, I fill in your “long” training days determined by the event you signed up for. Then, I fill in any group workouts such as masters swim, rides or runs Finally, the rest of your workouts including duration and intensity, dependent on the phase of training, intense training days, followed by recovery days Sport specific intensity is determined by the distance of the athlete’s event as well as baseline testing protocols. Intensity is measured via heart rate or power and is very specific to the athlete’s current fitness when the build period starts as well as their SMART goals for their event.Step 5: Be Mindful As your coach, I know one training plan does NOT fit ALL. You keep a log, communicate with me, and listen to your body to avoid overtraining, injury and burnout. I am flexible and update your training plan when needed. Sometimes your rest week comes at an unplanned time if you get sick, travel or weather gets in the way of your workouts for that day or week. Anyone can find a training plan online, knowing what you do with the plan with the expertise of a coach can keep you healthy and strong to set you up for a strong performance. Haphazardly training without a purchase and not understand the training lingo can can lead to an season full of injury and illness and sub par performances. Need more guidance? Contact wendy@t2coaching to set up a consulation or inquire about her coaching services.   To learn more about t2coaching fill out the online athlete profile and contact t2coachwendy@gmail.com

To Mdot or Not, that is my question.

The M Dot is the Ironman logo that some athletes get tattooed on their bodies after completing their first Ironman. Some do it after completing more than one. The Ironman is a 140.6-mile event, broken up into a 2.4-mile swim, a 112-mile bike, and a 26.2-mile run. I believe back in the 80s and 90s the M Dot was the symbol of the Hawaii Ironman World Championships. Now, with the creation of World Triathlon Corporation, the M Dot is used as a symbol for all World Triathlon Ironman events, not just the World Championships. I do not have an M Dot tattoo, nor do I plan on getting one. Having qualified for my first Hawaiian Ironman World Championships in 1994, I did not even know what Ironman was at the time, and passed up the slot to go. I made it a goal to qualify again when I was 24, and achieved that goal in 1997 at the Desert Sun Half Ironman in Grand Junction Colorado. I did not feel the need to get an M Dot at that time. When I started competing in the early 90s, Ironman North America owned five Ironman events (California, Lake Placid, Coeur d’Alene, Canada and Arizona). World Triathlon Corporation purchased Ironman North America last year, and has since developed numerous Ironman events around the world. Check out www.ironmanlive.com for a list. WTC also purchased many half-iron distance events, now called 70.3s. In my 23 years of competing in triathlon, I have done 13 Ironman events, seven in Hawaii, and was the Overall Female Amateur Champion on 2008. Even then, I never much considered getting an Ironman symbol tattooed on my body. Instead I purchased a gold pendent as my reminder and personal symbol of inspiration. I was interested in getting others’ perspectives on why and where on their body they would get an M Dot tattoo. I posted the question on Facebook. Most of those who did or plan to get the tattoo, as well as others who think it is “cool” supported the idea, commenting, “why not, it’s your body. If it means that much to you and since 140.6 is quite an accomplishment, then do it!” and “It represents something important to me, end of story. If you get one, be proud of it!! It’s a symbol of being a badass!!!” Those who felt like they definitely earned it mentioned getting the design on their ankle, upper back, or shoulder. Others mentioned upper thigh hip area near swim suit, side of rib cage, or wrist. Others not into the M Dot reminded me the M Dot is a logo for a commercial, for-profit business. Why put a logo on your body? “Let people know your accomplishments with your race results.” Like I always say, actions speak louder then words, in this case tattoos. For some, the 140.6 symbol is different than the M Dot logo, and more impactful. I think my friend Chip summed it up nicely, saying “I think the answer to your question is a psychological one. First, to put one on at all means someone feels the need to wear a badge. When you become an IM, you will be an IM whether you permanently stamp a badge on your body or not. Second, size and location speaks volumes: small and indiscrete means it’s for you and a badge of pride, a reminder of great accomplishment. Large and visible suggests the need to tell others, nonverbally.” Aside from the corporate brand aspect, I think your view here could be a generational thing. Maybe it depends how young-at-heart you are? Tattoos are much more acceptable these days. Sometimes it can be about wanting to be associated with something like a way of life and all that goes with that. At least a bumper sticker is easier to get rid of when you are no longer interested in that association. Does the M Dot define you? What about those endurance athletes that run 50-135 miles or ride RAAM? Do they have special symbols they tattoo on themselves?

So you signed up for an IronDistance Triathlon, now what?

Watching the Hawaii Ironman World Championships broadcast on TV or Youtube, is enough to motivate any triathlete to want to train and complete and Iron Distance event. I have completed there 10 times and was a spectator once. Being there live, coaching 3 athletes the months leading up to their day, watching and cheering was enough to want to compete again. How to Choose Your First Ironman.
If you’re considering training for your first Ironman event, there are some important factors to keep in mind. To start, building motivation and an iron-will along with stamina both mentally and physically is key. Visualizing your goal and expressing your WHY can help keep you motivated throughout the many weeks of training. Investing in the right gear is also important. For running, a gait analysis and proper shoes can help avoid injury. A professional bike fit for the bike you plan to ride is essential, and consulting with a coach or expert can help determine whether a tri or road bike is best for you. When it comes to swimming, shopping around for appropriate clothing and training in it before the event is recommended. Optional extras, such as water bottle cages and power meters, can also help enhance the experience. Consulting with a coach or Registered Dietitian is crucial for developing a nutrition and hydration plan. Proper nutrition, including carbohydrates, proteins, and fats, is essential for fueling both training and daily life. Building a progressive training program with recovery weeks and rest periods can help minimize the risk of injury and over-training. Keeping a training log can help track progress and maintain motivation. Listening to your body and taking rest periods when necessary is important for preventing injury and allowing your body to recover and grow stronger. Ultimately, remember to enjoy the journey and focus on getting to the finish line. By following these tips and putting in the necessary work, you can achieve the rewarding experience of completing an Ironman event.
Wendy Mader is a 21 time Ironman Finisher, 2008 Ironman World Champion and Ironman Certified Coach. View her website at www.t2coaching.com and contact her for more advice t2coachwendy@gmail.com. Check out my coaching and training programs.

10 Tips: Fueling During An Half or Full Ironman Distance Triathlon

Nutrition for 70.3 and 140.6 is super critical for maximizing performance. I always say “don’t let nutrition get in the way of your fitness or competition, like finishing an Ironman strong”. With regular practice and experimenting with what and how much you need to fuel during your longer bike, runs, and brick training sessions, then using that information to develop your nutrition plan for competition,  leaves NO  guess work on race day. If possible get your sweat rate tested. After my visit to the Gatorade Sport Science Institute in 2007, I found out that I don’t have alot of sodium in my sweat and can get all I need from Gatorade. I also learned that I was injesting too many carbohydrates, 1 power bar plus gatorade and water to total about 400 calories  / hour. Based on the sweat rate test,  I  was able to dial  in my nutrition plan to 200 calories and 40 ounces per hour. 1 gel plus 20 ounces of water and gatorade. Keep it simple is the name of the game when it comes to Ironman Race Day Nutrition
  • When you log your training, include a log of your  nutrition next to it. Include how you felt and continue tweak it if something is not dialed in. Keep a log of  how many calories you eat before and during for your longer workouts
  • Plan the details of your fueling strategy in advance. Will you rely on aid stations or your own supply? Will you take advantage of the special needs bags that you get around the half way point of an ironman and mile 18 of the run?
  • Liquid calories are easier to digest then solids and if you tend to get a nervous stomach race day try out varies products in training. Liquid vs solid is a personal preference and I have done both over the years with no GI distress. If you relay on solids, do so in the early stages of the bike course. I like to break a sport bar in 4 pieces and eat one every 15 minutes and drink water with it. Eat your solids, if any, early during the bike (first couple of hours). Aim to keep the rest of your fuel intake liquid.
  • When planning out the time between when you eat breakfast and when your swim start is, if is important to have some calories if your wave start is more then 3 hours after breakfast. Decide if you will consume an energy bar, gel, sports drink to top off  your energy tank as race start gets closer
  • Research recommends an intake of 40-60 grams of carbohydrate, or 150-250 calories per hour. I recommend starting with 200 calories and adjust it based on their body size/weight. Smaller athletes may need 100-150 calories, larger athletes as much at 450 / hour. Take to a local Registered Dietitian.
  • Dialing in your pace/power/heart rate on the bike will affect your nutritional needs which will impact your run. Even if you follow your planned number of calories, if you ride too hard, you will struggle in the run. So be mindful of pace and nutrition while training.
  • Travel with more then you need.  You don’t want to be buying different brands the day before the race.
  • Rely on an electrolyte drink throughout the day and keep water intake to when you eat dense carbohydrate sources (gels, bars, cookies, etc.), because mixing electrolyte with food will only make the solution denser.
  • Never skip and aid station on the bike or run. Grab water, sip it, dump it over your head if the conditions are hot to cool off
  • If you get stomach trouble, slow down! Your problems will resolve if you give your body the chance to recover. You can cruise easy for 10-15 minutes and only “lose” a couple of minutes on the day, or you can continue to carry on hard and lose hours!! Or worse, DNF!!
With practice will have your race day breakfast, before your wave start and during the bike and run portion dialed in. Food of choice: Find the brand of bar and gels you like, and get used to using them. Remember, gels and bars are only one option — dates, PB&J sandwich, snickers, coke and bananas are another. After you find what you like, stick to one brand of electrolyte drink and one brand of sports bar or gel. A nutritional strategy for race day should be simple and right for you. Make every long training session a practice run-through of your IM fuelling and pacing. By the time race day rolls around, it should be second nature what you eat and drink.   Learn more about t2coaching and Ironman and 70.3 Training plans here.

How to Fuel on the Bike in and Master Aid Stations

  How to Fuel on the Bike in  and Master Aid Stations with Wendy and Dave. Watch this episode of AskCoachWendy (click image above).

Triathlon then, and now

  Now, 25 year later, competing in triathlon goes something like this. Swim: I wear a “tri kit” padded shorts and tank top underneath a wetsuit or swim skin.  I believe the tri kits came out in late 90’s. Up to that point, I just wore my speedo swim suit for the entire race. I recall relying on my finish time after the event, never taking splits. Now I use a Timex GPS watch to track my racing splits. Most of the races I still exit the water first in my age group. T1: I am usually within 1-3 minute split depending how long the run is from the lake to the transition area. The first time I remember focusing on transition speed was went I lost a race by 12 seconds. Now I run as fast as I can to my bike. While running I start to peel off my wetsuit/swim-skin to my waist. When I get to my bike I remain standing and give one big pull down from my waist to ankles, step on it to get it off my feet. In an Ironman wetsuit strippers help remove the wetsuit. I quickly put on my glasses, helmet, socks and cycling shoes, then run to the mount line with my bike. Bike:  I only raced on a mountain bike for one season, then various road bikes for another 15 years. I started racing on a triathlon bike in 2009.  Thanks to Team Timex sponsorship, I am currently riding a Trek Speed Concept with Shimano components plus Bolle helmet and sunglasses. Cycling is my favorite part of triathlon, although compared to my competitors, my weakness.  I still get passed on the bike, not as frequently. T2: Dismount at the line, run my bike and re-rack,  take of helmet and cycling shoes, slip on running shoes, grab my racing belt,  visor and run. Run: While running out of t2 I wrap my racing belt around my waist and situate my visor. Depending on the distance of the triathlon I am competing in, sometimes I have fantastic runs, other times I struggle. It is just part of the learning curve and the challenge is what keeps me going. Finish: Depending on the event and who shows up to race, I can still come across the finish line first in my age group. Sometimes first overall. No matter what placing I get, I always finish with a smile and gratitude for the ability to train and compete 25 years later. Highlights the past 25 years.
  • 1992-1994, I won my age group at every race and was within the top 3 overall in most to them.
  • In 1995 I moved to CO to train under 300 days of sunshine
  • 1996 competing in my first Nationals and my only DNF due to injury
  • In 1997 I finished my first Ironman in Kona, finishing 10th in my age group (20-24)
  • 1998-2003, I competed in all distances, sprints to Ironman
  • In 2004 I won my first overall race at the Spring Chill Olympic Distance held at Boyd Lake, CO.
  • In 2007 I applied for my my first sponsorship with PowerBar.
  • In 2008 I won the overall Amateur title at the Kona Ironman World Championships
  • In 2009 I received sponsorship from Blue Bicycles and road my first triathlon bike
  • In 2010-present I am part of  Team Timex Multi-sport
  • 2011-2013 I competed Ultras, 50k-100 mile.
  • 2013 I finish my first 100 mile trail run in SteamBoat, Run Rabbit Run
  • 2014 I won my age group at the Inaugural Boulder Ironman, second overall Amateur. Two months later I finished 14 in my age group at the Ironman World Championships
  • Presently I have finishing 100s of Sprints-Half Iron-distance plus 15 Ironman, 8 in Kona, finished 3 X 50 mile trail runs and 1 x 100 miler
I have experienced numerous injures, most of them within the first 17 years trying to balance training, nutrition, injury prevention and life.  No injury has kept me from biking and swimming, they usually cause me to take time off running. In 2010 I started focusing on core strength training and that has been so critical for injury prevention. I enjoy each training and racing experience. I have the greatest friend and family support to keep me going for another 25 plus years. Do what you love, love what you do!

Benefits of Training Alone and With a Group

I will be celebrating 29 years since racing my first triathlon on June 12th, 1992.Within these 29 years, I have a swum with one master swim program, 1999-2004 before becoming the masters swim coach, cycled three years with the local Cycling Team and ran a couple months with a local running group. I would enjoy a few rides with a group of athletes for social camaraderie or who was slightly faster than me,  unfortunately, most groups I have tried to ride with are usually too fast or too slow or involve and involve a structure that is not part of my training plan.  I liked the group track sessions, but my schedule changed and the one I could attend did not work.  Masters swim programs often involve sets that give me too much rest and I never feel like I get my desired swim workout. I understand the value of training with a group. Motivation, accountability, friendship, and fun.  I started a triathlon club, coached the CSU Triathlon Team, coached two different Masters swim programs and started Team Trifecta in 2008 (weekly coached rides and runs) to help keep athletes motivated and on track and to educate beginners with hands-on technique. I am sure most of you can agree, the weekly longer bike and run sessions provide the most “fun” and entertainment to make the workout go by faster. When it comes to my own workouts, I enjoy the solitude and training at my own pace on my own time frame without the distraction of others. My long runs and rides are my thinking/processing time. I tend to create athlete training plans for the people I coach, and get inspired to write an article or blog while riding. Being able to self-monitor is very important in long races, and training alone on long rides and runs is the best way of achieving this for me. I do not do much open water swim training, I prefer to swim in the pool. I don’t push myself in group open water sessions and tend to get distracted by helping others get comfortable in the open water, acclimating to the temperature or learning how to breathe or sight more effectively. Since moving to Georgia I joined a local Triathlon Team in with the desire to try the group training thing again and every week they send out the weekend schedule, it does not mesh with mine. With work and family obligations, as most of us have other priorities and commitments to attend to. The upside of training with partner or group:
  • Motivation and the prospect of being “pulled” to work harder by stronger athletes.
  • You can learn a lot very quickly from other, more experienced triathletes.
  • The miles on the bike can go by quickly if you have others to chat with. Swimming with a masters swim group with pool-based coaching is very helpful. The coaches tend to push you that little bit more or correct stroke flaws you might not be aware of.
  • Training with others and observing them can help you improve or detect technique flaws, as well.
The downside of training with a partner or group
  • One training plan does not fit everyone. For best results for YOU, stick to a plan – your plan, and your workouts – and sometimes the group dynamic does not permit that.
  • You give up the control of setting your own schedule and can end up relying on other people.
  • Training alone can also be very good for mental toughness if you are honest with your efforts. Remember, one good workout done at the right level of effort and with good form beats five crappy workouts done without thought.
  • Your training partner/group is most likely training for different events than you are, and have their own schedules to follow.
  • In triathlon, you race alone – not in a group. While training for an Ironman, solitary training gets you used to long periods of time on the course that you will spend with only your own thoughts for entertainment or annoyance.
Be a Solo Act and Team Player
  • Get a good plan based on your current level of fitness and, if possible, get some feedback from a local coach to check in on your form occasionally.
  • Most people do their long rides on the weekends, which is the perfect time for you to line up riding buddies to go for some or all of your long rides. This makes it somewhat of an adventure, but also makes it safer. It’s also a good idea to switch up your long run. If you do your long ride on Saturday or Sunday, get in a long run on a Thursday.
  • When training for a long event, I recommend training solo for at least 50 percent of your long distance miles. This avoids the urge to slow your pace or work to keep up with or beat your training buddy and take your training session into the wrong training zone in the process. When you have a hard session, based on your individual training plan, it can be good to have a stronger training partner around to make you push a little harder.
  • Train alone during the weekdays (it is easier to schedule), and with friends on the weekends when you do your longer sessions. That way, you can get your big miles in with a bit of socializing, and the miles tend to go by a bit quicker.
  • It is important to train properly, at your fitness level, but you probably get something else out of spending a day riding with friends. You may or may not go as fast as you would individually, but you are likely to have enjoyed the ride. Unless you are an elite competitor and are going for a spot on the podium, it is better not to get obsessed. Train, sweat, and share “punishment” with friends.
Have a question or want to be a guest on the EnduranceHour Podcast, email t2coachwendy@gmail.com

t2coaching: Tips to Prepare your Body to train

When I start to coach an athlete after they have had a mental and physical break from training, their transition/off/no structure training time, I create a month of movements to help them prepare their body to train again. The Preparatory Training Phase lasts approximately 3-6 weeks and is focused on conditioning their body before additional volume and intensity of training begins. Otherwise known as, getting into a training groove and preparing their body to train Within this period of time I introduce low volume aerobic exercise, hip mobility and core stability movements, basic strength and swim, bike and run drills. Approaching an  early season preparation phase offers an appropriate primer for the higher volume and intensity training. Aerobic training intensity is determined on the athletes baseline fitness test data, zones 1-2 heart rate and power or rate of perceived exertion, 6-13 on the Borg scale. While there are very few intervals to be done during this phase, most workouts are drill based. Cycling workouts focus on one-legged, high speed and low cadence drills.  to prep tendons and joints for the slightly harder force and muscle endurance work during base training. Runners and swimmers are prescribed skill and drills to focus on economy of movement and injury prevention. Strength Training is focused on mostly body weight and light dumbbell movements. Dynamic stretching and strengthening. Some refer to this period as Anatomical Adaptation (AA) Phase. The athlete will be doing body movements or weights in the gym, higher reps and light resistance. This AA phase is about conditioning joints for the next round of heavier weights in the next phase of strength conditioning. Core stability and hip mobility Mobility movements help keep soft tissues, joints and tendons from getting too tight. As we increase the volume and intensity of our sport, the soft tissue in our legs stiffens. This is a positive training effect, but the stiffness can go too far and may lead to injury. As a result, getting a start of mobility  in the person to maintain thought the other training phases. While the research is inconclusive on the value of flexibility in preventing injury, I certainly find that when I consistently work on my mobility, I feel better while training and have fewer injuries. Core stability is about holding your trunk (core and hips) stable while you move your arms and legs. The more stable you can hold your trunk while your arms and legs are doing their thing, the more efficient you’ll be. Most research indicates that a weak core is a leading cause of injury. Gaining this important stability is easy and requires just a few exercises. There seem to be as many trunk stability exercises as there are runners. Again, find ones that challenge you and that you enjoy doing. You’re more likely to stick to them. Then, as you get into your injury-proofing routine, you can advance the exercises. One note: The growing body of evidence points to the hips as a primary cause of running ailments. It is critically important that runners strengthen their hips. The more injury prone you are, the more you need to work on hip strength and mobility.       Video to develop skills and drills Get a baseline of your swim, bike and run via video, add stills and drills for each sport then video yourself at the preparation phase for comparsion. Everyone can benefit from assessment of their sport with video and cleaning up their weaknesses. Better form may also hold off fatigue in training and racing. You can find dozens of drills to improve your form on youtube. I recommend seeking local expertise to work with you on form and assist and monitor you doing the drills so you know you are doing them correctly. Adapt and Repeat If a person wants to improve a skill, for the most part, he or she needs to repeat the task to gain fitness and progression onto the next skill. As your start to build your base, continue to implanted and maintain the movements and skills you adapt meting in the preparation phase

Breaking Down a Training Plan: The Taper

Breaking down the 5 steps when creating a training plan.    When developing a training plan I block off 10-21 days from an athletes A race date to taper. For a Sprint and Olympic Distance Triathlon, a taper is generally 10 days, for a 70.3, 14 days, and for an ironman, 2 days long. It is important to note, a taper is gradual reduction of training volume and intensity over a period of time, not just a few days of rest. Some people think if they rest a couple days before their race, that is a taper. Adding some more recovery or off days the week before a race is what I refer to a rest week, not a taper. Below is an example of a 14 day reduction in volume and intensity assuming your peak volume happens 2 weeks, day 14 and day 15, from your A event
  1. Maintain your schedule. If you normally swim on Wednesdays and Fridays, run on Tuesdays, Thursday and Sunday and bike T/Th and Saturdays, then continue that schedule
  2. Reduce volume on days 9-13 by 25%  and maintain “like intensity”.
  3. Days 8-3, continue to reduce volume another 25%. For example if your longest bike and run on day 14 and 15 was 4 hours and 2 hours respectively, day 8 ride 2 hours on and day 7 and run 1 hour.
  4. Transition to a strength training maintenance program if you have not done so already in the build phase, keep it to one day a week.
  5. Take naps and go to bed at the time you plan to go to bed the day before the race
  6. Tapering  is not the time to cut out nutrients in hopes of losing weight. Continue to eat nutrient dense foods with healthy fats, carbs and protein at all meals. Reduce portions slightly, not too much, since your body still needs those nutrients to repair from the heavy workload before taper started.
  7. On day 6-3 continue to reduce overall volume while maintaining  intensity at the same levels you’ve been training. For example, If 12 days out you ran 6X800s at the track, 5 days out run 6X 400s at the track. If 11 days you you did 5X 5 minute threshold pace on the bike, 4 days out bike 5X 2.5 minutes at threshold pace.
  8. If you plan to get a massage I recommend getting on no less than 4 days out from your event.
  9. Review your race plan outline
  10. Days 3 is meant to be a short workout just to keep the body lose, Review your training to remind yourself you are physically ready.
  11. Day 2 is complete rest day, stay off your feet
  12. Day before the race keep body loose with a 20 minute bike, 10 minute run, 10 minute swim.
  13. Race Day: Race it Like you trained it.
I look forward to taper time as it motivates to to training smart during the build phase of my plan. I love to spend extra time sleeping and napping cause I know how much my body and mind respond to the extra rest. I love fueling my body nutrient dense meals and filling up my glycogen stores to have race day. If you have a question you want featured on the Endurance Hour podcast, email us at endurancehour@gmail.com or  send us a voicemail. Record it HERE from your cellphone. 

t2coaching F.A.Q about the triathlon programs

General Questions I am often asked from athletes: How do you communicate the training? I use training peaks to load your program. Plus I respond to text and email daily, unless I notify you I am racing or out of service. Phone call set up by appointment. Frequency of contact? email and texting whenever, phone calls set up with advance notice How do you track progress (metrics) and are they important in your planning (watts, HR, pace, etc). Athletes upload their Garmin or Timex and me analysis whatever they train with, power, heart rate, pace, RPE, the more detailed training log the better. Is a training plan tailored to me – personally, specifically, uniquely. I do not have generic plans, they are trailed to each athlete based on goals, experience, strengths, and weaknesses. How do you analyze technique, mainly in the water? I have athletes who are not local send me a video of them swimming, above and underwater if possible. That helps me prescribe drills and skills How do you determine training intensity? The athlete starts with a series of a swim, bike and run test wearing their power and heart rate monitor. Based on the average HR for those tests, I can determine specific training zones. s a training plan tailored to me – personally, specifically, uniquely. I do not have generic plans, they are trailed to each athlete based on goals, experience, strengths, and weaknesses. Cost? prices can be found here. If you want to move forward and chat on the phone let me know.

Recovery from an Injury is Similar to Training

One month ago, I realized I wouldn’t be able to run for some time after feeling a pop in my Patella and a fracture was confirmed by an X-ray. Nine days later, I underwent surgery to begin the healing process. Although I am expected to return to normal activity in 12 weeks, I understand that my definition of normal may not be the same as before. I am willing to wait until my knee is fully healed and my quad is back to full strength before returning to my usual activities. While I am unsure what my running future will look like, I am willing to adapt to any outcome. Despite this major injury, I have remained relatively calm and mentally stable. I have let go of what happened and instead focused on what I can do to give myself the best chance of running in the future. My approach to recovery follows the same principles I use in training: understanding the intent of therapy, developing self-awareness, maintaining consistency with physical therapy movements, and learning from failure, inability to achieve the short term objective. Achieving success in recovery requires commitment and a plan. It is essential to set realistic goals, track progress, and strike a balance between challenging oneself and not pushing beyond one’s limits. Due to my lack of activity, and needing a higher level of protein to repair my broken bone, I am monitoring my nutrition and doing mobility and core movements to avoid more injury. During my first PT appointment, my PT asked me what my goal was during and after therapy. I liked her already!  As a Coach, I understand the importance when working with someone new, taking the time to understand their motivations and intentions is crucial to establishing a successful working relationship. By setting clear expectations and goals from the beginning, you can establish a pattern for how you will work together and stay on track towards achieving your desired outcome. I was training to run a 50k at Fort Mountain State Park on April 21st and another in May with the thought of running, Run Rabbit Run 100 miler in Steamboat to celebrate 10 years since I ran Run Rabbit Run, my first 100 miler in 2013. However, my current focus is on the process of healing. Today’s goal was to bend my knee at 45 degrees, which was a major victory since I was able to do it on my own. Recovery is similar to a training plan; you work backward from the ultimate goal and set objectives. The objective over the next three weeks is progressing to 90 degrees, which is a step to weight-bearing, then walking again. By completing a full recovery, I will be able to achieve my athletic goals. While I am uncertain about achieving my Ultra Run events, I know that if I focus on the steps in recovery, I will have that option in the future. What progress have you made recently? Comment below and share in our t2Endurance Facebook Group.

Anticipating How to Run After Biking “Brick Runs”

When I started triathlons I never did brick runs, running immediately after biking, in training. I did race frequently the second of training so reflecting back on that, I suppose those weekend sprint distance races were by “brick” workouts. Brick workouts, running after the bike, will bring a different experience, so it is important to include as a regular part of your training plan. Finding it difficult to run off the bike has been documented. A recent French study found that “70% of elite triathletes ran up to 10% slower in the first 500-1000m of the run leg. Another study showed that transition-phase running is marked by greater oxygen consumption and higher breathing and heart rates” Running economy is measurably lower after riding, that is why it feels tougher to run after biking then to run on fresh legs.  Incorporating efficient running technique by adding  skills and drills focused on cadence, strength, endurance and speed into your regular weekly training plan will help you run more economically after biking Factors that affect can present some fatigue and challenges when you make the transition from riding to running. Over time, with practice you will build fitness and strategies so the “brick” is efficient. intensity and duration of your ride
  • Your bike intensity and duration
  • Your nutrition (both hydration and calorie intake)
  • The weather
  • Terrain
Duration and intensity while riding will deplete your legs of muscle – hence the feeling of heaviness and unresponsiveness. Intaking calories and hydration can off set how soon your legs become glycogen depleted and dehydration taking its toll Although biking and running involve large lower body muscles, different movement patterns engage different muscles in different ways, which requires a redistribution of blood from one set of muscles to another.  Riding on hilly terrain, increases biking intensity as well as a variety of muscle pattern recruitment compared to riding on a flatter course as well as running hills or flat. Riding into a head wind can also increase intensity as well as mental anxiety to fatigue your muscles compared to riding with a tail wind, so average speed is not the determining factor with regards to training intensity. How to maximize your run off the bike performance
  • Practice weekly. Vary your workout distance and be sure to add some race specific intensity. Whether you decide to do a longer brick, 25 plus mile bike and 5k plus s mile run – or a shorter ‘transition run’ – a full bike session followed by a short run (10 minutes, you are conditioning your muscles and your nervous system to cope better with the bike-run transition. Whatever your level of ability, practicing the transition will make a huge difference.
  • Lighten the gears slightly as you get towards the end of the bike leg. Give your legs a chance to recover before you have to run – you can save a little energy and gain some ‘fresh legs’ without making major sacrifices of time.
  • Minimize glycogen depletion and dehydration by eating a meal within 2 hours of your training time and to eat and drink sufficiently on the bike. Have a clear plan and know how many grams and ounces of liquid (water, electrolyte mix with or without calories)  you need to consume to set yourself up for the run. Drink about about 6 ounces every 15 minutes and intake 40-60 grams of carbohydrate per hour depending on your size and how long you are riding for.
  • Give yourself permission to take the first 5-10 minutes to allow your body and mind to ease into the run, find your rhythm’. The priority should first be into getting into a a  groove before you focus on your competition.
  • ALWAYS, ALWAYS, ALWAYS be mindful of form as your begin your run off the bike.
  • Run within your fitness and training level. Use your heart rate and gps as tools to help gauge your rate of perceived effort in training and be mindful of RPE while racing since HR and Pace can be effected by fatigue and nutrion, ofter running via RPE while monitoring other variables will lead to a PR.
Running off the bike can be tough, even for someone like me who has been racing for 25 years.  If you can take a difficulty and turn it into an opportunity, then you’re closer to success. And that’s not just true for triathlon, that’s true for life!

t2coaching Hill Workout Tips

I often hear from athletes “should I sign up for that race, it is really hilly”. Oh, “since my A event is not hilly, do you think I should do that hilly course to prepare?” I often hear an excuse, it was a hilly course so “I did not preform well” or by discussing the nature of the hills, they are setting themselves up for a poor performance. Many runners avoid regular hill training or racing hill courses because, well, it’s hard. Depending on the grade of the hill, lactic acid builds quickly, our heart rate shoots up, several muscles fire all at once, and we tire quickly. Unfortunately, the only way to become proficient at ascending and descending hills is to run on hills. No doubt that running uphill and down puts and added stress on your muscles and can increase your risk for injury, if you train with the hilly course in mind you can overcome and mental and physical struggle with running hills. I used to be intimidated by hills. More so on the bike then on the run. Running uphill is my strength, running downhill not so much. Riding uphill makes me stronger on the flats. After 24 years of competing in triathlon I have never won a race riding uphill.  I am not an fast downhill rider either. In light of the upcoming Horsetooth Half Marathon this weekend I wanted to focus on running hills.  I used to shy aware from hills and internally admitted, hills “are too hard!” Now I thrive on any thing that seems “hard” including biking and running hilly courses. I prefer uphill running more then downhill running, unfortunately when you run you, you must run down! Best advice I give to newbies to to tackle each hill in training, commit to never walking up hill and you will continue to get stronger both mentally and physically. Note if you do walk uphill is it cause your muscles or lungs are fatigued? Benefits of Running/Riding Hills-reasons you should still train on a hilly course, despite your event being a flat course.
  • Hills will increase the intensity of your workout. When you increase the intensity of your workouts you expend more calories / unit of time.
  • Hills will strengthen your legs (especially your quads, butt and calves). Strength precedes speed, so hills incorporated into a progressive training program will lead to more efficient and faster running
  • Hills will strengthen your lungs and heart
  • Hills Provide some variety to a traditional routine
Tips while running uphill 
  • Start with a warm-up to gradually get your legs loose and heart rate elevated (5-15 minutes)
  • If you are new to hill training, progress gradually. View sample workouts below. It can be quite challenging on your body when you’re not used to it. Start with 2-4 repeats of 1-2 minutes and just run, don’t worry about pace
  • When running uphill, shorten your stride and pump your arms more to help you attack the hill
  • Mix up the grade and length of each hill you run on for maximum results with fitness, strength and speed.
  • Always Finish any hill workout with easy jog or spin to flush the legs and cool-down.
  • Stretching – focus on the calves, quads, hamstrings, glutes and lowback.
Do you live in  flat terrain? you can still get all the benefits above on the treadmill Tips when simulating uphill runs on the treadmill
  • Listen to your body: Since fitness levels and running abilities vary greatly, it’s difficult to give an exact workout prescription (ie. run at a speed of 6.0 mph at 8% incline for 15 minutes). So choose a grade and pace that challenges you without causing exhaustion or muscle/joint strain.
  • Try increasing the incline to 4-8% grade for 1-2 minutes at a speed that challenges you, but not a speed you can’t maintain, better to start slower and monitor your intensity via heart rate, followed by 1-2 minutes at 0% to simulate the downhill effect.
  • For reference, 0% grade is exactly flat.
  • A 2% grade does not seem very steep but it’s enough to make you feel a bit slow and fatigued and it like running outside.
  • Most highway off-ramps are 4-percent grade.
  • A 6% grade is enough to dramatically reduce your speed.
  • A 10% grade would be really steep; steeper than most of the usual hills any of us who live outside of mountainous areas would run into.
Sample Workouts This are examples for Favorite Fort Collins Running Route Course Profiles Hilly Loop or out and back. Hilly Long Runs These runs are incredibly valuable, especially if your race is on a hillier course. These workouts need to be frequent during your build stages after you’ve built a solid injury-free base. Mixed hilly runs can be attacked in several different ways: Map out a course that includes a few, 3-5, hills of various length and grade.  Your breathing will be moderately heavy but you won’t feel completely out of breath. As you approach the first hill, start to shorten your stride, increase your turnover and pump your arms move. During the hill segment, your breathing will get heavier and it will be harder to catch your breath. Short Hills: The focus of these short workouts is on speed, power and anaerobic energy recruitment. The grade should be relatively steep. Because you will be working extremely hard for a short period of time, your recovery time will be longer, one to two minutes, in order to bring breathing and heart rate back to normal. These short repeats are great to do during your base building phase, too, as they will help you with longer rides/runs in the future. For running, find a short hill of 100 to 200 meters in length, 4-10% grade, can be a golf course or park  that you will run multiple times (these hills tend to be a bit steeper and harder and your effort shoulder increase). Same for cycling short and steep hill that will take you 30-60 seconds to power up. Your intensity, rate of perceived effort, should approach 8 to 9 out of 10. It will feel like the pace is out of your comfort zone and that you won’t be able to hold this intensity for very long. Push the pace until you reach the top of the hill. Turn around and walk easily, or coast if you are cycling, down the other side at about an RPE of 5. Repeat this 4-8x. Remember to cool-down with a 5 -15 minute at an easy pace. This workout from start to finish including warmup and cool down should not take very long. For running about 30 minutes, cycling about an hour or less. Long and Gradual When you are riding or running long hill climbs, the focus is more on aerobic energy recruitment and less about power and speed. These hills climbs can take up to three minutes, so it’s important to start slower and manage your pacing throughout the climb. Your perceived exertion will be approximately 6-8 on a scale of one to 10. Depending on the grade, your heart rate may exteed your aerobic zone,  think about running form or pedal stroke. Grade is gradual 6-10% so pace is slower, since length is longer, find one that takes 5-10 minutes or longer to ascend.   Hill workouts can be really taxing and consequently should only be done once or twice per week pending your fitness and experience. In addition to uphill form, it’s equally vital to practice running downhill with proper form, relaxed with a forward lean. Try not to let your legs get too far out front as it can be jarring and “put on the brakes” instead of acceleration. Make sure you’ve built up a solid mileage base before adding in too many hill workouts. Whether you’re building strength or going for a personal best, hill training will complete a well-rounded training regime and help you to become a more complete athlete.

Aqua Jogging Not just for Rehabbing injuries

Aqua jogging not just for rehabbing! I started aqua jogging when I got injuried training for my first Ironman in 1997. A friend of mine introduced me to it in deep water. Now, I aqua jog a few times a week for injury prevention. I incorporate run drills and listen to podcasts and visualize where I would be running if I as outside. And, I never heard of anyone getting injured from aqua-jogging Wear Old pair of running shoes Less impact of running on hard surface Drills High knees, butt kicks, A and B skip drills with a forward lean Form focused that you dont get when you cross train on the elliptical or step mill, which are great cross training activities for cardio. Mimic the workout that you would be doing on land with duration, intensity, cadence, knee drive, foot strike as your run on deep or shallower water If you are not comfortable in the water and it is deep, wear a flotation or tether device helps put you in forward lean position Cons of using it as a cross trianing for running is that heart rate does not get as high which depends on the individual fitness, so I still like to use the elliptical or step mill Aqua jogging 5-10 minute warm up, with drills and accelerations then break it up into intervals. Listening to audio or podcast

t2coaching: Running Injury

Given the high rate of running related injury in endurance running, I was always battling an injury the first 15 years of my triathlon journey. I attributed that to training load, to much volume or too much intensity or both and under recovery or nutrition. Now I include  injury-preventing exercises, core and mobility based on a functional movement screening with my PT and recommend it be included in athletes training plans. Movements include sport-specific strengthening exercises using functional movement patterns to reduce the likelihood of problems. The more common running injury causes and methods of prevention are describe below. I never diagnosis and injury with and athlete. Though my shared experience with what the athlete may be dealing with, we communicate and then they seek treatment from a local qualified specialist. Iliotibial Band (ITB) Syndrome I  used to have a tight ITB band from cycling. I have a leg length discrepancy so that does not help and I struggled to get my Triathlon Bike fit dialed it.  ITB is  pain on the lateral side of the leg just below the knee and tight night along the Iliotibial band. The discomfort starts 10-15 minutes into a run and stops when finished.  Prevention includes strengthen the core and glute muscles (gluteus minimus, glute medius, gluteus maximus) and external hip rotators  plus improve stability during stance phase of running and reduce the stress on the ITB. Plantar Fasciitis I developed PF in 1999 while training for my 2nd Ironman in Florida. Still new to Ironman training, I was also struggling with IT band syndrome before developing PF.  This was close to the most painful injury I have had. The plantar fascia is a band of connective tissue that runs along the bottom of the foot, from the heel bone to the metatarsals.  Pain along the bottom of the heel that feels worse in the morning upon waking. It is most painful when pushing off while running. Causes can be tight calf muscles that pull on the Achilles, which pulls on the calcaneus, which pulls on the plantar fascia. Like most injuries a strong core, posterier kinetic chain, helps prevent it. Prevention begins by strengthening the glute muscles, hip flexors, quadriceps and core. Barefoot walking, stride and cadence running drills  can help strengthen the muscles in the foot.  Still probably the most painful injury I have had to date. Achilles and Tibialis Tendinitis Too much training load will inflame my Posterior Tibialis tendonitis and my Achilles tendonitis flares up. The Achilles tendon is located at the back of the lower part of the leg, directly above the heel. Just like the tight calfs can cause Plantar Fasciitis, a  lack of calf-muscle strength and tightness, improper recovery between workouts, running on your toes, too much volume or intensity too soon. Besides a progressive training plan with slow increases in volume and intensity, prevention includes running form assessment, stride and cadence drills, strengthen and stretching the calves and use of a form roller. After Ironman Texas 2017, I went to an A.R.T Doctor, had a full strength and treadmill running form assessment. I understand my imbalances and found some treatment and relief Runner’s Knee I am fortunate to have never experience pain or aching beneath the kneecap. When the patella repeatedly moves out of alignment during running, the articular cartilage beneath it becomes irritated. Tightness or weakness in the quadriceps and knee extension weakness are associated with patello-femoral pain syndrome. Running gait, overpronation, has also been known to increase stress along the inside of the patella.Coaches can evaluate an athlete’s gait to check for overpronation or stride issues and integrate drills to address these issues during the athlete’s training sessions.Weak glute and core muscles can cause an athlete’s hip to drop while running, causing the patellae to fall out of alignment. The best way to prevent runner’s knee is with a strong and healthy kinetic chain. Athletes should work on strengthening the muscles in their quadriceps, hips, glutes, and core during training, use a foam roller to loosen tight quadriceps. Shin Splints I only experience shin splits when I ran track in high school. My heart and lungs were always in shape from swimming, my leg tendons, bones and ligaments were not caught up yet to run and I quickly got pain in the front of the lower part of the leg. Both muscular and bone-related shin pain can cause “shin splints”. If athletes feel pain when pressing on the inside of their shinbone after running, it may be a sign of posterior medial tibial stress syndrome. Prevention includes running form assessment, gait analysis and running shoes. Prevention involves use of a foam roller on shins and calves daily. As with many injuries, a good strategy for prevention is to follow the 10% rule and adding hip and core strengthening exercises, decreasing stride length and increasing cadence. Piriformis Syndrome Since entering the 40-44 age group, I have noticed tight Piriformis. It is know at a “Pain in the Butt”, pain deep within their glutes on one side, mostly when seated. The piriformis is a small muscle that lies deep within the buttocks and right next to the sciatic nerve. Its role in running is to help stabilize the hip as the athlete lands during gait. When the piriformis becomes too tight, it squeezes the sciatic nerve, causing pain. Tightness in the piriformis is caused by weakness in one or more of the muscles in the kinetic chain. Overpronation can also be an issue. One of the jobs of the piriformis is to help prevent the knee from rotating too much. Too much pronation creates too much rotation and tension along the piriformis.There are a variety of exercises that athletes can perform to help prevent piriformis syndrome. These include standing resistance-band hip abduction, lateral band walks, plyometric jump squats, planks and fire hydrant’s. Athletes can also use a foam roller every day to keep muscles loose and work out any tight spots. Strained/Pulled Hamstring There are two common types of hamstring strains or pulls that can result from running. If the athlete experiences pain near the glutes that’s especially uncomfortable during the terminal stance phase of running, the injury may be a proximal hamstring strain. A sudden, sharp pain closer to the knee that occurs during a run and forces the athlete to stop is due to a pull or strain in the middle third of the hamstring. The pain athletes experience when loading their hamstrings may be mild or excruciating, depending on the severity of the strain. This injury occurs when athletes stretch their hamstring muscles too far, when athletes put a sudden and heavy load on their hamstrings, or a combination of both. If the loaded hamstring is weak or fatigued, or both, the result may be a strain or pull. Coaches should prescribe exercises that strengthen the glutes, hip flexors, quads, core and hamstrings to prevent strains and tears. Exercises to include in strength and conditioning sessions include the hip raise, the reverse hip raise, the walking lunge, planks and the dumbbell step-up. Interval training, hill running, and stair climbing are other excellent activities for building hamstring strength. As with other injuries, the use of a foam roller is recommended to prevent muscle tightness.

What injuries had you struggled with and how have you treated them?

Join the chatter in our t2endurance Facebook group  

Running Training lingo

Running workouts during a “typical” training week can be defined as intensity (intervals/track or fartlek), long, or recovery/technique runs. All of these runs follow a simple workout structure, include a warm-up into the main portion of the run, followed by a cool-down.

Track Workouts / Fartlek Running

Higher intensity runs can be performed as either track workouts or “fartlek” (literally- speedplay) runs. Fartlek running can be as structured or unstructured as the individual would like. A structured fartlek run might be done on a favorite loop and would include a warm-up followed by a main set, and cool down. Structured example: WU: 10-15’ MS: 5 x 2’ @ zone 3, RI: 1’ recovery @zone 1,  CD: 10-15’. An unstructured fartlek run might include the same warm up and cool down with an assortment of pick-ups within the middle 15 minutes. You could pick objects in the distance (light poles, telephone poles, parked cars, trees, small dogs), hills, flats, or downhills as the distances to “pick it up”.

A typical track workout:

Warmup 10-15 minutes, perform two to three laps of ins-and-outs, straights-and-turns, or whatever you want to call them. The purpose of these is to get your body up to the pace you want to run your intervals with a minimum of shock to your system. A common session would be MS:  8 x 400m  RI: 200m recovery jog in between. As the season progresses you will, hopefully, be able to increase the pace of the recovery without hindering the pace of the 400s. After the last 400 CD: 10-15’ The main points to remember when doing a track workout is to keep the session moving (make it a continuous run from warm-up to strides to the main set to the cool down!). Stopping for more than a couple of minutes allows your muscles to cool down thus increasing your chances of injury when you get going again.

Strides / Accelerations and Form Drills

Many runners complain of their lack of leg speed and general poor efficiency in their running mechanics. Although one’s bio-mechanics are inherited to a certain extent, there are some things that can be done to improve both speed and efficiency. “Strides/accelerations and drills” are best done in the beginning or end of an average distance, moderately paced run. Many athletes do these as part of the warm-up or cool down for a track workout and, if this is the only opportunity to do them, then one must take advantage of the occasion. Since intensity and longer days provide enough specific stress by themselves, it is more useful to do strides and drills on days when one’s legs are warmed up (at the end of a run) but the necessary focus and energy can be given to performing these exercises optimally. During a “normal” moderately paced run, athletes fall into their customary stride length and rate. Over time, the motor neurons that innervate the running muscles (and the muscles themselves) become entrenched in this one rate / range pattern. Considering the total time spent running at this pace, it’s easy to see why “changing gears” becomes difficult for many athletes. One’s natural leg speed never gets trained to its potential and, subsequently, diminishes. Even when doing intervals as short as 400 meters, one’s stride rate isn’t close to one’s pure speed potential. Strides and drills enable an athlete to lengthen their normal stride and fire the motor neurons involved in running at a much faster rate than they are accustomed to. With consistent practice, the pure speed component that lies latent within everyone becomes trained and made available for use in running at all paces. Find a 10 to 140 meter stretch of nice grass (a football field at the local high-school is great). If this stretch is on a gradual slope, so much the better. The “workout” goes as follows: · 2 x 40-80 steps of high knees · 2 x 40-80 steps of butt kicks · 2 x 25-50 steps of skipping · 4-10 x 100-120 meter strides / accelerations (the first 2-5 for form and the second 2-5 for leg speed) All of the drills should be performed on one’s forefoot and are done at a high rate (quick feet!).

Running Drills-Refer to Newton Running Form Friday 

High Knees This drill is done just how it sounds. Maintaining a normal running posture, you exaggerate the knee lift portion of your stride. Arm action is also slightly exaggerated. The knee comes up to, but not beyond, the height of the hip. Butt Kicks This drill emphasizes the recovery or heel to butt portion of the stride. There is no knee lift in this drill but as the heel comes up to one’s rear, the knee will naturally move forward. One is simply maintaining normal posture and slightly exaggerated arm action while flicking the heels up to the butt. The biggest mistake one tends to make is in leaning forward too far. Strive to maintain normal posture and keep your feet underneath your hips. Skipping This is the same thing but you are driving your knee up and extending the rear leg in an exaggerated full stride. You skip on the extended leg and do the same thing on the other side continuing down the field in front of God and everybody. Again arms are slightly exaggerated and must be synchronized properly (right arm-left leg, left leg-right arm).

Common mistakes include:

· Incorrect synchronization of arms and legs. Remember that when your left knee is up, your right arm is forward and up (just like when you run). Don’t forget your arms. · Too much bouncing up and down. Make an effort to limit bouncing up and down when doing these drills. It is possible to limit vertical oscillation (bouncing) by focusing on lifting the foot off of the ground (not placing the foot on the ground). Think about limiting the amount of time the foot spends on the ground while keeping one’s body (hips up to head) in one plane. · An overly upright-leaning back posture (knees coming up higher than the hips). Posture should remain as though you were running (straight up to slight forward · lean, depending on who you are, with eyes looking about 10-15 meters ahead) normally. Note: the purpose of these drills is to exaggerate the different stages of a running stride. You are not interested in getting down the field at a fast pace but focused on proper execution of the drill.

Tips for Running Hills

Many runners avoid regular hill training or racing hill courses because, well, it’s hard. Depending on the grade of the hill, lactic acid builds quickly, our heart rate shoots up, several muscles fire all at once, and we tire quickly. Unfortunately, the only way to become proficient at ascending and descending hills is to run on hills. I used to be intimidated by hills. More so on the bike then on the run. Running uphill is my strength, running downhill not so much. Riding uphill makes me stronger on the flats. I prefer uphill running more then downhill running, unfortunately when you run you, you must run down! Best advice I give to newbies to to tackle each hill in training, commit to never walking up hill and you will continue to get stronger both mentally and physically. Note if you do walk uphill is it cause your muscles or lungs are fatigued? Reasons you should train on a hilly course, even if your event is a flat course.
  • Hills will increase the intensity of your workout. When you increase the intensity of your workouts you expend more calories / unit of time.
  • Hills will strengthen your legs (especially your quads, butt and calves). Strength precedes speed, so hills incorporated into a progressive training program will lead to more efficient and faster running
  • Hills will strengthen your lungs and heart
  • Hills Provide some variety to a traditional routine
Tips while running uphill 
  • Start with a warm-up to gradually get your legs loose and heart rate elevated (5-15 minutes)
  • If you are new to hill training, progress gradually. View sample workouts below. It can be quite challenging on your body when you’re not used to it. Start with 2-4 repeats of 1-2 minutes and just run, don’t worry about pace
  • When running uphill, shorten your stride and pump your arms more to help you attack the hill
  • Mix up the grade and length of each hill you run on for maximum results with fitness, strength, and speed.
  • Always Finish any hill workout with an easy jog or spin to flush the legs and cool-down.
  • Stretching – focus on the calves, quads, hamstrings, glutes, and low back.
Do you live in  flat terrain? You can still get all the benefits above on the treadmill Tips when simulating uphill runs on the treadmill
  • Listen to your body: Since fitness levels and running abilities vary greatly, it’s difficult to give an exact workout prescription (ie. run at a speed of 6.0 mph at 8% incline for 15 minutes). So choose a grade and pace that challenges you without causing exhaustion or muscle/joint strain.
  • Try increasing the incline to 4-8% grade for 1-2 minutes at a speed that challenges you, but not a speed you can’t maintain, better to start slower and monitor your intensity via heart rate, followed by 1-2 minutes at 0% to simulate the downhill effect.
  • For reference, 0% grade is exactly flat.
  • A 2% grade does not seem very steep but it’s enough to make you feel a bit slow and fatigued and it like running outside.
  • Most highway off-ramps are 4-percent grade.
  • A 6% grade is enough to dramatically reduce your speed.
  • A 10% grade would be really steep; steeper than most of the usual hills any of us who live outside of mountainous areas would run into.
Hill workouts can be really taxing and consequently should only be done once or twice per week pending your fitness and experience. In addition to uphill form, it’s equally vital to practice running downhill with proper form, relaxed with a forward lean. Try not to let your legs get too far out front as it can be jarring and “put on the brakes” instead of acceleration. Make sure you’ve built up a solid mileage base before adding in too many hill workouts. Whether you’re building strength or going for a personal best, hill training will complete a well-rounded training regime and help you to become a more complete athlete.

Running Made Easy

T2Coaching: The Science of Marathon Running

Joe Hanson, Ph.D. is a curious group of atoms in a curious universe, and he’s here to tell you how it all works. We officially live in the future, and everyone should know that it’s okay to be smart! And today is all about the Science of Marathon Running. Dr. Hanson says, even though we can’t and never will be able to outrun cheetahs or antelope, humans are uniquely adapted for long distance running. The question is, what does science have to say about marathon running? To find out, Dr. Hanson decided to run one! Here’s what he found out about the science of long distance running.   If that video motivated you, maybe it’s time to get on a training plan!?  If so, you’re going to LOVE “Marathon Training Made Easy“.  Watch this short video to learn more. For more on the science and evolution of distance running and cellular physiology, check out Tim Noakes’ Lore of Running, 4th Edition and/or Christopher McDougall’s Born to Run.

Five Technique Tips to Become a More Efficient Runner

An often-overlooked area of focus for new triathletes is running technique. Most of us, whether new or experienced, often put a large amount of emphasis on swimming technique and either don’t know or neglect to work on proper form. Why focus on run mechanics? Because proper form: • is a critical part of running performance and injury prevention. • will improve your economy and efficiency. • will allow you to run easier, faster and farther. Poor form will slow you down, decrease your efficiency and can even be the cause of many injuries. Some run low to the ground with little knee lift, while others run powerfully, with high knee lift and a strong kick. Some athletes run with a slight forward lean and some run very upright. Despite the large variety in specific running forms, there are a number of elements that are common to successful running styles, even among elite triathletes/runners. After running for more than 25 years, I am still continually making small adjustments to my form. Like swim technique, running technique is a learned skill. The main areas of focus when you are running are foot strike, posture, rate, stride and arm swing. Foot strike One of the most important phases of running mechanics is the position of your foot when it lands on the ground. When you foot strikes the ground, you can land in a variety of ways – toes first, ball of the foot first, flat footed or heel first.
  • Heel strikers often over stride when reaching out in front of their body. Landing heel first is like putting on the brakes with each step, as if you are trying to drive your car while pressing on both the gas and brake pedals at the same time. This wastes energy and makes your running harder than it should be.In addition to being inefficient, heel striking can cause of a long list of injuries. When you land on your heel, your leg is straight and extended in front of your body. The combination of a straight leg and a hard heel landing transfers a lot of impact through your heel and up through your knee to your hip. The excessive stress that a heel strike places on your joints can cause pain and injury to your hips, knee, ankle and foot. Shin splints (pain of the front of your lower legs) is one example of a common running injury that can be caused by heel striking and over striding.
  • Toe strikers landings results in a lot of up and down motion in your stride and puts a lot of stress on the calf muscles. Toe running is more appropriate for sprinting than for distance running
  • Mid-foot strikers. The most-efficient foot strike is one in which your foot lands directly under your hips or your center of gravity. This is when you land on the ball of your foot or flat footed. Doing some barefoot walking and running will help strengthen the ankle and foot muscles that stabilize your lower leg. Doing exercises and drills on an unstable surface such as a wobble board or stabilization pads can also help with this problem.
Where toe strikers tend to leap or bound forward and push off vigorously, and heel strikers reach out and almost pull themselves forward, a mid foot strike with a high cadence and a forward lean propels you in a subtle, forward falling way. You land on your foot in the way it and your body were built to move, and efficiently use and conserve your energy and momentum The Newton Running website is a great resource of information on running form. The offer video tips every Friday and run clinics Saturday mornings at their store in Boulder. Posture Within the last couple of years, I was told I run with a very upright and straight posture. I know the importance of a forward lean and had no idea I was still running upright. I attribute my posture to years of running with my dogs, who often pull me forward, which causes me to lean back to keep them closer to me. I often have my husband observe me run if I am struggling with injures or when running becomes more difficult and less enjoyable. The most efficient posture is one that is relaxed, with a slight forward lean. Your chest should be out and your shoulders back. A backward lean will cause you to over stride and land heavily on your heel, stressing your knees, hips and back. Keep your hips pressed forward and your butt tucked in. Visualize standing face first against a wall. Press your hips forward so that the bones of your hip touches the wall. Running with your hips forward will help you lift your knee higher with less effort. Concentrate on keeping your shoulders, jaw, torso and legs nice and loose. Keep your head and chin up, don’t tuck your chin and look down. Keep your focus forward, toward the horizon. Stride Length and Rate I covered the problem of over striding earlier. When you reach out in front of your body with your foot and land heavily on your heel, you get the braking action that I mentioned earlier. In a proper stride, your foot should land directly under your body with every step. You should run at a rate of about 170-180 foot strikes a minute before you focus on your lengthening your stride. Do not sacrifice quick rate for a longer stride. The quicker rate will allow you to land mid foot, underneath your center of mass. Arm position The main purpose of an arm swing is to provide balance and coordination with the legs. Arms should be loose and relaxed, close to the body. Relax your shoulders and down through your back – no shrugging! Your wrists and hands should be loose, not clenched. Keep your arm swing compact and your elbows at about a 90 degree angle. Drive your elbow backwards with each stride. Avoid “robot arms” where you drive your arms forward causing over striding. During the arm swing, your hands should not travel above your chest or behind the midline of your body. Avoid crossing your hand in front of your body, as any lateral movement across your body robs you of forward momentum. Putting It All Together So what does an efficient running stride look like? Just put all the pieces together. Head up, your body is loose and relaxed from head to toe, with a slight forward lean. Shoulders are back, chest is out/forward. Arms are close in to your body, elbows are at about a 90-degree angle. Tuck your glutes underneath you and press your hips slightly forward. Drive your knees forward and up, and follow through with your foot/leg as you finish each stride. Land mid foot, and you heel will make contact with the ground. Keep your cadence high. Easier said than done, right? Like any complex movement, it can be difficult to pay attention to everything at once. Through a proper warm up, some specific exercises to focus on specific parts of the movement, and staying focused as you run, you can put the pieces of a fast, efficient, comfortable running technique together. The most common form flaw I observe in runners I’ve coached is over striding and running with a cadence less then 170 foot strikes a minute, so those are the first things I focus on when evaluating someone’s run technique. Want a FREE Run Analysis? Have a friend or family member video you with your smart phone you running on the treadmill or 4 minutes, holding phone horizonally from 3 angles. Total body from the side, front and back and focused on foot strike from side, front and back angle. Check out our Half Marathon and Marathon Training Plans Made Easy  

Half Marathon Training Made Easy

You’re going to love this training plan! In addition to 12 weeks of running workouts, we also include 12 FREE INSTRUCTIONAL VIDEOS; one before every training week. That’s right!  You’ll be able to see and hear your coach explaining how each training week is organized and structured. This half marathon program goes beyond numbers on a spreadsheet. It’s a multimedia approach along with links to drills, heart rate and pace training so you know the purpose and effort of each workout.
Each week in this program, we include a mix of running, cross training as well as planned rest days. This program is meant to be flexible based on time and distance. So, before you start this program, you’ll need to be comfortable running between 10-15 miles per week with at least a 5 mile long run. The goal of this half marathon plan is to increase your weekly mileage to 20 -25 miles. Order today and join Ironman Certified Coach, 15x Ironman Finisher, 8x Kona Finisher, Wendy Mader and 5x Ironman Finisher, Dave Erickson for a professionally produced and guided 12 week multimedia training program for marathon runners.  Available as a PDF download or on Training Peaks for an additional $10 (links below):
  • Instructional videos before every training week  (3-10 minutes each)
  • Sample Run Workouts
  • Target Heart Rate Training Zone Guidelines
  • Stability, Core, and Strength Exercises
  • Race Day Training Tips & Nutrition Advice
  • PLUS 10 Bonus Videos:  Speed Work,  How To Avoid Muscle Cramps,  Aqua Jogging,  How to Avoid Overtraining,  Heart Rate, How and When to Warmup, Post Marathon Depression and more!
“I have been participating in the half marathon plan and I wanted to provide you some feedback.  I really like the progression. It has been challenging but not discouraging. I like the videos and drills to assist with running form. Also, I found it helpful to workout in zone 1-2 while doing the longer runs. That way I don’t go too hard and then not finish. The only part of the workout I don’t enjoy is track days. It is really hard for me  to get motivated to go to the track. I’m trying to embrace the rewards of the track” Amy Course Introduction Video Below
$39 –Training Peaks Download

t2coaching

I have a collaborative, athlete-centric, coaching style. We work closely together to determine the training plan, methods of communication, goals and more. Coaching is more than just a training plan. We discuss more about the differences between a A Training Plan and Coaching
Ironman Triathlon Plan vs Coaching
in the Endurance Hour Podcast.  Coaches are an athletes accountability partner. We are on your journey to better health, fitness, and sport. My role is to educate each athlete. Empowering each athlete to make decisions, to understand what the intent of the workout is so they can hold themselves accountable. I build a personalized training program with specific KEY training sessions based on the athlete’s current fitness level and supporting sessions, skills and drills and endurance to facilitate recovery and provide to the key workouts. I scale the workout time based on the athletes time availability to train. I educate each athlete with solid nutrition and recovery protocols and within the training plan, integrate strength and conditioning.   Communication is the key component to a successful athlete/coach relationship. I have benefited from have a variety of coaching and lessons learned. I prefer communication via training log comments, email. Text and facebook message is fine. If you want to chat on the phone call, we set up a call in advance “Being a great coached athlete is not about punching the clock and simply checking off workouts. Life is not a spreadsheet, and therefore, neither is training. I often giggle when an athlete reports a great week of training simply because they did every session. Effective training is that which facilitates positive physiological adaptations, so ensure you and your coach maintain a dynamic mindset when it comes” -Matt Dixon My philosophy of triathlon coaching stems from my time management skills I developed as a being an age group- collegiate swimmer and my learning the sport of triathlon on my own when I started in 1992. Along with continuing education, I apply what I learned to coach myself, born my triathlon coaching career.  Because of my struggles as a high school and collegiate swimmer, I would train but when it came to competition I flopped, I am really into the psychology of training and racing. I have been labeled a “mental band-aid” by many athletes I coach in Turkey. COMMUNICATION The better I know how you respond to your training, the better I can create the best training plan for you. My coaching services are set up to allow, encourage, and foster high levels of communication. I will frequently check in with you via email and text. Communication is a two-way street. To make the most of my coaching, I encourage you to actively keep me posted on how you are doing, and to be as honest as possible with yourself when doing so. HELPING YOU HELP YOURSELF A training plan does not make great athletes. I take pride in putting thought into your training plan, ultimately it is up to you to go out and make your goals and dreams reality. Trust that you are receiving the highest quality training program designed to maximize your performance. However, it is WHAT YOU DO with the training information and other suggestions that really count. If you receive a plan that recommends, X, Y, and Z you should do X, Y and Z unless you are too tired to do so, the conditions are too dangerous, or your schedule has changed and will not allow it. It is the EXECUTION of well-design training plans that will help you progress towards your goals. I welcome and will always use your feedback together with my knowledge and experience to create a plan that will best help you attain your goals. My role is to help you help yourself in your process as an athlete. IT’S IN THE DETAILS Pay attention to the details of your training plan. Your monthly plan is developed with a larger picture in mind. Each workout is intended to establish specific aspects of your performance potential. The details, the type, duration, and intensity of training are important. If you tell me that you feel like the workout is too easy or you are not doing enough of a particular kind of training I want to work TOGETHER with you to create the best course of action that takes you to your goals. If you are unsure why you are training a particular way, let me know and I will explain more clearly the reasons for the workout. Please ask “why” if you don’t understand something. Informing you of “why” you are training a given way empowers you to execute your training with the greatest quality you can. This will create the best results for you. If you decide on your own that the training plan is not right and slightly alter what you do, then you should know that you are not getting the most from my coaching. I recommend specific types, durations, and intensities to help you train to reach YOUR stated goals. You will be cheating yourself by not paying attention to the details of your prescribed training. Pay attention to the details and you will get the most from my coaching. HEALTH IS YOUR #1 PRIORITY There is NO way to perform at your best without optimal health. Health requires you to manage all the stressors in your life while allowing the optimal function and harmony of all your bodies systems. NO training program will foster ideal development or ideal performance if a person is stressed and unhealthy. This could be the result of a rough work situation, family life trouble, school trouble, poor nutritional habits, commute stress, or similar factors. If you want to maximize your development and performance as an athlete and make the most from my coaching, then make sure you do everything in your power to live as healthfully as possible. I make a big effort to go way above and beyond simply the training aspect of conditioning for a sport. I encourage you to do all that you can to create and continually improve your overall health. I am excited at the opportunity to work with you help you to pursue your athletic goals. Our approach to coaching is simple and honest. We design our programs based on your current level of fitness, your goals, and your needs.  Using a variety of assessment tools we gain an accurate measure to determine your starting point, health challenges, preferred activities, and personal goals. Then we design a personalized plan for your success.  And finally, we offer training and support to help keep you motivated and on track. F.A.Q If interested in t2 coaching, please fill out the Client Intake and Athlete Profile forms. Client Intake Form Athlete Profile Form
  • I use training peaks to load the details of your program in 2-week blocks and make changes when needed and update each block based on your progression and feedback.
  • I track progress (metrics) with power, HR, pace and RPE (Rate of Perceived Effort) with data you upload and subjective feedback in your training log
  • The athlete starts with a series of a swim, bike and run test wearing their power and heart rate monitor to determine specific training zones.
  • I analyze swim and run from the video you send me and prescribe drills based on your technique limiter
  • I respond to text and email. Phone call set up by appointment.
  • I will modify your plan to your specific needs along the way so you can be as successful as possible.
Monthly Online Coaching $349 / month Phone Consultation via SKYPE/ZOOM: $150 Whether you are getting started or getting serious in the sport of triathlon, it can be quite a task trying to manage three different disciplines, juggling jargon like base training, tempo runs, and lactate threshold, and for many, working a full-time job. A consultation over the phone, SKPYE, with Wendy for 60 minutes to discuss your current and future health, fitness, and sports goals. I will help you:
  • Set personal goals for the season
  • Decide which races to go for
  • Determine goals for individual disciplines
  • Create an annual training plan outline
DON’T SEE A PROGRAM FOR YOU, CONTACT ME AND I WILL HELP YOU DECIDE AND CREATE A PACKAGE TO FIT YOUR NEEDS AND WANTS

YOU CAN DO THIS, WE CAN HELP!

Sprint Triathlon Training for Beginners

100% FREE: 8 WEEK VIDEO TRAINING COURSE

YOU CAN DO THIS, WE CAN HELP!

Join Ironman Certified Coach, 19x Ironman Finisher, 9x Kona Finisher, Wendy Mader and 5x Ironman Finisher, Dave Erickson for a professionally produced and guided 8 week multimedia training program. This program includes:
  • Welcome videos before every training week
  • Weekly Swim Workout Videos
  • Detailed Swim, Bike, and Run Workouts
  • Target Heart Rate Training Zone Guidelines
  • Nutrition and Hydration Tips
  • Stability, Core, and Strength Exercises
  • Race Day Training Tips
  • Sports Medicine and Injury Prevention Q&A Videos

Why Swimming More Doesn’t Always Mean Swimming Better

You’ve probably heard it before, probably I a Facebook group of strangers that dont know you or have any expertise with swim advice “If you want to get better at swimming, just swim more.” It’s not wrong… but it’s definitely not the full story.

The Volume Trap

Many triathletes get stuck in the mindset that more yards/meters = more improvement. Swimming is a highly technical sport and if you an adult onset learner, technique is critical to progress. If you’re practicing with poor form, you’re just reinforcing bad habits. More time in the pool won’t fix a flawed stroke, it can actually make it harder to change later.

Quality Over Quantity

The real gains in swimming come from improving how you swim not just how far. What you can do now?
  • Video analysis helps you see what you can’t feel
  • Drills isolate specific areas like breathing, balance, kick, rotation, recovery, hand entry, pull
  • Prescribed training zones ensure you’re not swimming just to swim and check off the distance box
  • Frequency matters but only when paired with intention
Intention Matters When athletes come to me frustrated and stop swimming because they are not seeing progress, the first thing I look is what they’re actually doing in the water. ✅ Are you swimming with purpose? ✅ Do you know what how to fix your technique limiter? ✅ Are your workouts written with a goal in mind — or are they just filling a logbook? For most triathletes I coach, the biggest breakthroughs come from:
  • Fixing breathing rhythm and timing
  • Hand entry, learning how to set up/catch the stroke (not just pulling harder)
  • Building confidence in open water with mindset and skill, not just survival

Final Thought

If you’re swimming 2–3x/week with poor technique, swimming 5x/week won’t help much. But 2–3 purposeful, well-structured sessions will. Better doesn’t come from more. It comes from better.

All Blogs

Or Have A Question? Call Us

(770) 123 4567

Join t2coaching eNewsletter for

FREE Health, Fitness
and Performance Tips!